You can absolutely grow flowers in glass jars, and it works beautifully for two different goals: starting seeds in jars before transplanting them to the garden, or keeping compact flower varieties in jars as a mini indoor display. The key is understanding that glass has no drainage and traps moisture, so your setup, your soil choice, and your watering rhythm all need to account for that from day one. Get those three things right and a glass jar becomes a surprisingly capable little growing vessel.
How to Grow Flowers in Glass Jars: A Complete Guide
James Holloway
8 Jun 2026
What glass jar growing actually means for flowers
When most people search for this, they have one of two pictures in their head: either a seed-starting setup using jars as mini propagators, or a cute display of flowers actually living and blooming inside glass on a windowsill. Both are valid, and this guide covers both, but they involve different jar choices and different expectations.
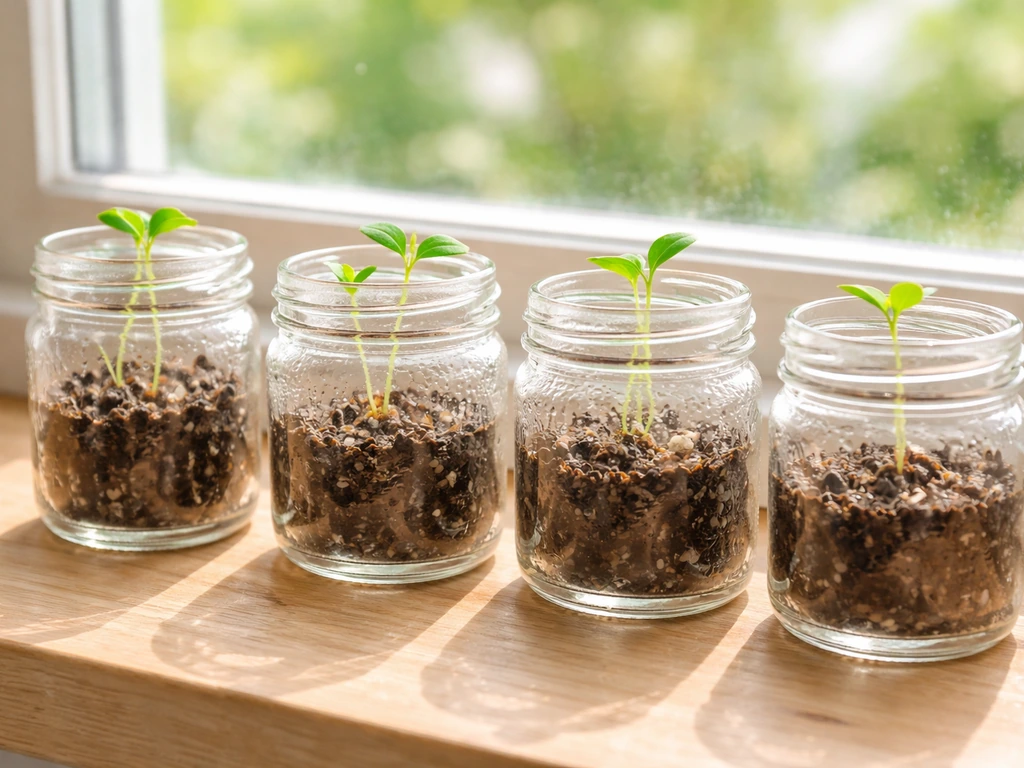
For seed starting, almost any jar works. A wide-mouth mason jar (quart or half-gallon size) gives seedlings enough root room to develop before transplanting, usually 4 to 6 weeks after germination. For a more permanent display, you want something wider at the mouth, like a large apothecary jar or a wide-mouth 32 oz jar, so you can get your hands in to plant and tend properly. Narrow-neck bottles are essentially decorative at that point, better suited to propagating cuttings in water than growing flower seeds.
On the lid question: skip it for most flower growing. A lid creates a terrarium effect, which can work for moisture-loving tropical plants but tends to produce mold and fungal rot for the kinds of flowering annuals and cottage garden varieties most of us want to grow. Leave the jar open, or use a loose piece of plastic wrap with a few holes poked in it only during the first few days of germination when you need consistent humidity. After seeds sprout, remove any cover completely.
Indoors is really the natural home for jar-grown flowers, at least initially. Outdoors, jars act as magnifying glasses in direct sun and can overheat and cook roots quickly. If you move jars outside, keep them in bright shade rather than full sun, and bring them back in if temperatures exceed 85°F.
Choosing the right flowers for jar culture
Not every flower is a good candidate for jars, and being honest about that upfront saves a lot of frustration. The best choices fall into two categories: flowers you'll start in jars and transplant, and smaller compact varieties that can actually reach bloom in a jar before you decide what to do with them.
Flowers to start in jars and transplant
Most annual flowers are perfect for jar seed-starting because they germinate reliably, grow quickly, and move well into the garden. After starting your seeds in jars, focus on giving annual flowers the light, watering, and transplant timing they need so they thrive outdoors all season. Marigolds are my top recommendation here: they germinate in 5 to 7 days, are nearly bulletproof, and give you a clear visual signal when they're ready to transplant. Snapdragons, zinnias, cosmos, and wildflower mixes all work well too. Poppies are the one exception I'd flag: they dislike root disturbance intensely, so starting them in jars and then transplanting is risky. If you want poppies, direct sow them outdoors or into a biodegradable pot you can plant whole.
Flowers that can stay in jars longer
If you want something that can actually bloom inside a jar (or at least reach bud stage), look for compact dwarf varieties. Dwarf French marigolds, miniature snapdragons, compact pansies, and small violas can all reach a presentable flowering stage in a wide-mouth jar before outgrowing their space. These are also great candidates if you're inspired by the idea of growing flowers in other small containers, plastic bottles, or vertical wall setups, all of which share the same principle of working with compact root systems. You can use the same approach when you want to grow flowers in plastic bottles growing flowers in plastic bottles.
Setting up your jar the right way
This is the step most people skip, and it's why their jar attempts end in soggy, moldy failure. A few minutes of prep work here makes everything downstream easier.
Sterilizing the jar
Wash the jar with hot soapy water, rinse thoroughly, then fill it with boiling water, let it sit for 2 minutes, and drain. Alternatively, run it through a dishwasher on the hottest setting. This removes residue and kills any lingering bacteria or fungal spores that could cause problems once you add moist soil. Don't skip this step, especially if you're reusing a food jar.
Drainage and airflow
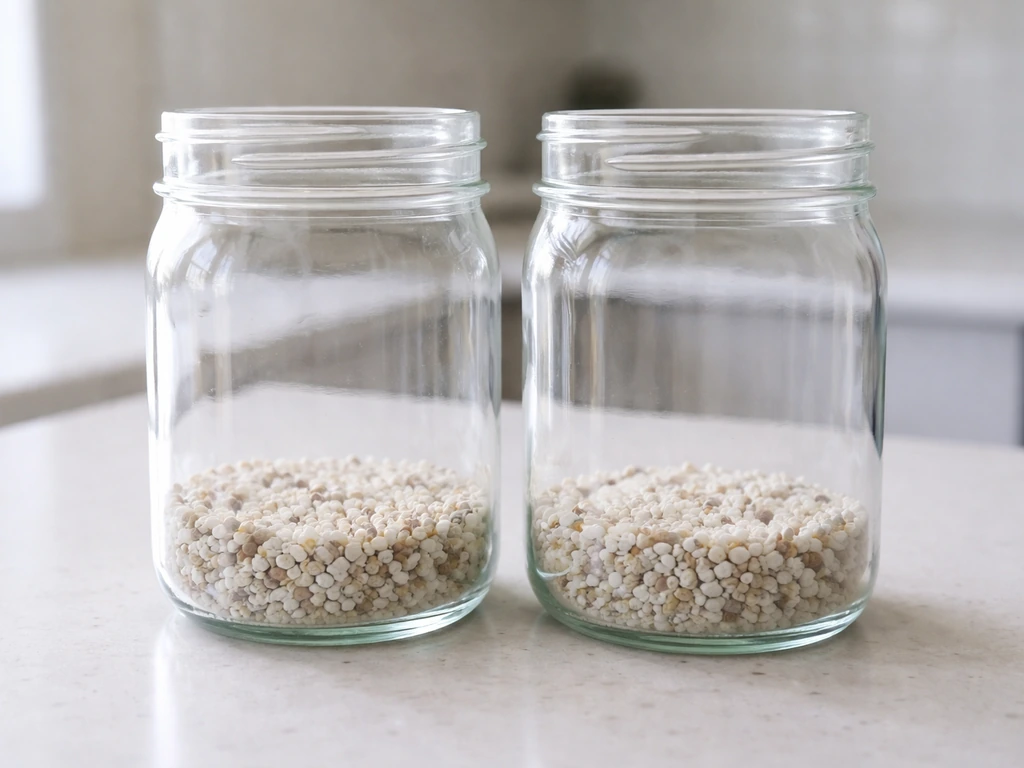
Glass has no drainage holes, so you need to create a false drainage layer. Add about an inch of coarse horticultural perlite or small clean gravel to the bottom of the jar before adding soil. This doesn't drain water out of the jar, but it keeps the root zone above any pooled water at the base, which dramatically reduces rot. For airflow, keeping the jar open-topped is the simplest solution. If you're growing seedlings in a cluster of jars, give each jar a couple of inches of space around it so air can circulate.
Choosing the right growing medium
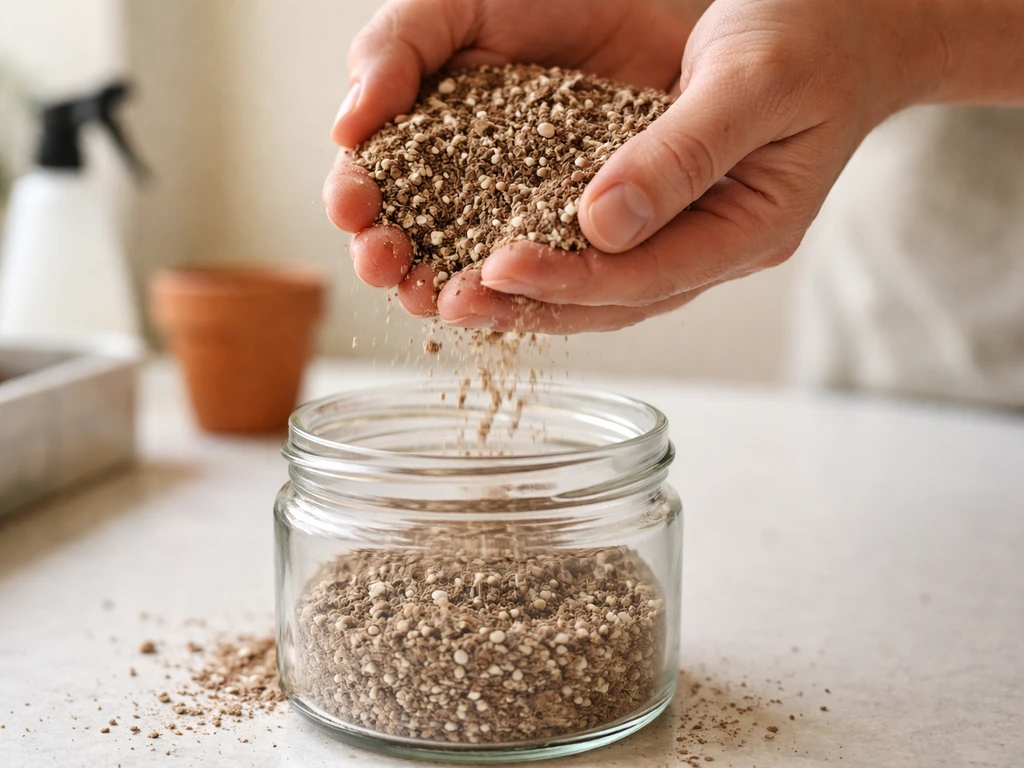
Use a sterile, soilless seed-starting mix, and this is non-negotiable. UGA CAES also recommends using a blank" rel="noopener noreferrer">sterile, soilless seed-starting mix because garden soil is too heavy and may contain weeds or disease. Garden soil is too heavy, compacts easily in the confined space of a jar, and almost certainly contains fungal spores including the ones responsible for damping-off, which kills seedlings at soil level seemingly overnight. A commercial seed-starting mix is sterile, lightweight, and has fine particles that allow uniform germination and root development. blank" rel="noopener noreferrer">Commercially available soilless mixes are generally free of damping-off fungi and don't need any additional treatment. Fill the jar to about 1 inch below the rim so you have working space.
Sowing seeds and managing germination
Moisten your seed-starting mix before filling the jar, not after. Add water gradually and mix until the medium feels like a wrung-out sponge: damp throughout but not dripping. Dry mix in a jar is tricky to water evenly from the top without disturbing seeds.
Sowing depth and spacing
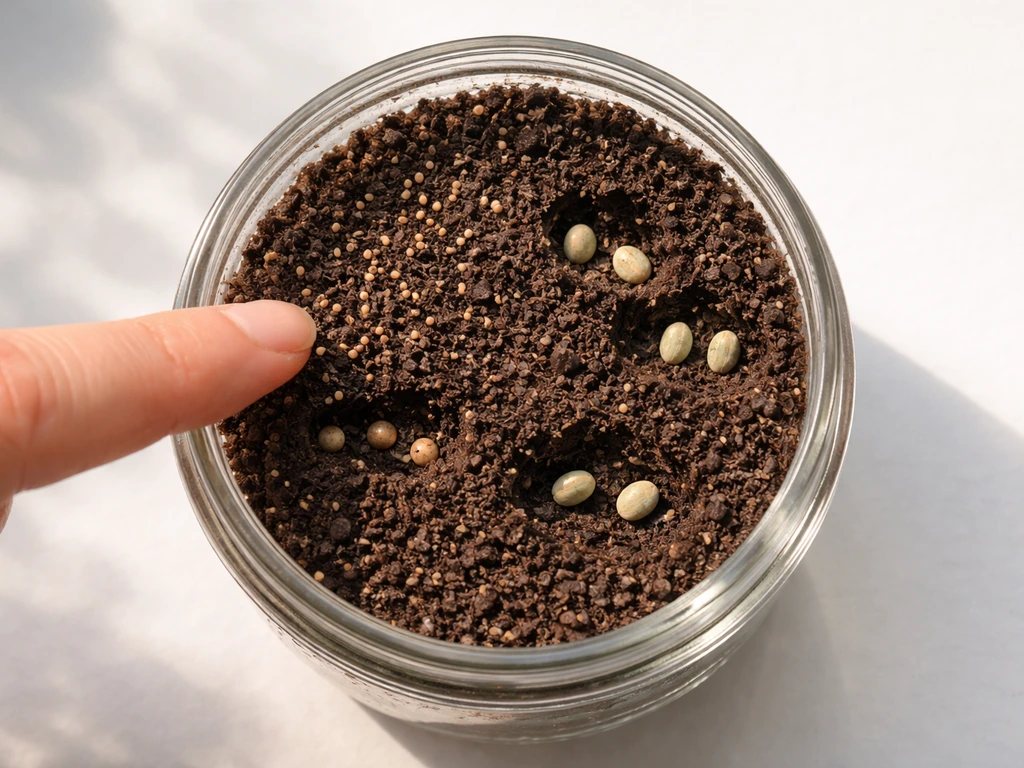
As a general rule, sow seeds at a depth equal to twice their diameter. Tiny seeds like snapdragon and poppy go on the surface and get a light press but no cover. Medium seeds like marigolds go about 1/4 inch deep. In a quart mason jar, you can comfortably sow 3 to 4 seeds spaced about an inch apart. Once germinated, thin to the strongest 1 or 2 seedlings by snipping the others at soil level with small scissors. Don't pull seedlings out; that disturbs the roots of the keepers.
Temperature and moisture during germination
Most annual flowers germinate best between 65°F and 75°F. A warm spot on top of a refrigerator or near a heat vent works well. During the first 3 to 5 days, you can loosely drape plastic wrap over the jar opening to hold humidity and speed germination, but check daily. The moment you see the first sprout, remove the cover immediately. From then on, mist the surface lightly only when the top 1/4 inch of mix feels dry to the touch. In a sealed or semi-sealed jar, the soil stays moist longer than you'd expect, so restrain the urge to water.
Ongoing care: light, water, and feeding
Light
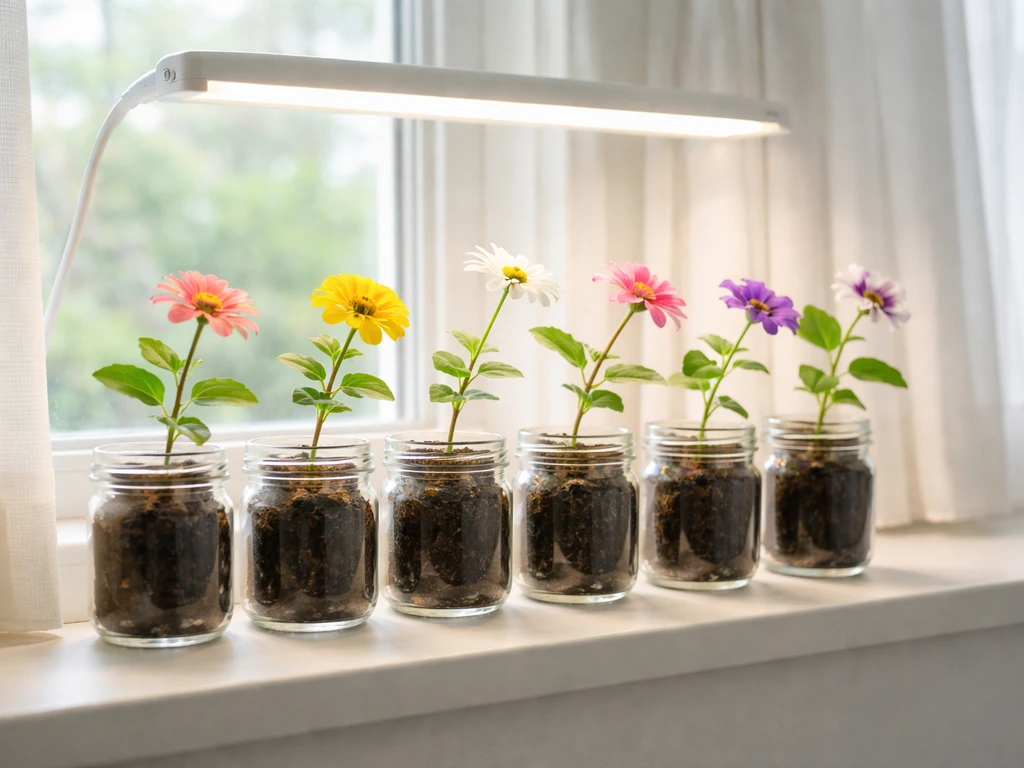
This is where most indoor jar-growing struggles live. Flower seedlings need a lot of light, more than a typical windowsill provides in most homes. A south-facing window is your best bet, but if seedlings start stretching tall and thin within the first two weeks, that's your signal that the light is insufficient. A simple grow light positioned 2 to 4 inches above the jar for 14 to 16 hours a day makes a dramatic difference. Leggy growth is hard to reverse once it happens, so address light levels early.
Watering in jars
Water less than you think you need to. Glass traps moisture and the sides of the jar let you actually see condensation or water pooling at the bottom. If you see water sitting in the gravel/perlite layer at the base, stop watering until the medium dries out somewhat. Use a small spray bottle or a narrow-spout watering can to apply water gently to the soil surface rather than the leaves and stems, which helps prevent fungal problems.
Fertilizing
Hold off on fertilizing for the first 3 to 4 weeks after germination. Seed-starting mix has little or no nutrients, which is fine early on since seedlings live off their seed's stored energy. Once the first true leaves appear (the second set of leaves, which look more like the plant's adult foliage), begin a very diluted liquid fertilizer at about 1/4 the label strength, once a week. A balanced formula like 10-10-10 or a bloom-booster with slightly higher phosphorus works well for flowering annuals.
When to keep plants in jars and when to move them out
Here's the honest truth: most flowering annuals will perform far better transplanted into the garden or into larger containers than they ever will staying in a glass jar. Wallflowers are often a good fit for jar growing when you keep conditions airy and avoid letting the soil stay too wet how to grow wallflowers. If you want to take that compact-plant idea further, check out how to grow flowers up a wall for vertical options and training methods. Jars are a great starting point, not usually a final destination, unless you're specifically growing a compact dwarf variety for a windowsill display.
The right time to transplant is when seedlings have 2 to 3 sets of true leaves and are about 3 to 4 inches tall, typically 4 to 6 weeks after germination for most annuals. At this stage, root systems are developed but not yet root-bound. Hardening off matters: move jars outside to a sheltered, shaded spot for a few hours a day over 7 to 10 days before transplanting, gradually increasing outdoor exposure. This acclimatizes seedlings to wind, temperature swings, and stronger light, and skipping this step is one of the most common reasons transplants fail.
When you're ready to transplant, water the jar thoroughly an hour before to help the root ball hold together. Tip the jar gently and slide the root ball out rather than pulling the stem. Plant at the same depth as the seedling was sitting in the jar, firm the soil around it, and water in well. Marigolds, snapdragons, and zinnias all transition easily this way.
If you're keeping a compact variety in the jar longer, upgrade to a wider jar or a small 4 to 6 inch pot once roots start circling the base or poking out of drainage holes. You won't get drainage holes in glass, so watch for signs of stress: yellowing lower leaves, stunted new growth, or a sour smell from the soil, all of which suggest it's time to move on.
Fixing the problems that jar growers run into
Mold and fungal growth on the soil surface
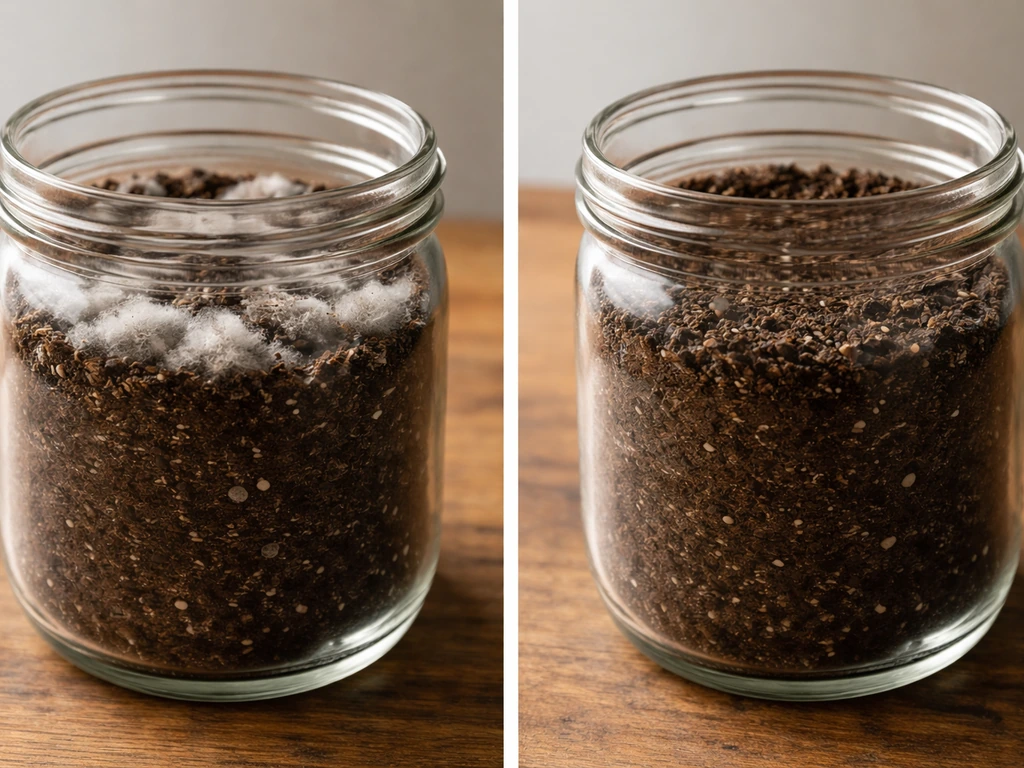
White fuzzy mold on the surface usually means overwatering combined with poor airflow. Remove the mold with a spoon or a light scrape, let the surface dry out completely, reduce watering frequency, and make sure the jar is open-topped and not sitting in a humid corner. If damping-off (stems collapsing at soil level) is the problem, it's caused by soilborne fungi. At that point, the affected seedling can't be saved, but you can prevent it spreading by removing the collapsed seedling immediately and top-dressing with a thin layer of fresh dry perlite, which helps the surface dry faster.
Green algae on the glass
Green slime or film building up on the inside of the glass is algae, and it's harmless to plants but a sign that you have too much moisture plus light hitting the jar sides. Wipe the inside of the jar with a damp paper towel if you can reach, and try wrapping the lower half of the jar with a strip of dark paper or cloth to block light from reaching the soil zone. Algae needs both moisture and light to grow, so removing one of those inputs stops it.
Leggy, stretched-out seedlings
Leggy growth means the seedling is reaching for light it's not getting. The fix is simple but needs to happen immediately: move the jar to a brighter location or add a grow light. You can't un-stretch an already leggy stem, but you can prevent further stretching. When you transplant a leggy seedling, bury it slightly deeper than it was growing to compensate, which works for most annuals (though not for flowers with a central rosette habit like some snapdragons).
Overwatering and root rot
Yellowing leaves (especially lower ones), a musty smell, and a seedling that wilts despite moist soil all point to root rot from overwatering. In a glass jar, there's nowhere for excess water to escape, so this escalates quickly. If caught early, let the jar dry out completely, remove any obviously dead plant material, and restart your watering routine with much less frequency. If the roots are already black and mushy when you check, the plant is lost, but use it as a lesson in jar watering restraint and start a fresh seed.
Pests
Indoor jar growing is relatively pest-free, which is one of its genuine advantages. Fungus gnats are the most common nuisance: their larvae live in moist soil and can damage seedling roots. Letting the soil surface dry out between waterings is the most effective prevention. If gnats are already present, a layer of coarse sand or fine grit over the soil surface breaks their breeding cycle. Aphids and spider mites can occasionally hitch a ride from a nearby infected houseplant, so keep your jars away from plants that have a pest history.
A quick comparison of common jar-friendly flowers
| Flower | Germination time | Best jar use | Transplant or keep? | Notes |
|---|---|---|---|---|
| Dwarf French marigold | 5–7 days | Seed start or display | Either works | Best all-around jar flower, forgiving and fast |
| Snapdragon (dwarf) | 10–14 days | Seed start or compact display | Transplant for best blooms | Needs good light to stay compact |
| Zinnia | 5–7 days | Seed starting only | Transplant | Grows fast and outgrows jars quickly |
| Cosmos | 5–10 days | Seed starting only | Transplant | Too tall for jar display, great for garden |
| Viola/pansy | 7–14 days | Compact display | Keep or transplant | Cool-season, good for late winter jar growing |
| Wildflower mix | Varies | Seed starting | Transplant to garden | Fun experiment; mixed results for jar display |
| Poppy | 7–14 days | Not recommended in jars | Direct sow outdoors | Dislikes root disturbance; skip the jar |
Your next steps to get started today
You don't need a lot to get going. Grab a clean wide-mouth mason jar, a bag of sterile seed-starting mix, a handful of perlite, and a packet of dwarf marigold or pansy seeds. Sterilize the jar, layer in an inch of perlite, fill with pre-moistened mix, sow 3 or 4 seeds at the right depth, and set it in your brightest window or under a grow light. Check moisture daily but water sparingly, remove any cover as soon as seeds sprout, and thin to the strongest seedling once you see the second set of true leaves. Four to six weeks from now, you'll have a healthy little plant ready to go into the garden or brighten up a patio pot. That first jar success makes the next one even easier.
- Sterilize a wide-mouth quart mason jar with boiling water or a hot dishwasher cycle
- Add 1 inch of coarse perlite or clean gravel to the bottom for a drainage buffer
- Fill with pre-moistened sterile seed-starting mix to 1 inch below the rim
- Sow 3 to 4 seeds at the depth specified on the packet, spaced about 1 inch apart
- Cover loosely with plastic wrap for the first 3 to 5 days only, then remove as soon as sprouts appear
- Place in a south-facing window or 2 to 4 inches below a grow light running 14 to 16 hours daily
- Water only when the top 1/4 inch of mix feels dry; use a spray bottle or narrow spout
- Thin to 1 or 2 strongest seedlings once the second set of true leaves appears
- Begin diluted fertilizer at 1/4 strength once per week after the first true leaves emerge
- Harden off seedlings over 7 to 10 days before transplanting to garden beds or larger containers
FAQ
Can I use any glass jar I have at home, or are some jars a bad idea for growing flowers?
You can, but avoid containers with chips or cracks (they stress with heat and watering). Also, highly decorative jars with narrow openings make it hard to thin, remove mold, and maintain airflow, so wide-mouth jars are much easier, especially for seed-starting.
What should I do if my jar gets condensation on the inside walls even after I remove any plastic wrap?
Light condensation is normal early on, but if it keeps forming heavily, your mix is staying too wet. Skip watering until the top 1/4 inch feels dry, then mist only that surface area. If condensation persists, increase airflow by moving the jars away from other jars and away from drafts that keep the air stagnant.
Is it okay to bottom-water a glass jar to avoid disturbing seeds?
It usually is not the best approach because glass traps moisture and bottom-wetting can leave the root zone too wet. If you bottom-water at all, do it briefly and then allow the jar to drain fully, but the simpler method is to pre-moisten the mix before sowing and then use gentle surface watering only when the top layer dries.
How do I prevent damping-off in jar seed-starting beyond using sterile seed mix?
Sterile mix helps most, but airflow and watering rhythm matter just as much. Keep jars open-topped, space jars so air circulates, and water only when the top layer dries. If you see collapsed seedlings, remove them immediately and top-dress with a thin layer of dry perlite to speed drying at the surface.
What’s the best way to water in a jar without soaking everything, especially once seedlings are growing?
Use a narrow-spout watering can or a small spray bottle and aim at the soil, not the stems. Water in small amounts until the surface darkens evenly, then stop. In glass, it’s better to water less frequently but thoroughly later, rather than repeatedly flooding the jar.
My seedlings are growing, but they’re slow. How can I tell if it’s low nutrients versus light or temperature?
First check light and temperature. Leggy, pale growth points to insufficient light, while stalling with cool conditions can be temperature related. Only after true leaves appear, start diluted fertilizer at about 1/4 strength once a week, because adding nutrients too early often increases moisture issues without improving growth.
Can I grow perennial flowers in glass jars the same way as annuals?
Often not as a full “keep it in the jar” method. Perennials usually have slower growth and larger root demands, so jar time works best for starting cuttings or starting young plants briefly. Plan on transplanting into soil or a larger container sooner rather than trying to keep them blooming long-term inside glass.
How many seeds should I plant per jar, and what if they germinate very densely?
For a quart-size wide-mouth jar, 3 to 4 seeds is a practical target, spaced about an inch apart. If more sprout, thin promptly after you can identify seedlings, snipping weaker ones at soil level rather than pulling them, so you do not disrupt the roots of the keepers.
What are signs it’s time to move seedlings out of the jar even if they are not wilting?
Look for roots circling the bottom, seedlings crowding and bending toward each other, yellowing lower leaves, or a musty/sour soil smell. Those are jar-specific stress signs tied to moisture and root space, and waiting too long often leads to root rot or transplant shock.
If I want to keep flowers living inside a jar longer, what’s the safest “compromise” option?
Choose dwarf or compact varieties and use a wide-mouth jar that you can access easily. Keep it open-topped, provide strong light from a grow lamp, and treat watering conservatively. Even then, many plants will eventually outgrow the jar, so plan for a transition to a small pot with drainage when roots start pressing outward.
Can I cover the jar at night to keep warmth in for faster germination?
You can, but keep covers loose and temporary. Plastic wrap or a light humidity cover should be used only for the first few days if needed, with daily checking. Once sprouting begins, remove covers immediately because sealed conditions increase mold risk.
What should I do with algae or green film on the inside of the glass?
Algae usually means too much light reaching a consistently moist soil zone. Wipe the inside glass if reachable, then block light to the lower portion of the jar (dark paper or cloth wrap works well). After that, water less frequently and only when the top layer dries.
Next Articles

How to Grow Annual Flowers: Step-by-Step From Seed to Bloom
Step-by-step guide to grow annual flowers from seed to bloom, with timing, soil, spacing, watering, and fixes for common
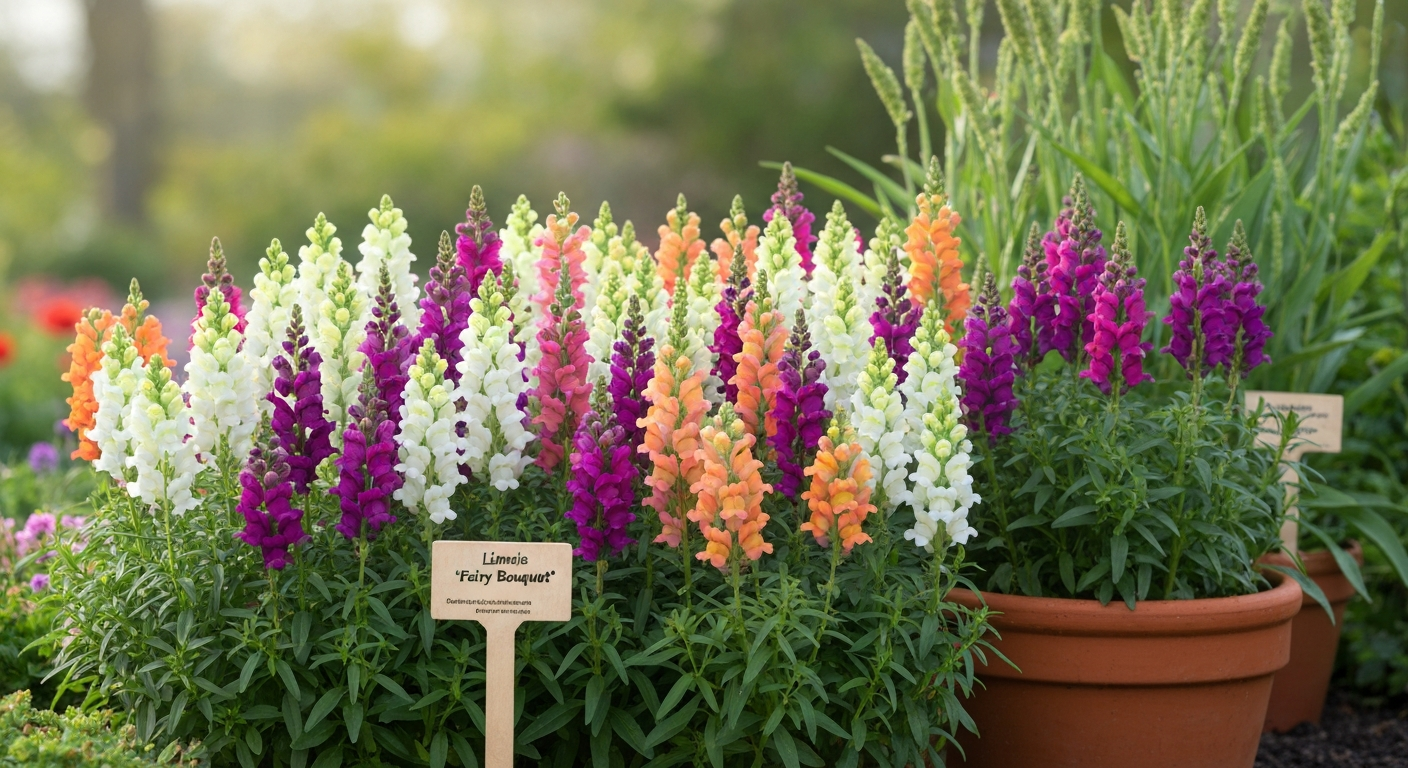
Linaria 'Fairy Bouquet' How to Grow: Seed to Cut Flowers
Grow Linaria 'Fairy Bouquet' from seed to vase: step‑by‑step sowing, care, cutting, seed saving & troubleshooting.
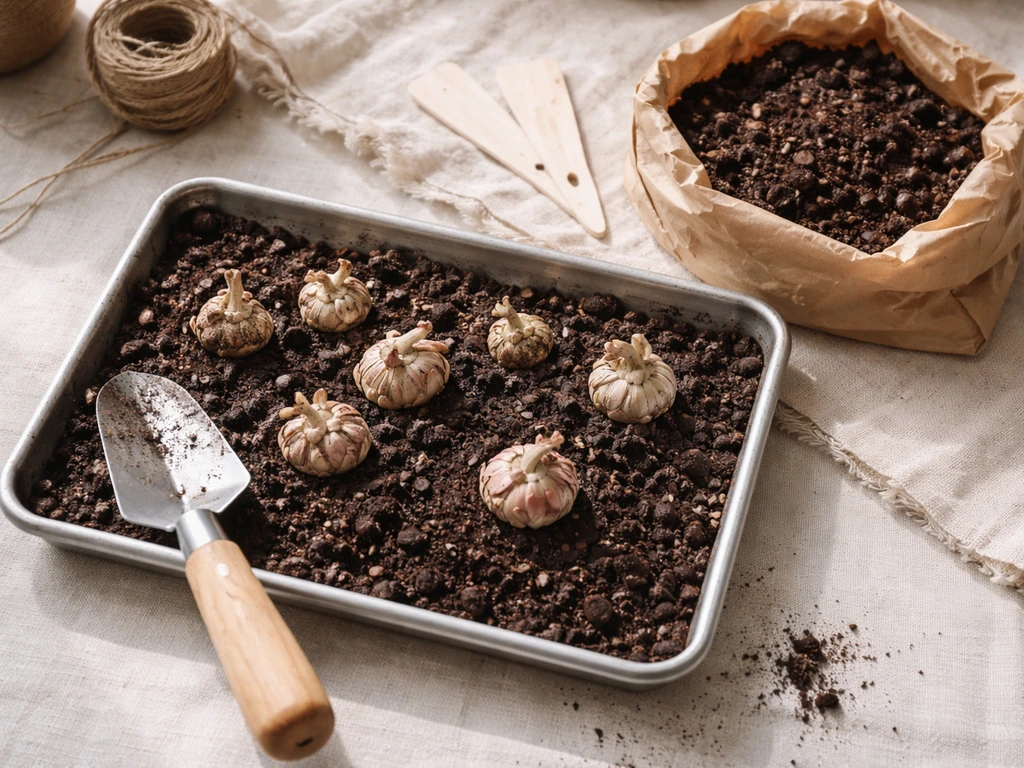
Floret How to Grow Ranunculus: Step-by-Step Guide
Step-by-step Floret-style ranunculus guide: corm prep, planting, watering, frost care, troubleshooting, and harvest for