You can absolutely grow flowers in plastic bottles, and it works better than most people expect. The key is picking the right bottle size and resin type, choosing compact flower varieties, cutting clean drainage holes, and filling with a lightweight soilless mix rather than garden soil. A 2-liter soda bottle holds enough potting mix for dwarf marigolds, compact snapdragons, or a small wildflower planting, and with a few tweaks it can even join a bottle-wall installation on a sunny fence.
How to Grow Flowers in Plastic Bottles: Step-by-Step Guide
James Holloway
26 Jul 2026
Why bother growing flowers in plastic bottles?
The honest answer is that this method punches above its weight for people with limited space, limited budget, or both. Plastic bottles are free, lightweight, and endlessly available. If you rent a flat with a balcony, or your garden is mostly concrete, repurposing bottles lets you put colour almost anywhere, windowsills, railings, vertical wall grids, and hanging rows. There's also a sustainability argument: every bottle you turn into a planter is one that skips the recycling bin for at least a growing season, and with some care you can reuse the same bottles for two or three years before they degrade.
This guide is written for anyone starting out, but there's enough detail here for experienced gardeners who want to level up their vertical or balcony setups. I've tested several of these setups personally, including a bottle wall on a north-facing fence that surprised me with how well direct-sown marigolds performed, and I'll be straight with you about what works and what tends to frustrate people.
What you'll need before you start
Getting a few basics together before you start cutting bottles saves a lot of backtracking. Here's the full checklist:
- Plastic bottles: 2-liter soda bottles (best all-rounder), 1-liter water bottles, or large 4–5 liter juice or water containers for bigger root zones
- A sharp craft knife or box cutter, plus scissors for trimming
- A drill, hammer and nail, or heated skewer for making drainage holes
- Coarse sandpaper (80–120 grit) or a nail file for smoothing cut edges
- A permanent marker for marking cut lines
- Wire, twine, zip ties, or picture hooks for hanging or wall-mounting
- Lightweight soilless potting mix (see potting media section below)
- Perlite or vermiculite for amending if your mix needs it
- Slow-release granular fertiliser (6-month type) and a liquid feed for ongoing care
- Thick gloves for handling cut plastic
- Safety glasses if you're drilling
- A dilute bleach solution (10% household bleach in water) for sanitising used bottles
- Seeds or small seedlings of your chosen varieties
- Watering can with a fine rose head, or a spray bottle for seedlings
Choosing the right plastic bottle: what the numbers mean
Flip a bottle over and you'll usually see a recycling symbol with a number inside it. That number is the Resin Identification Code, and it tells you what type of plastic the bottle is made from. For flower growing, the two numbers to look for are 1 (PET, like most clear soda and water bottles) and 2 (HDPE, the thicker cloudy plastic used for milk jugs and some juice containers). Both are the most widely recycled household resins and the most practical for DIY planters. Avoid code 3 (PVC/vinyl), which contains phthalate plasticizers that are under ongoing regulatory review, and code 6 (polystyrene), which is brittle and poorly suited for outdoor use.
The BPA question comes up a lot, and it's worth addressing directly. BPA is more commonly associated with polycarbonate (code 7) rather than PET or HDPE. That said, research does show that heat and prolonged UV exposure increase the rate at which additives migrate out of PET containers. The practical takeaway: don't use bottles that have been left in a hot car or exposed to boiling water, and if you're keeping bottles outdoors for a full season, choose a shaded or partially shaded spot where possible, or paint the outside of the bottle to reduce UV penetration. These are reasonable precautions, not reasons to abandon the method entirely.
Size and shape: matching bottles to plants
Volume matters more than most bottle-garden tutorials admit. A standard 500 mL water bottle gives you roughly 0.25 to 0.4 liters of actual soil volume once you account for the neck and cut. A 1-liter bottle gives around 0.4 to 0.8 liters, and a 2-liter soda bottle gives 0.8 to 1.5 liters depending on how high you cut it. Compare that to the typical extension-service recommendation of roughly 1 gallon (3.8 liters) of potting mix per foot of mature plant height, and you'll see why choosing genuinely dwarf or compact varieties matters. Extension tables (see blank" rel="noopener noreferrer">Vegetable Gardening in Containers / extension references (example container-volume tables)) list minimum container sizes by crop, for example, beans 2 gallons, cherry tomatoes 1 gallon, and large vegetables 5 gallons, and using similar minimums helps avoid chronic root restriction in bottle-sourced containers. blank" rel="noopener noreferrer">Container and Raised‑Bed Gardening (Virginia Tech Extension) recommends using roughly 1 gallon (3.8 L) of potting mix per foot of mature plant height as a practical guideline for many annuals. For anything taller than about 30 cm at maturity, consider using two or three linked bottles, a larger 4-liter container, or transplanting into a bigger pot once the plant establishes. A 500 mL bottle is really only suited to seedling raising or very shallow-rooted small annuals.
Which flowers actually work in bottles?
The honest shortlist is compact annuals and short-lived ornamentals with shallow-to-moderate root systems. Dwarf marigolds (French types like 'Bonanza' or 'Disco') are my top recommendation for beginners: fast-germinating, forgiving of inconsistent watering, and cheerful in any bottle size from 1 liter upward. Dwarf snapdragons (look for 'Floral Showers' or 'Montego' series) do well in 2-liter bottles and put on a long show. For cutting-garden staples, compact zinnias and dwarf cosmos both work in 2-liter containers and will flower prolifically if you keep deadheading them.
Wildflowers are a great fit for bottle walls and hanging bottle strips because you're essentially creating a seed-sown mini-meadow in a row. Nigellas (love-in-a-mist), small-flowered cornflowers, and violas all direct-sow happily into larger bottles. Poppies are trickier because they resent root disturbance, so direct-sow into the final bottle rather than transplanting. Annual types like Californian poppies (Eschscholzia) and the dwarf 'Mikado' oriental poppy strains are the most bottle-friendly. Wallflowers (Erysimum) can work in 2-liter or larger bottles but prefer a slightly alkaline mix and do best in cooler conditions; they're better suited to autumn sowing for spring flowering. For more on growing wallflowers from seed, there's dedicated guidance worth reading alongside this article.
Avoid anything with a large tap root (like many native wildflowers or standard dahlias) or a mature height much above 40 cm unless you're willing to stake carefully and accept that the bottle is really just a temporary home before transplanting on.
Quick-reference: flower varieties, bottle sizes, and light needs
| Flower variety | Minimum bottle size | Mature height | Light requirement | Sow or transplant? |
|---|---|---|---|---|
| Dwarf French marigold (e.g. 'Bonanza') | 1 liter | 15–25 cm | Full sun | Sow or transplant |
| Dwarf snapdragon (e.g. 'Floral Showers') | 2 liter | 20–30 cm | Full sun to part shade | Sow or transplant |
| Compact zinnia (e.g. 'Thumbelina') | 2 liter | 15–25 cm | Full sun | Transplant (sow first in trays) |
| Dwarf cosmos (e.g. 'Sonata' series) | 2 liter | 30–40 cm | Full sun | Sow or transplant |
| Californian poppy (Eschscholzia) | 2 liter | 20–30 cm | Full sun | Direct sow only |
| Cornflower (dwarf types) | 1–2 liter | 20–35 cm | Full sun | Direct sow or transplant |
| Nigella (love-in-a-mist) | 2 liter | 25–35 cm | Full sun to part shade | Direct sow only |
| Viola / pansy (compact) | 500 mL–1 liter | 10–20 cm | Part shade to full sun | Transplant seedlings |
| Wallflower (Erysimum, annual/biennial) | 2 liter | 25–40 cm | Full sun | Transplant seedlings |
| Sweet alyssum | 500 mL–1 liter | 10–15 cm | Full sun to part shade | Sow or transplant |
Preparing your bottles safely
Before you cut anything, wash the bottle thoroughly with hot soapy water, then sanitise it. University extension guidance recommends a 10% household bleach solution (roughly 1 part bleach to 9 parts water) with a contact time of 10 to 15 minutes, followed by a thorough rinse and air-dry. This matters most for bottles you've bought secondhand or found, but it's a good habit for all reused containers to avoid passing on fungal spores or bacteria to your seedlings.
Cutting methods
The cut style you choose depends on how you plan to use the bottle. For a simple upright planter, cut the bottle horizontally about two-thirds of the way up, remove the top, and use the bottom section as your pot. For a horizontal hanging planter (great for bottle walls), leave the bottle intact, cut an oval opening in the side facing upward, and hang it by the neck and base. For a wall-mounted row, punch a hole through the base of one bottle and thread twine or wire through to connect a series of bottles horizontally.
Always score the cut line with a marker first. Press the craft knife in at a slow, controlled angle rather than forcing it, PET can crack and shatter if you rush. Wear thick gloves throughout, and run coarse sandpaper or a nail file along every cut edge until it's smooth. This protects your hands every time you water or tend the planter, and it stops sharp edges from cutting through hanging twine over time.
Drainage: the step people skip and regret
Root rot from sitting water is the single most common cause of failure in bottle planters, and it's completely avoidable. Purdue Extension recommends at least three or four drainage holes of around 6 mm (roughly 1/4 inch) in diameter for small DIY containers. For a 2-liter bottle used as an upright planter, make four holes evenly spaced across the base. For a horizontal bottle planter, make holes along the lowest point of the curved base. A heated metal skewer works well on thin PET; a drill with a small bit is easier on thicker HDPE. If you're using a bottle inside a decorative sleeve or outer container, Illinois Extension is clear on this: make sure there's a way for water to escape from the inner planter and not pool between the two layers.
Stabilising your bottles
An upright bottle planter is top-heavy once filled with moist potting mix. You can push the base 5–8 cm into a tray of gravel, sit several bottles together in a wooden crate or old colander, or cut the bottle base slightly wider and press it into loose soil outdoors. For hanging bottles, use strong UV-resistant zip ties or jute twine doubled up, and check the attachment points every few weeks, UV degrades most plastics and natural fibres faster than you'd expect in full sun.
Getting the potting mix right
Regular garden soil is too dense for bottles, it compacts, drains poorly, and suffocates roots in small volumes. What works is a lightweight soilless mix. A reliable starting recipe from university extension sources is one-third peat moss or coconut coir, one-third compost or a sterile organic amendment, and one-third perlite or vermiculite for aeration and drainage. I've used this ratio for three seasons in bottle planters and it consistently outperforms bagged general-purpose compost, which often contains too much bark and not enough aeration material for small containers.
Aim for a mix pH of around 5.5 to 6.5, which suits the vast majority of container annuals and ornamentals. Most commercial peat-based mixes fall in this range naturally. If you're using a coir-heavy or compost-heavy blend, it's worth doing a quick pH test with an inexpensive strip tester, coir can run slightly higher (around 6.5–7) and very high compost ratios can push beyond 7, which locks out iron and causes yellowing in heavy feeders like marigolds.
Filling the bottle without creating air pockets
Fill in layers of about 5 cm at a time, gently tapping the bottle on a hard surface between each layer. Don't press or tamp the mix down with your fingers, this compacts the perlite out of the lower layers and undoes the drainage work. For upright planters, leave a gap of at least 2 cm between the top of the mix and the rim of the bottle so water doesn't run straight off the surface before it can soak in. Add a small pinch of slow-release granular fertiliser (a 6-month formulation works well) mixed into the top third of the fill.
Sowing seeds and planting seedlings
For direct-sowing (poppies, Californian poppies, nigellas, cornflowers), moisten the potting mix before you sow, scatter seeds thinly across the surface, then cover with a fine layer of vermiculite or sieved mix to roughly 1.5 times the seed's diameter. Mist gently and cover with a piece of cling film or a cut-off top from another bottle to create a mini propagation dome until germination, which typically takes 7 to 14 days for most annuals at 15–20°C.
For transplanting seedlings (snapdragons, zinnias, wallflowers, violas), make a small depression in the centre of your pre-filled bottle, lower the root ball in so the stem sits at the same depth it was in its original module or tray, firm gently, and water in with a fine rose. Avoid transplanting on a hot sunny day, move transplants into their final outdoor positions in the evening or on a cloudy day to reduce transplant shock.
Timing: when to sow and plant
For temperate northern-hemisphere gardens, most annual flowers do best sown indoors in bottles from late February through April for late spring to summer flowering, or direct-sown outdoors from April onward once night temperatures stay reliably above 5°C. Marigolds and zinnias want warmth (soil temperature 18–21°C ideally) and should wait until after your last frost date. Snapdragons and violas are cool-season flowers that can go out earlier, late March or April in most UK and US Zone 6–8 gardens. Wallflowers are typically sown in late spring or early summer of the previous year for flowering the following spring, making them a biennial commitment in bottles. Annual Erysimum types (like 'Sugar Rush') will flower in their first year from an early February sowing.
Watering and feeding in bottle planters
Small containers dry out fast, that's the single biggest management challenge. In warm weather a 2-liter bottle planter in full sun may need watering every day, sometimes twice. Push your finger 2 cm into the mix; if it feels dry at that depth, water thoroughly until it runs freely from the drainage holes. In cooler or shadier conditions, every two to three days is usually fine. Overwatering is less common than underwatering in bottles but does happen in shaded or cool positions, especially in autumn.
| Stage | Watering frequency | Feeding |
|---|---|---|
| Germination / first 2 weeks | Keep surface moist; mist daily | None |
| Seedling (2–6 weeks) | Every 1–2 days; check daily in heat | Half-strength liquid feed weekly once 2 true leaves appear |
| Established plant, growing season | Every 1–2 days in sun; every 2–3 days in shade | Full-strength balanced liquid feed (e.g. 10-10-10) every 10–14 days |
| Flowering peak | Daily in hot/sunny conditions | Switch to a higher-potassium feed (e.g. tomato fertiliser) every 10 days |
| End of season / cooling weather | Every 3–5 days; reduce as temperatures drop | Stop feeding 4–6 weeks before first frost |
Light, position, and vertical installations
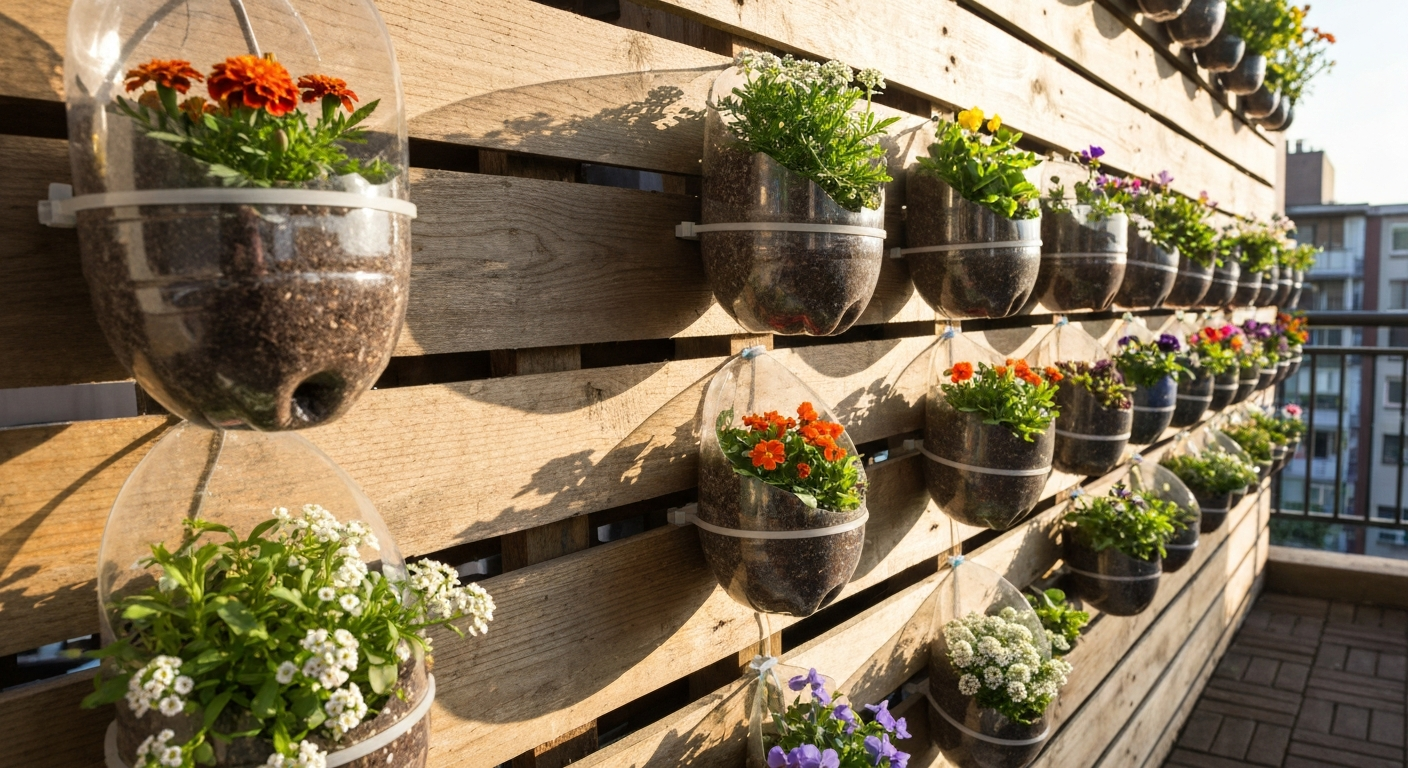
Most flowering annuals want at least six hours of direct sun per day for strong flowering. Bottles on a south-facing wall or fence work brilliantly. If you're creating a bottle-wall installation, essentially a vertical garden made of rows of horizontally-mounted bottles, a sunny fence is the ideal canvas. Use a length of sturdy wire or a wooden pallet as your framework, mount bottles horizontally with the opening facing up and slightly outward, and plant each one with a single compact variety. Dwarf marigolds, sweet alyssum, and compact violas look fantastic in these setups and hold their shape without needing staking.
For a shaded wall, nigellas, violas, and sweet alyssum will tolerate partial shade better than most annuals. Wildflower mixes with a high proportion of cornflowers and poppies also perform reasonably in dappled shade, though flowering will be lighter than in full sun. Growing flowers up a wall with bottles is genuinely one of the most rewarding small-space projects I've tried, a single wooden pallet fitted with 12 horizontal 2-liter bottles becomes a full wall of colour within six to eight weeks of transplanting.
Hanging bottles: practical design ideas
- Row of horizontal bottles on wire: thread galvanised wire through drainage holes at the base of each bottle and secure to fence posts — great for cascading sweet alyssum or trailing violas
- Vertical tower: stack upright half-bottles in a PVC drainpipe or zip-tied to a bamboo cane, with one plant per tier — suits strawberries and compact marigolds
- Single hanging planter: suspend a 2-liter bottle upright from three lengths of twine tied around the bottle neck and base, like a macrame holder
- Pallet wall: mount horizontal bottles across a pallet face using zip ties, one row per pallet slat — plant each bottle with a single variety for a striped colour display
- Window box substitute: line five or six 2-liter upright bottles in a row inside a wooden trough or metal gutter for a fuller soil volume and easier watering
Plastic bottles versus glass jars: a quick comparison
Growing flowers in glass jars is a popular alternative worth comparing directly. Glass is chemically inert and won't leach anything into the growing medium regardless of heat or UV, which is its main advantage over plastic. For step-by-step guidance on using glass containers safely and getting the best results, see how to grow flowers in glass jars. However, glass is heavy, breakable (especially outdoors), and usually lacks drainage holes unless you drill them with a diamond-tip bit. Plastic bottles are lighter, easier to modify, and far better suited to vertical and wall installations. For a windowsill display, glass jars have an aesthetic edge. For a balcony, fence, or any setup where weight and flexibility matter, plastic wins convincingly. Both need good drainage to work as planters.
Pests, diseases, and common problems
Bottle planters are not immune to the usual suspects. Aphids cluster on new growth, especially on snapdragons and nasturtiums; a strong jet of water knocks most off, or use an insecticidal soap spray. Fungus gnats breed in overly wet, peat-heavy mix, letting the top centimeter of mix dry between waterings usually breaks their breeding cycle. Powdery mildew appears on zinnias and snapdragons in humid, poorly ventilated spots; space bottles apart and water at the base rather than over the foliage.
Root rot (shown by wilting despite moist soil, blackened stems at the base, and a sour smell from the mix) is almost always a drainage issue. If you see these signs, check that your drainage holes haven't blocked with roots or debris and consider repotting into fresh mix. Leggy, pale growth usually means not enough light rather than a nutrient problem, move the bottle to a brighter position before reaching for the fertiliser bottle.
Troubleshooting checklist
| Symptom | Most likely cause | Fix |
|---|---|---|
| Wilting despite moist soil | Root rot from poor drainage | Check and clear drainage holes; repot if roots are blackened |
| Yellowing lower leaves | Overwatering or nutrient deficiency | Reduce watering; apply half-strength balanced liquid feed |
| Leggy, pale stems | Insufficient light | Move to a brighter position; at least 6 hours direct sun for most annuals |
| No flowers despite healthy leaves | Too much nitrogen, or wrong season | Switch to high-potassium feed; check sowing-to-flower timeline |
| Seedlings collapsing at soil level (damping off) | Fungal rot from overcrowding or overwatering | Thin seedlings; improve air circulation; reduce watering |
| Aphid clusters on new growth | Aphid infestation | Knock off with water jet; apply insecticidal soap if persistent |
| White powdery coating on leaves | Powdery mildew | Space bottles apart; water at base; apply bicarbonate spray if needed |
| Mix drying out within hours | Too small a bottle volume | Upgrade to a larger bottle or group several together; add water-retaining gel crystals sparingly |
End of season: transplanting, saving seeds, and responsible disposal
When flowering finishes or the first hard frosts arrive, you have a few options. If a plant has done well and you want to keep it, autumn is a good time to transplant it from its bottle into a proper garden bed or a larger container, ease the root ball out gently, check for root binding (gently tease apart any circling roots), and plant at the same depth in its new home. Annual flowers like marigolds, zinnias, and cornflowers are worth letting run to seed before you pull them. Allow a few seed heads to dry fully on the plant, harvest the seeds into a labelled paper envelope, and store in a cool dry place for next season.
For the bottles themselves: PET (#1) and HDPE (#2) bottles are recyclable in most kerbside programmes, but a bottle that has been outdoors for a full season and is visibly brittle, cracked, or discoloured has undergone UV degradation and may not be accepted by all recycling streams. Check your local recycling guidelines. Bottles that are still structurally sound can be cleaned (repeat the 10% bleach sanitisation), air-dried, and stored for the following season. If you're done with them, rinse thoroughly before recycling to avoid contaminating the batch. Avoid putting degraded, brittle plastic into recycling, the better option is to let them serve as a disposable planter for one final season of seed-raising before disposal.
Sustainable habits worth building in
The most sustainable approach to bottle growing isn't just about reusing containers, it's about the whole system. Collect rainwater to water your bottle planters where you can; bottle planters are small enough that a single watering can filled from a rain butt covers a whole collection. Use peat-free coir-based potting mixes to reduce peat extraction impact. Save seeds from your best performers to close the loop entirely. And when the bottles finally need to go, buy the next generation in bulk (large 5-liter water containers are often available cheaply and give a much better soil volume per plant than standard soda bottles) rather than sourcing lots of small bottles just for gardening.
Growing annual flowers from seed in recycled bottles is one of those projects where the barrier to entry is almost zero and the reward is genuinely outsized. See our guide on how to grow annual flowers for a step-by-step primer on sowing, transplanting, and seasonal care. A packet of dwarf marigold seeds, a handful of old 2-liter bottles, and a bag of potting mix is all it takes to go from nothing to a wall of colour in about eight weeks. That's a pretty good return on what amounts to about an afternoon of setup work.
FAQ
Title and meta description for an article about growing flowers in plastic bottles
Title: Grow Beautiful Flowers in Recycled Plastic Bottles: A Step‑by‑Step Guide Meta description (≤160 characters): Recycle bottles into lovely planters—learn safe bottle selection, best flower choices, planting steps, vertical ideas, care, and end‑of‑season tips.
What are the key headings and subheadings recommended for the article?
Suggested structure: - Introduction: Why grow flowers in bottles? - Safety first: plastic types, heat/sun risks, cleaning and sanitizing - Choosing bottles: sizes, shapes and how much soil they hold - Which flowers work best: quick reference by bottle size and light - Preparing bottles: cutting, drainage, liners and sealing edges - Potting mix and pH: DIY mix recipes and ready mixes - Planting: sowing seeds vs transplanting seedlings (step‑by‑step) - Watering, feeding and light: schedule and tips - Vertical and bottle‑wall installations: methods and weight/anchor notes - Pest and disease management: prevention and control - Troubleshooting checklist: common problems and fixes - End of season: transplanting, disposal and sustainable recycling - Design, hanging ideas and DIY image suggestions - Resources and internal links to seed pages, sowing calendar and pest control guides
Which plastics are safest to reuse as planters and what safety precautions should gardeners follow?
Choose PET (#1) and HDPE (#2) bottles when possible; they are widely recycled and generally more stable. Avoid PVC (#3), polystyrene (#6) and unknown “other” (#7) where possible. Practical safety precautions: avoid long‑term direct sun or constant heating of bottles (heat and UV increase additive leaching); use bottles for short‑term or decorative plantings and consider lining interior surfaces for long‑term use; clean/sanitize used bottles with 10% household bleach for 10–15 minutes, rinse and air‑dry before planting; don’t put food crops into reused bottles you suspect contain hazardous additives—this guide is for ornamentals.
How do I choose the right bottle size and match it to flower varieties?
Estimate soil volume from bottle cut height: small 500 mL bottles ≈0.25–0.4 L; 1 L ≈0.4–0.8 L; 2 L ≈0.8–1.5 L. Use these volume limits to pick appropriately sized flowers or use multiple bottles per plant or stacked systems for more volume. Rule of thumb: very small bottles for micro‑annuals or seedlings only; 2 L bottles or stacked/tall bottles suit small bushy annuals or multiple small flowers. For larger, longer‑lived annuals aim for at least 1–3 L per plant or plant dwarfs and varieties bred for containers.
Quick reference: recommended flower varieties by bottle size and light needs
500 mL (very small, bright filtered light): dwarf annuals and accents—mini marigolds (dwarf), alyssum, dwarf snapdragons, small wildflowers (poppy micro varieties). 1 L (small, full sun to partial): marigolds (compact), dwarf snapdragons, small wallflowers, some wildflower mixes, poppy micro types. 1.5–2 L (medium, full sun): full‑size marigolds, standard snapdragons, cutting‑garden staples (small cosmos), many wildflower mixes and poppies (small cultivars). Stacked/vertical bottles (medium soil depth per module): trailing or cascading varieties—calibrachoa, trailing lobelia, nasturtiums (compact), small wallflowers. Light guide: most listed annuals need 4–6+ hours of sun; check variety label for full sun vs part shade.
Step‑by‑step: preparing bottles safely (cuts, drainage, sanitizing)
1) Clean: wash bottle with soap and water, then sanitize in 10% bleach solution for 10–15 minutes; rinse and air‑dry. 2) Decide orientation and cut: mark and cut with a sharp utility knife or scissors—ensure smooth edges; sand sharp edges or fold a trimmed tape strip over rim. 3) Add drainage: drill or puncture three to four holes (~6 mm / 1/4 inch) in the base or low side for drainage (multiple holes recommended). 4) Optional liner: add breathable liner (coconut coir or landscape fabric) that won’t trap water; ensure liner allows excess water to escape. 5) Add a small gravel layer only if using a false bottom for decorative reasons, but don’t rely on gravel for drainage—holes are essential.
Next Articles
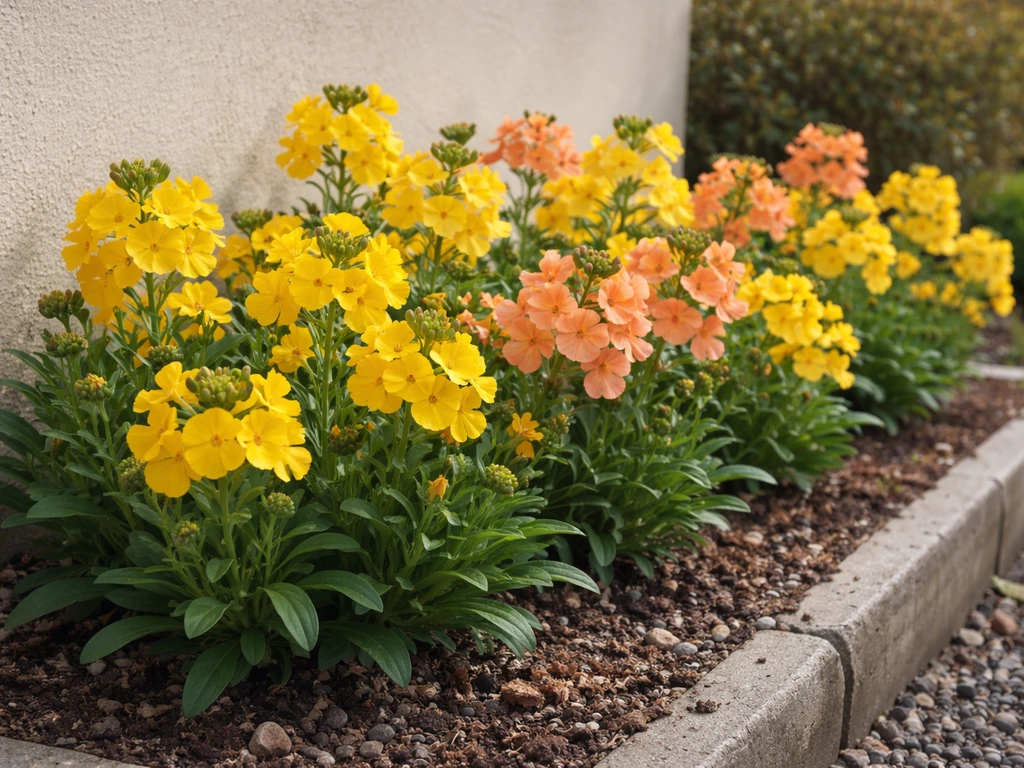
How to Grow Wallflowers From Seed: Step-by-Step Guide
Step-by-step guide to grow wallflowers from seed, from sowing and germination to transplant, spacing, and blooms.
How to Grow Flowers Up a Wall: Step-by-Step Guide
Step-by-step guide to grow flowers up a wall: plan support, pick plants for light, plant, train, water, and maintain blo
How to Grow Flowers in Glass Jars: A Complete Guide
Step-by-step guide for growing flowers in glass jars: jar choice, seed starting, care, transplant timing, and troublesho