You can grow beautiful ornamental flowers at home without ever touching a seed packet. The practical alternatives are bulbs, tubers, corms, rhizomes, divisions, stem or root cuttings, layering, nursery transplants, bare-root plants, and water-rooting or forcing. Each method suits different flowers, different seasons, and different levels of gardening experience, and several of them are genuinely easier and faster than starting from seed.
How to Grow Flowers Without Seeds: Easy, Practical Methods

James Holloway
5 Aug 2026
Why skip seeds in the first place?
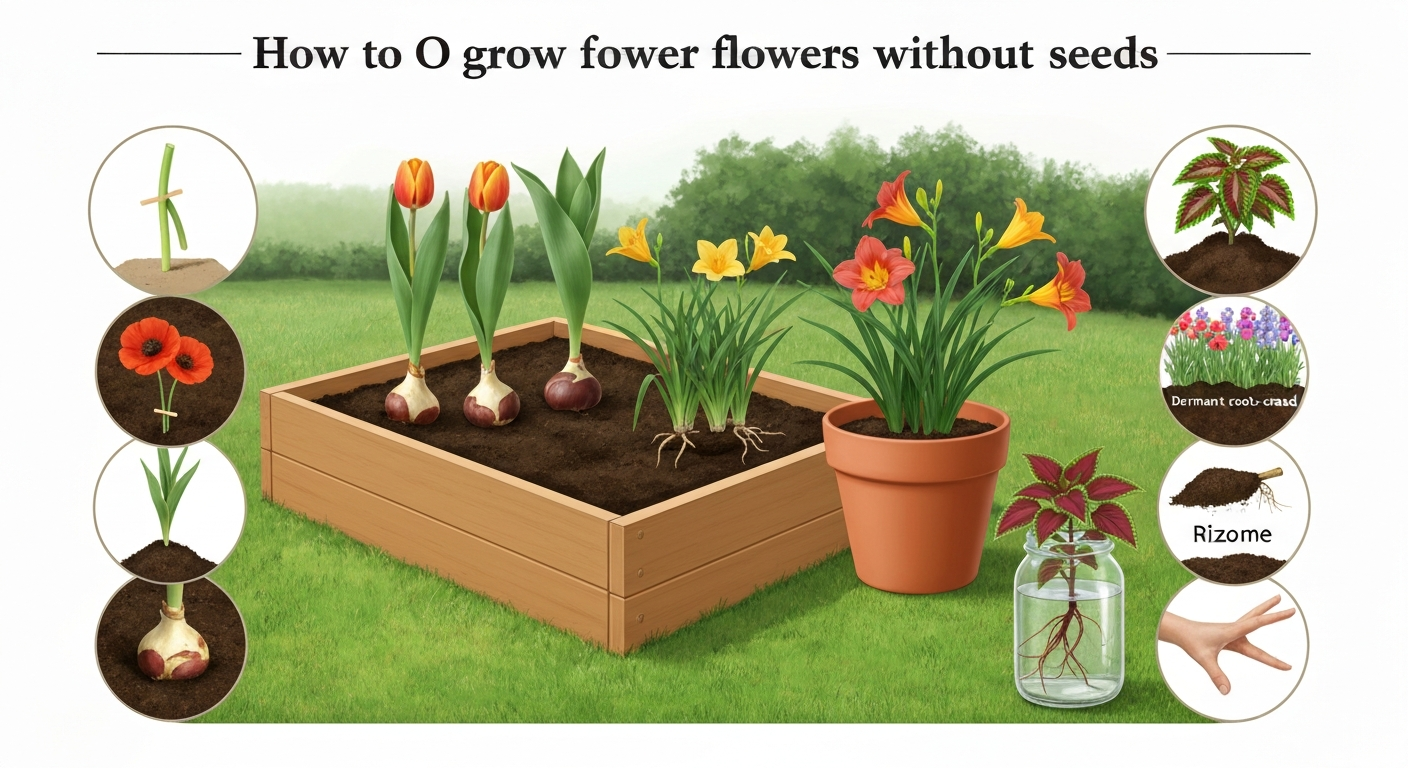
Seeds are wonderful, and this site celebrates them. But there are real situations where a non-seed method just makes more sense. First, many ornamental cultivars, especially hybrid dahlias, named hydrangeas, and bearded iris varieties, won't come true from seed. The only way to get an identical copy of a plant you love is to propagate it asexually. Second, some flowers simply take too long from seed: peonies can take three to five years to bloom from seed, while a divided clump from a neighbor can flower the very next spring. Third, if you're starting late in the season and missed the seed-starting window, a nursery transplant or a potted bulb gets you to bloom much faster. Finally, for complete beginners, planting a tulip bulb or potting up a nursery six-pack is a low-stress entry point that builds confidence before you tackle seed starting. The encouraging news is that once you understand the handful of non-seed methods available, you'll have a toolkit that works year-round.
All the non-seed options at a glance
Before diving into step-by-step instructions, here's a quick map of every method covered in this article so you can jump to the one that fits your situation.
- Bulbs, tubers, corms, and rhizomes: underground storage organs you plant directly in the ground or containers (tulips, dahlias, gladiolus, iris).
- Division: splitting an established perennial clump into multiple new plants (daylilies, hostas, coneflowers, bearded iris).
- Stem and root cuttings: removing a piece of stem or root and encouraging it to produce its own roots (geraniums, hydrangeas, roses, phlox).
- Layering: bending a stem to the ground (or wrapping it in moss) so it roots while still attached to the parent plant — great for climbing roses and shrubs.
- Nursery transplants: buying a rooted plant in a container and planting it out — the simplest option of all.
- Bare-root plants: dormant plants sold without soil, typically in late winter or early spring (peonies, roses, daylilies).
- Water rooting: placing cuttings in a jar of water until roots appear, then potting up — works well for coleus, impatiens, and tradescantia.
- Forcing and basic hydroponics: getting bulbs or cuttings to root and bloom indoors in water or a soilless medium, outside their normal season.
Tools and materials to have on hand
You don't need a professional propagation bench to do any of this well. Most of what you need is probably already in your potting shed. Before you start any method, gather and clean your tools, dull or dirty blades are one of the most common causes of cutting failure and disease spread. Here's what covers almost every technique in this article.
- Sharp, clean pruning shears or a pruning knife — wipe blades with rubbing alcohol or a 10% bleach solution between cuts.
- Rooting hormone: an IBA (indole-3-butyric acid) powder or gel product from any garden center — the 3,000 ppm talc-based powder is the most widely available and works for most home uses.
- Propagation medium: a 1:1 mix of peat (or coir) and perlite, or straight coarse perlite, for cuttings; pre-mixed bulb compost or gritty potting soil for bulbs and tubers.
- Humidity dome or clear plastic bag: critical for keeping cuttings from wilting before roots form.
- Small pots (3–4 inch) or plug trays for rooting cuttings and divisions.
- Labels and a waterproof marker — you will forget what you planted.
- Dibber or pencil for making planting holes without crushing stems.
- Trowel and garden fork for digging and dividing in the garden.
- Optional: a heat mat set to 70–75°F (21–24°C) speeds rooting for many cuttings.
- Safety: wear gloves when handling bulbs (especially daffodils, which irritate skin) and when applying rooting hormones or fungicide dust.
Bulbs, tubers, corms, and rhizomes: the easiest way to start
These underground storage organs are nature's head start. They already contain all the energy a plant needs to produce roots, shoots, and flowers. The main thing you need to get right is planting depth, timing, and drainage. Let me break down each type briefly before getting into the how-to.
What's the difference between a bulb, corm, tuber, and rhizome?
| Type | What it is | Common flowers | Replaces itself by |
|---|---|---|---|
| True bulb | Layered, fleshy scales around a central bud (like a tiny onion) | Tulip, daffodil, hyacinth, allium | Producing offset 'daughter' bulbs alongside |
| Corm | Solid, swollen stem base with a papery skin | Gladiolus, crocus, freesia | Forming new corms and cormels (tiny offsets) on top or below |
| Tuber | Swollen stem or root section with growth eyes | Dahlia, tuberous begonia, anemone (tuber) | Enlarging and forming new eyes; divided at dormancy |
| Rhizome | Horizontal underground stem that grows sideways | Bearded iris, canna lily, lily of the valley | Spreading laterally; divided every 3–4 years |
Step-by-step: planting spring-flowering bulbs (tulips, daffodils, hyacinths)
Spring bulbs are planted in autumn, typically from September through November in zones 3–8 before the ground freezes. They need a cold dormancy period (12–16 weeks below about 40°F/4°C) to flower. Here's the process:
- Choose a site with full sun (at least 6 hours) and well-drained soil — bulbs rot quickly in waterlogged ground.
- Loosen soil 12 inches deep and work in a handful of slow-release bulb fertilizer or bone meal per square foot.
- Plant bulbs pointed end up at a depth of roughly twice the bulb's height. For a 2-inch tulip bulb, that means a 4-inch-deep hole. Daffodil bulbs (2–3 inches tall) go in 5–6 inches deep. This 2x-height rule is the standard guidance from university extension programs.
- Space bulbs 4–6 inches apart for small bulbs (crocus, grape hyacinth), 6–8 inches for medium (tulips, daffodils).
- Backfill, firm gently, water once to settle the soil, then leave them alone — they need no further watering in most climates until spring.
- Mark the spot so you don't accidentally dig into them when planting spring annuals.
Step-by-step: planting summer-flowering bulbs and corms (gladiolus, dahlias, canna)
Summer-flowering bulbs are tender in most of the US and UK, they go in the ground after the last frost date and come out (in colder zones) before the first autumn frost. Gladiolus corms are planted 4–6 inches (10–15 cm) deep with 6 inches (15 cm) of spacing. To extend your cutting-garden season, plant a new batch every one to two weeks from late April through early June, this succession planting staggers the blooms beautifully. For dahlias, plant tuber clumps with the crown (where the stem was) facing up, about 4–6 inches deep. Both need full sun and loose, well-drained soil.
Step-by-step: planting bearded iris rhizomes
- Prepare a raised or mounded bed in full sun — iris rhizomes need heat and light on their tops to bloom well.
- Dig a shallow planting hole and create a small ridge of soil in the center.
- Set the rhizome horizontally on the ridge with roots dangling on either side, so the top of the rhizome sits at or just barely below the soil surface (not buried deep — exposed rhizomes are normal and intentional).
- Trim the fan of leaves to about 6 inches to reduce water loss while roots establish.
- Firm the soil around the roots, water in, then allow the top of the rhizome to dry and toughen in the sun.
- Best planting time: late summer, roughly July through September in zones 3–9.
Division: splitting perennials for reliable blooms
Division is my favorite technique for beginners because it's nearly foolproof and costs nothing if you already have established perennials in the garden. You're essentially taking a healthy, blooming plant, cutting it into pieces, and replanting those pieces, each one will bloom independently. Most clump-forming perennials actually benefit from being divided every three to four years; if you don't divide them, they get congested and flower less.
Best plants for division
- Daylilies (Hemerocallis): divide in early spring or late summer — among the easiest, virtually indestructible.
- Bearded iris: divide in late summer (July–September) after flowering; each division needs at least one healthy fan of leaves.
- Coneflower (Echinacea): divide in early spring as growth just emerges.
- Black-eyed Susan (Rudbeckia): spring division, every 2–3 years.
- Hostas: divide in early spring before leaves unfurl fully.
- Peonies: divide in autumn (September–October); each division must have 3–5 eyes (pink buds on the crown) or the plant won't bloom for 2–3 years.
- Ornamental grasses: divide in early spring before new growth exceeds 4–6 inches.
How to divide a perennial clump
- Water the plant well the day before dividing — moist clumps lift more easily and the roots survive better.
- Dig around the entire clump with a garden fork, working 6–8 inches out from the crown to avoid slicing through roots.
- Lift the whole clump and set it on the ground or a tarp.
- Pull the clump apart by hand if it separates easily, or use two garden forks inserted back-to-back and levered apart for tough, fibrous clumps (daylilies, ornamental grasses). For peonies or iris, use a clean, sharp spade or knife.
- Each division should have a good portion of healthy roots and at least 2–3 growing shoots or eyes.
- Replant divisions at the same depth as the original plant — within the same day if possible. If you need to wait, keep divisions in a shaded spot covered with a damp cloth.
- Water in thoroughly after replanting and keep consistently moist for the first 2–3 weeks.
Recovery tip: divisions may look sad and limp for the first week. That's normal. As long as the roots are intact and the soil stays moist (not waterlogged), they'll bounce back. Trim any damaged or excessively long roots cleanly with pruning shears before replanting, ragged tears invite rot.
Stem and root cuttings: rooting new plants from a snip
Taking a cutting is one of the most satisfying propagation moments in gardening, you put a piece of stem in a pot and a few weeks later you have a new, independent plant. Hydrangeas, for example, root readily from softwood/semi‑ripe cuttings taken in late spring–midsummer; see blank" rel="noopener noreferrer">Cuttings: softwood | RHS Advice for stepwise guidance on cutting length (10–15 cm), leaf removal, humidity domes, and potting‑on. The key variables are cutting type (which depends on how woody the stem is), rooting hormone concentration, and keeping humidity high enough that the cutting doesn't dry out before roots form. Practical guides like Hortus, Plant Propagation from Cuttings recommend basal quick‑dips in water‑soluble IBA at about 100–1,500 ppm for home/nursery use and note that talc/powder preparations (commercial products around a 3,000 ppm equivalent) remain widely used; always follow product label directions Hortus — Plant Propagation from Cuttings.
Cutting types and when to take them
| Cutting type | Stem maturity | Best timing | Expected rooting time | Common flower examples |
|---|---|---|---|---|
| Herbaceous / softwood | Soft, green, actively growing | Spring through early summer | 1–4 weeks | Coleus, impatiens, pelargonium (geranium), tradescantia |
| Semi-ripe / semi-hardwood | Firm at base, still green at tip | Mid to late summer | 3–8 weeks | Hydrangea, rose (shrub), penstemon, salvia |
| Hardwood | Fully dormant, woody | Late autumn through winter | 4–12+ weeks | Rose (species and old garden), deutzia, forsythia |
| Root cutting | Thick storage root sections | Dormant season (winter) | 4–8 weeks | Oriental poppy, Japanese anemone, phlox |
Step-by-step: taking a softwood or semi-ripe stem cutting
- Take cuttings in the morning when stems are well-hydrated. Cut a 4–6 inch (10–15 cm) non-flowering shoot just below a node (the bump where a leaf meets the stem).
- Strip leaves from the bottom half of the cutting, leaving 2–4 leaves at the top.
- If the remaining leaves are large (hydrangea, for example), cut them in half to reduce water loss.
- Dip the cut end into rooting hormone. For softwood cuttings, a 3,000 ppm IBA talc powder works well — tap off the excess. For semi-ripe material, the same product is fine; for hardwood cuttings of roses, you may want a higher-concentration product (up to 8,000 ppm) since harder wood needs more hormonal encouragement.
- Use a dibber or pencil to make a hole in your propagation medium (1: 1 peat/coir and perlite, or straight perlite) and insert the cutting so the bottom third is buried. Don't push it straight in or you'll rub off the hormone.
- Firm the medium gently around the stem and water lightly.
- Cover with a humidity dome or a clear plastic bag propped up so it doesn't touch the leaves. Place in bright indirect light — direct sun under a dome will cook the cuttings.
- Check moisture every few days; the medium should feel barely damp. Mist the inside of the dome if it dries out.
- After 3–4 weeks (softwood) or 6–8 weeks (semi-ripe), gently tug the cutting — resistance means roots have formed. Don't rush this.
- Once rooted, gradually open the dome over several days to acclimate the cutting, then pot up into standard potting mix with a dilute liquid feed (around 100–150 ppm nitrogen).
Water rooting: the low-barrier version
For easy-rooting flowers like coleus, tradescantia, impatiens, and even some pelargoniums, you can skip the propagation medium entirely and root cuttings in a jar of water. Take cuttings as described above, strip the lower leaves, and place the stems in a clear jar with about 2 inches of water, enough to cover the node but not the leaves. Set in bright indirect light and change the water every three to four days to prevent bacterial buildup. Roots typically appear in one to three weeks. Move to potting mix once roots are half an inch to an inch long, if you wait until the roots are very long, they can struggle to adapt to soil.
Root cuttings for phlox and oriental poppies
Oriental poppies and tall garden phlox are actually easier to propagate from root cuttings than from stem cuttings. In late autumn or early winter while the plant is fully dormant, dig down and expose a few pencil-thick roots. Cut 3–4 inch sections, keeping track of which end is 'up' (closer to the crown), place them right-way-up in pots of gritty compost, just below the surface, and keep barely moist in a cold frame or unheated garage. New shoots will emerge by late winter or early spring.
Layering: the lazy gardener's best friend
Layering is the most forgiving propagation method I know. You bend a low stem to the ground, bury part of it, and wait for it to root while still fed by the parent plant. Because the cutting never gets separated until it has its own root system, the failure rate is very low. It works particularly well for climbing and rambling roses, forsythia, magnolia, rhododendron, and wisteria.
Simple ground layering step-by-step
- Choose a long, flexible stem from the current or previous year's growth. It should be able to touch the ground 12–18 inches from its tip without snapping.
- About 12 inches back from the tip, make a shallow wound on the underside of the stem — either a 1-inch-long tongue cut angled upward (stopping just past the center) or remove a narrow ring of bark (about half an inch wide). This wound stimulates root production at that point.
- Dust the wound with IBA rooting powder, or stuff the tongue cut open with a small pebble or toothpick to keep it open.
- Dig a shallow trench (3–4 inches deep) under the wound and fill the bottom with a handful of peat and perlite mix.
- Pin the wounded section into the trench with a U-shaped wire staple or a bent piece of coat hanger, then backfill and firm. Leave the growing tip protruding and stake it upright if needed.
- Water well and keep the area moist. Roots form at the wound site over 6–16 weeks depending on species and season.
- Check for rooting by gently tugging the layered section. Once it resists pulling, sever the stem from the parent plant close to the rooted section, wait another two to four weeks, then dig up and transplant.
- Best time to start layering: early spring through midsummer for most shrubs and climbing roses.
Air layering: for stems that won't reach the ground
Air layering uses the same wounding principle but brings the rooting medium to the stem rather than bending the stem to the ground. Wound the stem as described above, pack a golf-ball-sized wad of moistened sphagnum moss around the wound, and wrap it tightly in clear plastic film, sealed at both ends with tape. Roots grow into the moss over 6–12 weeks and are visible through the plastic. Once you see a solid mass of roots, cut the stem below the root zone, unwrap carefully, and pot up. I've used this successfully on magnolias and gardenias where a stem simply couldn't reach the ground.
Nursery transplants and bare-root plants: buying your head start
For total beginners, buying a nursery transplant is the most direct route to a flowering garden. You're paying for someone else's propagation work, and that's completely fine. There are a few things worth knowing to make sure the plant you buy actually thrives.
Choosing and planting a nursery container plant
- Look for compact, bushy plants with deep green leaves and no yellowing, spotting, or visible pests on the undersides of leaves.
- Avoid plants that are already heavily in bloom at the nursery — they've spent their energy on flowers instead of building roots, and they'll struggle in the transition. A plant in bud is ideal.
- Check the root ball: tip the pot and look at the drainage holes. Some circling roots are fine; if the entire root ball is a solid mass of circling roots with no visible soil, the plant is severely pot-bound.
- At home, water the plant in its nursery container thoroughly an hour before planting.
- Dig a hole as deep as the root ball and two to three times as wide. Mix a handful of compost into the backfill.
- Set the plant so its crown sits at soil level — not buried deeper than it was in the pot.
- Backfill, firm gently, water deeply, and mulch 2–3 inches around the base (keeping mulch off the crown).
- For outdoor planting, the ideal time is overcast weather or late afternoon to reduce transplant stress.
Planting bare-root flowers
Bare-root plants (peonies, roses, daylilies) arrive dormant and rootless-looking, typically in late winter and early spring. They look almost dead, which alarms beginners. Don't be put off. Soak the roots in a bucket of water for 12–24 hours before planting to rehydrate them. Dig a wide, generous hole and build a small cone of soil in the center. Drape the roots down over the cone so they spread naturally in all directions. For peonies, the critical rule is that the pink eyes (buds) should sit no deeper than 1–2 inches below the soil surface, plant them deeper and they won't bloom. Firm the soil, water well, and mark the spot. Bare-root plants are often slower to show above-ground growth than container plants, but they establish root systems that are just as strong, if not stronger.
Forcing bulbs and water propagation: growing flowers indoors out of season
Forcing is a genuinely rewarding winter project. You're tricking a bulb into thinking it's had its cold winter and it's now spring, which means you can have hyacinths blooming in January and paperwhite narcissus filling a room with fragrance in December. No soil required.
Forcing bulbs in water (hyacinths, paperwhites, amaryllis)
- Paperwhites (Narcissus papyraceus) require no cold period at all — they're one of the easiest forcing bulbs. Place them in a shallow bowl with pebbles and add water just to the base of the bulbs (roots should be in water but the bulb base should stay dry to prevent rot). Set in a cool, bright spot. Blooms typically appear in 4–6 weeks.
- Hyacinths need a cold pre-chilling period of 12–16 weeks at 35–48°F (2–9°C) before they'll force. Buy pre-chilled bulbs in autumn, or chill your own in a paper bag in the refrigerator (keep away from fruit — ethylene gas causes bud abortion). After chilling, place in a hyacinth vase or glass jar with the base of the bulb just touching the water. Move to a cool, bright windowsill. Blooms in 3–4 weeks.
- Amaryllis bulbs are sold specifically for forcing and need no cold treatment. Plant the large bulb in a pot of well-drained potting mix with the top third of the bulb exposed above the soil. Water once, then water very sparingly until the flower stalk emerges — overwatering at this stage rots the bulb. Place in a warm, bright spot. Blooms in 6–10 weeks from planting.
Basic hydroponics and soilless growing for cuttings
For cuttings, rockwool cubes or LECA (lightweight expanded clay aggregate) are soilless alternatives to peat-perlite mixes. They're well-drained, sterile, and easy to work with. Take cuttings exactly as described in the stem cutting section, pre-soak rockwool cubes in pH-adjusted water (around 5.5–6.0), and insert the cutting. Keep in a humidity dome under grow lights or a very bright windowsill. The main advantage over standard propagation mix is that you can see root development easily and the sterile medium reduces fungal issues. Once roots are visible and an inch long, move rooted cuttings into a standard potting mix or continue into a dilute hydroponic nutrient solution if you want to grow that way. For most home gardeners, this level of soilless growing is more interesting than necessary, but it works very well.
Site and growing media choices
The method you choose affects where and what you grow in. Bulbs and tubers need well-drained soil above almost all else. Cuttings need a sterile, open propagation medium. Container growing works for nearly every non-seed method and is especially useful if your garden soil is heavy clay. If you're unsure about pot depth or how much soil flowers need to grow, see our short guide on how much soil flowers need to grow for simple rules on container size and soil volume. If you're interested in growing in containers or raised beds specifically, those are topics worth exploring in detail, both raised beds and containers give you complete control over soil quality, which is a huge advantage when establishing new divisions or transplants.
How much soil depth do flowers actually need?
| Flower type / method | Minimum soil depth | Ideal container size | Notes |
|---|---|---|---|
| Tulips / daffodils (bulbs) | 8–10 inches (20–25 cm) | 10–12 inch pot minimum | Needs depth for proper planting depth plus root development below |
| Gladiolus (corms) | 10–12 inches (25–30 cm) | 12 inch pot | Deep enough to plant 4–6 in and allow root growth below |
| Dahlias (tubers) | 12–16 inches (30–40 cm) | 5-gallon container minimum | Tubers are large; roots extend deep in warm months |
| Bearded iris (rhizomes) | 8 inches (20 cm) | 10–12 inch shallow wide pot | Rhizome sits at surface; roots go down 6–8 in |
| Division transplants (daylilies, coneflower) | 10–12 inches (25–30 cm) | 1-gallon to 3-gallon | Needs room for expanding root clump |
| Stem cuttings (geraniums, coleus) | 4–6 inches (10–15 cm) | 3–4 inch starter pot, then upgrade | Start small; pot up once rooted |
| Nursery transplants (mixed perennials) | 12 inches (30 cm) | 1-gallon to 5-gallon by plant size | Match container to mature root system size |
Using compost and dealing with heavy clay soil
Compost is the single best amendment for almost any flower bed. If you’re asking “can you grow flowers in compost,” the short answer is yes, well-rotted compost improves most flower beds and helps bulbs, divisions, and transplants thrive. For sandy soil, it improves water and nutrient retention. For clay soil, it opens up the structure and improves drainage, which is critical for bulbs especially. Work 2–4 inches of well-rotted compost into the top 8–10 inches of a new bed before planting bulbs, divisions, or transplants. For really heavy clay, adding coarse horticultural grit (not builder's sand, which can make clay concrete-like) at a rate of one part grit to two parts soil further improves drainage. Raised beds filled with a custom mix (topsoil, compost, and grit) sidestep clay problems entirely and are worth considering if your native soil is problematic. For step-by-step tips on how to grow flowers in clay soil, see our guide on how to grow flowers in clay soil.
Which flowers work best with each method?
Not every non-seed method suits every flower. Here's a practical guide organized by difficulty, so you can match your experience level to a realistic starting point. I've also flagged a few common ornamentals where seed-starting is genuinely the better or only practical option, there's no shame in going back to seeds when they make sense.
| Method | Easy (beginner) | Intermediate | Better started from seed instead |
|---|---|---|---|
| Spring bulbs (plant and wait) | Tulip, daffodil, crocus, muscari | Allium, fritillaria | Poppy (annual), wildflower mixes, bachelor's button |
| Summer bulbs / tubers | Gladiolus, tuberous begonia | Dahlia (tuber division), canna | Zinnia, marigold, sunflower (much faster from seed) |
| Division | Daylily, hosta, coneflower, black-eyed Susan | Peony (strict depth rules), ornamental grass | Annual bedding plants (petunias, snapdragons — seed or buy transplants) |
| Stem cuttings (water or medium) | Coleus, tradescantia, pelargonium/geranium, impatiens | Hydrangea (softwood), salvia, penstemon | Marigold, cosmos (trivially easy from seed) |
| Layering | Forsythia, climbing rose (simple layering) | Rhododendron, magnolia (air layering) | Most annuals (no benefit over cuttings or seed) |
| Nursery transplants | Any — this is the easiest option for any flower | Specialty varieties, unusual perennials | N/A — transplants available for almost everything |
Seasonal timing calendar
Timing is where a lot of gardeners come unstuck. Here's a practical seasonal calendar for most of the US (zones 5–7) and UK. Adjust a few weeks earlier for warmer zones and later for colder ones.
| Season / Month range | Outdoor tasks | Indoor tasks |
|---|---|---|
| Late winter (Jan–Feb) | Plant bare-root roses and peonies as soon as soil is workable; force paperwhites indoors | Start amaryllis forcing; take root cuttings of phlox and oriental poppy |
| Early spring (Mar–Apr) | Divide early-emerging perennials (hostas, daylilies) as growth emerges; plant summer bulb tubers indoors in pots to start early | Take softwood cuttings of overwintered geraniums/pelargoniums; pot up any forced bulbs that have finished |
| Late spring (May–Jun) | Plant gladiolus corms (first succession) after last frost; transplant nursery perennials; plant dahlia tubers outdoors | Take softwood cuttings of coleus, impatiens, tradescantia; begin layering shrubs and climbing roses |
| Summer (Jul–Aug) | Plant bearded iris rhizomes (late summer division); succession-plant gladiolus through early July; divide and replant iris after flowering | Take semi-ripe cuttings of hydrangea, salvia, rose; continue layering; check rooted layers for separation |
| Early autumn (Sep–Oct) | Plant spring bulbs (tulips, daffodils, crocus, alliums) by end of October; divide and move perennials before hard frost; dig and store dahlia tubers after first frost | Begin chilling hyacinth bulbs for forcing; take hardwood rose cuttings; pot up divisions for overwintering in a cold frame |
| Late autumn / winter (Nov–Dec) | Finish spring bulb planting before ground freezes; apply mulch over marginally hardy bulbs | Force pre-chilled hyacinth bulbs; maintain overwintering cuttings and divisions in frost-free conditions |
After-planting care: keeping new plants alive and thriving
The work doesn't end at planting. The first few weeks after establishing a new plant, whether it came from a bulb, a cutting, a division, or a nursery pot, are the most critical. Here's what to focus on.
Light, water, and feeding
- Light: most flowering ornamentals need a minimum of 6 hours of direct sun per day. Newly planted divisions and transplants benefit from afternoon shade for the first one to two weeks while roots establish — a temporary shade cloth or even a propped-up board will do the job.
- Watering: the most common mistake with newly established plants is inconsistent watering. Water deeply and less frequently rather than shallowly and daily. Aim to wet the soil to 6–8 inches depth, then allow the top inch to dry before watering again. Bulbs in their dormant post-bloom phase need much less water — back off significantly after foliage yellows.
- Feeding: hold off on heavy feeding for the first 2–4 weeks to avoid burning tender new roots. Once plants show active new growth, a balanced liquid fertilizer at half the recommended rate (or around 100–150 ppm nitrogen for container plants) applied every 2 weeks is a safe, effective routine. Avoid high-nitrogen feeds for bulbs and flowering perennials — they push foliage at the expense of flowers.
- Mulching: a 2–3 inch layer of organic mulch (wood chips, shredded bark, or straw) around transplants and bulb beds retains moisture, moderates soil temperature, and suppresses weeds. Keep mulch a couple of inches away from plant crowns and stem bases to prevent rot.
Staking climbers and tall flowers
Tall flowers like gladiolus and dahlias will need staking as they grow. For gladiolus, push a 3–4 foot bamboo cane next to each corm at planting time so you don't accidentally spike the corm later. For dahlias, install sturdy stakes (5–6 feet for tall varieties) at planting and tie stems loosely with soft garden twine as they grow. For climbing roses and other climbing flowers, training stems horizontally along wires or trellis rather than straight up produces many more flowering side shoots, this is worth doing from year one.
Pruning and deadheading for continuous bloom
Deadheading (removing spent flowers before seeds form) extends the blooming season for many ornamentals, including dahlias, coneflowers, and phlox. Pinching out the growing tip of young plants (dahlias especially) when they reach about 12 inches tall encourages a bushier habit with many more flowering stems rather than one dominant spike. For iris and peonies, remove spent flower heads but leave the foliage intact until it yellows naturally, the leaves are photosynthesizing and recharging the rhizome or root system for next year's blooms.
Troubleshooting: what went wrong and how to fix it
Most propagation problems come down to a handful of recurring issues. Here's a straightforward diagnosis and fix guide.
| Problem | Likely cause | Fix |
|---|---|---|
| Cuttings wilt and collapse within days | Humidity too low or cutting taken too late in the day | Use a humidity dome; take cuttings in the morning; ensure medium is moist but not waterlogged |
| Cuttings turn black at the base (stem rot) | Overwatering or poor drainage; fungal pathogen in non-sterile medium | Use a fresh, sterile peat/perlite medium; reduce watering; remove and discard affected cuttings; treat remaining with a dilute fungicide |
| Bulbs fail to emerge in spring | Planted too shallow, eaten by rodents, or rotted in poorly drained soil | Check planting depth (2x bulb height); use grit and raised beds in heavy soil; place wire mesh below bulbs if rodents are a problem |
| Divisions fail to bloom in first year | Too few eyes/growth points per division; planted too deep or too late | Ensure each division has 3–5 active growing points; plant at correct depth (especially critical for peonies); divide at the recommended season |
| Rooted layers not establishing after separation | Separated too early before root system is substantial | Wait until roots are clearly visible and resistant to gentle tugging; leave separated layer in place for another 2–4 weeks before digging |
| Transplants drooping for weeks after planting | Transplant shock; root damage during planting; or underwatering | Keep consistently moist for 3–4 weeks; shade from midday sun; avoid fertilizing until new growth appears |
| Forced bulbs produce leaves but no flowers | Insufficient chilling period (for hyacinths); bulbs not getting enough light after forcing begins | Ensure full cold-chilling duration; move to a brighter, cooler location (around 60°F/15°C) once shoots emerge |
| Aphids or fungal spots on newly propagated plants | Stress from propagation makes plants temporarily vulnerable | Blast aphids with water; use insecticidal soap for persistent infestations; improve air circulation around rooting area to reduce fungal issues |
Starter plant lists and shopping checklist by method
When you head to the garden center or browse online, it helps to know exactly what you're looking for and what to avoid. Here's a practical shopping guide organized by method.
Spring bulbs (buy in autumn)
- Buy: tulips (single late or Darwin hybrid for reliability), daffodils (any species or hybrid — deer-resistant bonus), crocus, grape hyacinth (Muscari), alliums.
- Avoid: very cheap mixed bags with no variety name — quality bulbs should feel firm and heavy, not soft or shriveled.
- Avoid: bulbs with visible mold, damaged necks, or missing basal plates (the flat root-end).
Summer bulbs and tubers (buy in late winter/spring)
- Buy: dahlia tubers (named varieties with clear labels; each tuber clump should have visible eyes/crown growth points), gladiolus corms (firm, no soft spots), tuberous begonias (round, firm, button-like).
- Avoid: dahlia tubers with no visible crown or eyes — they may not grow. Avoid soggy, mold-covered tubers.
Division plants (buy divisions or divide your own)
- Best divisions to buy or accept from gardening friends: daylilies (incredibly easy), bearded iris (any named variety), coneflower, black-eyed Susan, hostas.
- Buy bare-root peonies in autumn or early spring — the most reliable way to get named varieties true to type.
Cuttings (take from existing plants or swap with gardeners)
- Easiest to root from cuttings: coleus (any variety), pelargonium/geranium (zonal and ivy types), tradescantia, impatiens.
- Worth the slightly extra effort: hydrangea (Annabelle or bigleaf), shrub roses, penstemon.
- Buy rooting hormone: any garden center product listing IBA (indole-3-butyric acid) as the active ingredient — the standard 3,000 ppm talc powder is fine for most home use.
Forcing supplies (buy in autumn for winter indoor projects)
- Buy: paperwhite narcissus bulbs (no chilling needed — the easiest indoor forcing project), pre-chilled hyacinth bulbs (or chill your own), amaryllis kits.
- Supplies needed: shallow bowl with pebbles or a hyacinth glass, bright windowsill or a grow light for post-chilling phase.
Your seasonal action plan: what to do next
The most important thing you can do right now is match your current calendar date to the seasonal timing table above and pick one method to start with. If it's summer, start with stem cuttings of something you already have in the garden, a geranium on a windowsill or a coleus in a pot is all you need. If it's early autumn, buy a bag of daffodil or tulip bulbs and get them in the ground before the first frost. If it's winter, force some paperwhites in a bowl of pebbles and enjoy blooms before the snow melts.
- Pick one method from this article that matches your current season and try it this week.
- Assemble the basic toolkit: clean pruners, a bag of perlite, a pot or two, and rooting hormone if you're doing cuttings.
- If you have heavy clay soil or poor drainage, address it with compost and grit before planting bulbs or divisions — this single step prevents more failures than anything else.
- If you're growing in containers or a raised bed, check that you have adequate soil depth for your chosen flower (see the depth table above).
- Keep a simple garden journal: note what you planted, when, and how it performed. Over a season or two you'll have genuinely useful personal data that beats any general guide.
- Once you've built confidence with the basics, explore growing climbing flowers on trellises and walls — layering and cuttings both give you plants to train upward without buying more from a nursery.
Growing flowers without seeds is not a consolation prize for people who can't be bothered with seed starting. It's a parallel toolkit that gives you faster results for some plants, genetic-clone accuracy for named varieties, and year-round propagation opportunities that seeds simply can't match. Start with one method, get comfortable, and build from there. Every rooted cutting and every spring bulb emergence is a genuine small win, and those small wins add up to a very full, very beautiful garden.
FAQ
What main topics must the article cover to teach gardeners how to grow flowers without seeds?
Cover when/why to choose non‑seed methods; an overview of non‑seed propagation and planting options (bulbs, corms, tubers, rhizomes, divisions, root & stem cuttings, layering, transplanting nursery or bare‑root plants, water rooting and basic hydroponic/forcing); step‑by‑step how‑to protocols and materials lists for each method; timing and seasonal schedules (indoor vs outdoor); best flower types for each method with difficulty ratings; site and media choices (containers, raised beds, soil depth, compost, clay adjustments); after‑planting care (light, water, feeding, staking); troubleshooting (pests, diseases, rot, poor rooting); starter plant lists and a short seasonal checklist with links to follow‑up guides.
Which authoritative source types should be used as the article’s evidence base?
Primarily university extension publications (NC State, UC ANR, Penn State, Cornell, UMN, UF/IFAS, Purdue), major horticultural societies (RHS), peer‑reviewed horticulture journals (HortScience, ASHS), and recognized propagation manuals/practitioner references. Use regionally relevant extension bulletins for timing and cultivar notes, and product/manufacturer labels for chemical/auxin recommendations.
What propagation methods need step‑by‑step, evidence‑based protocols?
Division of bulbs/tubers/rhizomes/corms; stem and leaf cuttings (herbaceous, softwood, semi‑ripe, hardwood) including rooting media, hormone use and expected rooting times; layering variants (simple, tip, air); transplanting nursery or bare‑root stock; water rooting and basic hydroponic forcing of bulbs; lifting, dividing, storing tubers (e.g., dahlias). For each, include sanitation, cut/plant geometry, depth/spacing, and common failure points.
What precise technical details are required for cuttings and rooting?
Cutting size and maturity (length, number of nodes, leaf removal), recommended propagation media (e.g., 1:1 sphagnum peat or coir:perlite, coarse perlite, pine‑bark mixes), humidity/cover and misting guidance, rooting hormone types and concentration bands (IBA/NAA ranges for quick‑dips and talc indicators), expected rooting time ranges (herbaceous 1–4 wks, semi‑hardwood 3–8 wks, hardwood 4–12+ wks), and post‑rooting fertilization (e.g., ~100–150 ppm N soluble feed).
Which plant‑by‑plant recommendations and difficulty ratings are needed?
Lists of easy (coleus, pothos, tradescantia, mint, geranium, some hydrangeas), intermediate (roses, many shrubs via semi‑hardwood cuttings, peonies by division), and specialty/difficult (some bulbs best from offsets, species that need tissue culture). Include species where seed propagation is preferable or necessary. Cite extension or RHS pages for each species’ recommended method and seasonal timing.
What site, media and planting‑depth information must be provided?
Bulb/corm/tuber depth rules (rule‑of‑thumb: true bulbs ≈ 2× bulb height; gladiolus 10–15 cm deep), spacing guidelines, container and raised bed soil depths and volume guidance, compost incorporation rates, and clay‑soil improvement tactics (add coarse sand, compost, gypsum depending on soil test). Reference UC ANR, UMN, and extension planting charts for specifics.
Next Articles
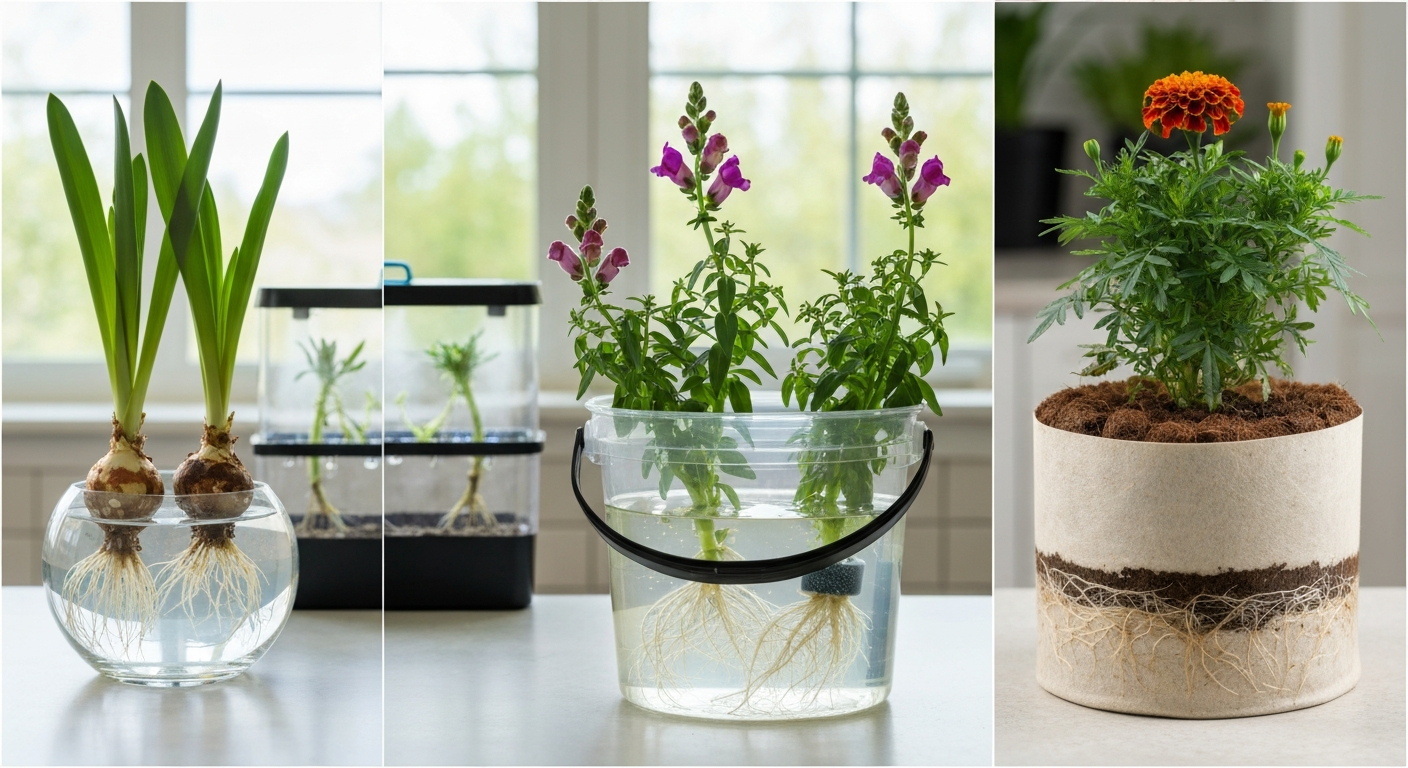
How to Grow Flowers Without Soil: Practical Soilless Guide
Soilless flower growing: step-by-step hydroponic, aeroponic & inert-media setups, nutrient targets & troubleshooting.
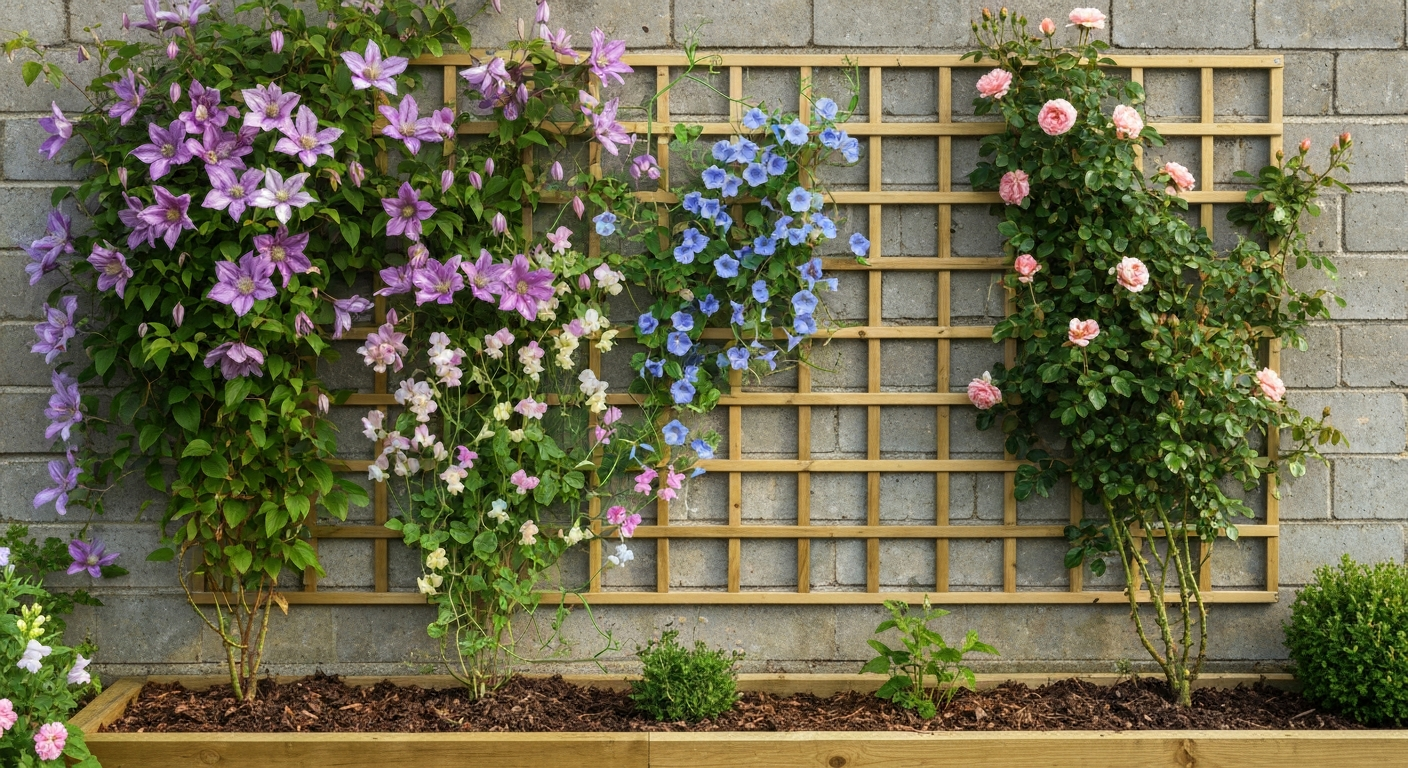
How to Grow Climbing Flowers: Complete Guide for Gardeners
How to grow climbing flowers: step-by-step planting, varieties, supports, soil depth, container sizes & troubleshooting.
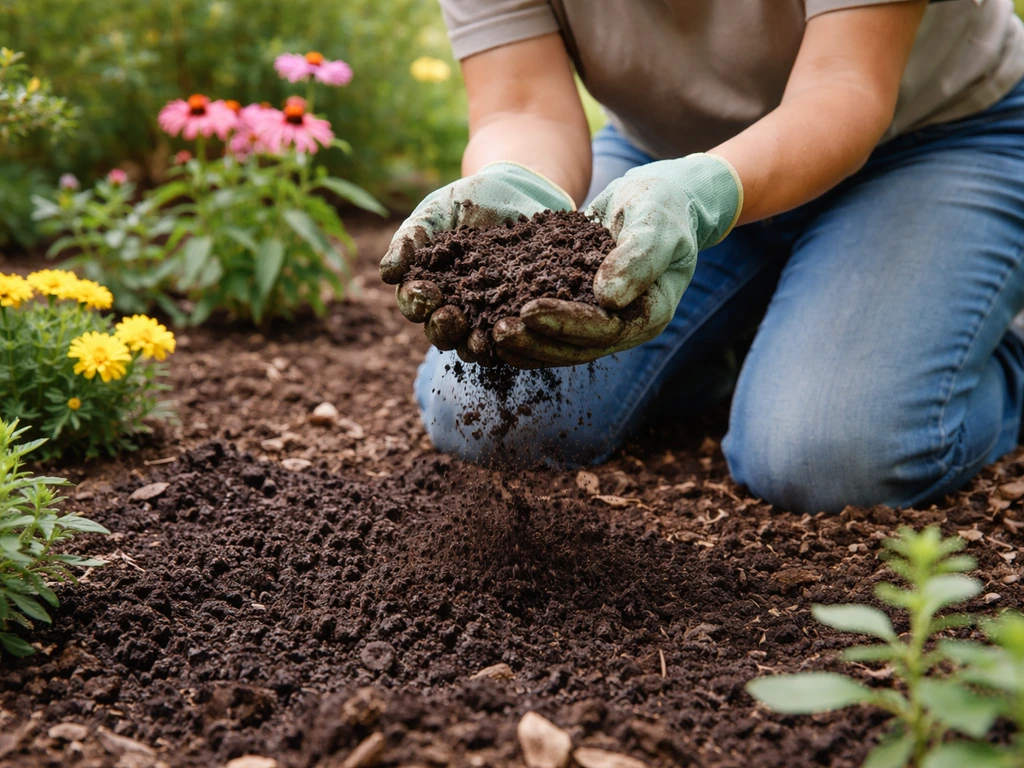
Can You Grow Flowers in Compost? How to Do It Right
Yes. Learn how to grow flowers in compost with proven mix ratios, timing, and fixes for weeds, wet soil, and burn.