You can get cut flower stems to grow roots, but only certain stems will cooperate, and the process requires a few specific conditions to work. The short version: take a 4–6 inch cutting from a healthy, actively growing stem, remove the leaves from the bottom half, dip the cut end in rooting hormone powder, and stick it into a moist but well-draining medium like perlite, vermiculite, or a 50/50 mix of the two. Keep it warm (around 65–75°F), out of direct sun, and consistently humid. Most soft-stemmed flowers will show roots in 3–6 weeks. That's the core of it. The rest of this guide fills in the details so you don't lose cuttings to rot or drying out before roots ever form.
How to Make Cut Flowers Grow Roots: Step-by-Step Guide
James Holloway
8 Jul 2026
Why cut flowers won't usually root (and what you can control)
The reason most cut flowers from a vase never grow roots isn't a mystery. By the time a stem ends up in a flower arrangement, it's already working against itself in several ways. First, commercial cut flowers are often treated with preservatives and conditioned to extend vase life, not to encourage rooting. Second, the older and more mature the stem, the harder it is to coax roots from it. Adventitious roots, the kind that form on stem tissue rather than from existing root zones, need actively dividing cells to get started. A stem that's been sitting in a vase for five days has significantly less of that cellular energy available.
Dehydration is another big killer. An unrooted cutting has no way to pull water from the soil, so it's entirely dependent on what's stored in its tissue. If the stem dries out before roots initiate, it's done. On the flip side, too much moisture causes rot. Saturated conditions cut off oxygen to the base of the stem and create exactly the environment that root-rot organisms thrive in. The good news is that both of these problems are controllable. The key variables you have power over are: how fresh the stem is, how you prepare it, what medium you root it in, and how you manage moisture and humidity afterward.
One thing worth understanding is that wounding the stem base actually helps. Scraping or nicking the bark layer near the base triggers cell division in the tissue between the bark and the woody core, which is exactly where adventitious roots emerge. This is why stem preparation matters more than most people expect.
Best candidates: which cut stems root reliably
Not every flower stem is worth attempting to root, and being realistic about this saves a lot of frustration. The best candidates are soft-stemmed or semi-woody plants with actively growing, mid-maturity stems. You want stems that are neither the very youngest growth (too soft and floppy, collapses under stress) nor the oldest woody growth (too lignified to form new roots easily).
In terms of flowers you're likely to have in a cutting garden, here are the ones that root most reliably from stem cuttings:
- Roses: one of the most commonly rooted cut flowers, they respond well to hormone powder and a sterile medium
- Hydrangeas: take 5–6 inch cuttings from non-flowering stems; root readily in damp vermiculite
- Geraniums (Pelargonium): root easily but benefit from a brief air-drying period on the cut end before sticking to prevent rot
- Coleus: roots quickly, often within a week or two; great for beginners to practice on
- Snapdragons: soft-stemmed and root reasonably well from tip cuttings
- Impatiens: fast-rooting soft stems; one of the easiest to get started in water or media
- Dahlias: can be propagated from stem cuttings taken early in the season from tuber-sprouted shoots
- Chrysanthemums: commonly propagated from tip cuttings; cooperative with standard rooting methods
Flowers that are harder or nearly impossible to root from cut stems include tulips, daffodils, irises, and poppies. These grow from bulbs, corms, or taproots, and their stems simply don't have the tissue structure to form adventitious roots. If you're trying to grow more of those, propagation happens through bulb division or seed, not stem cuttings.
Tools and supplies for rooting
You don't need much to get started, and most of this is inexpensive or already in your home if you do any gardening at all. Here's what actually matters:
Containers
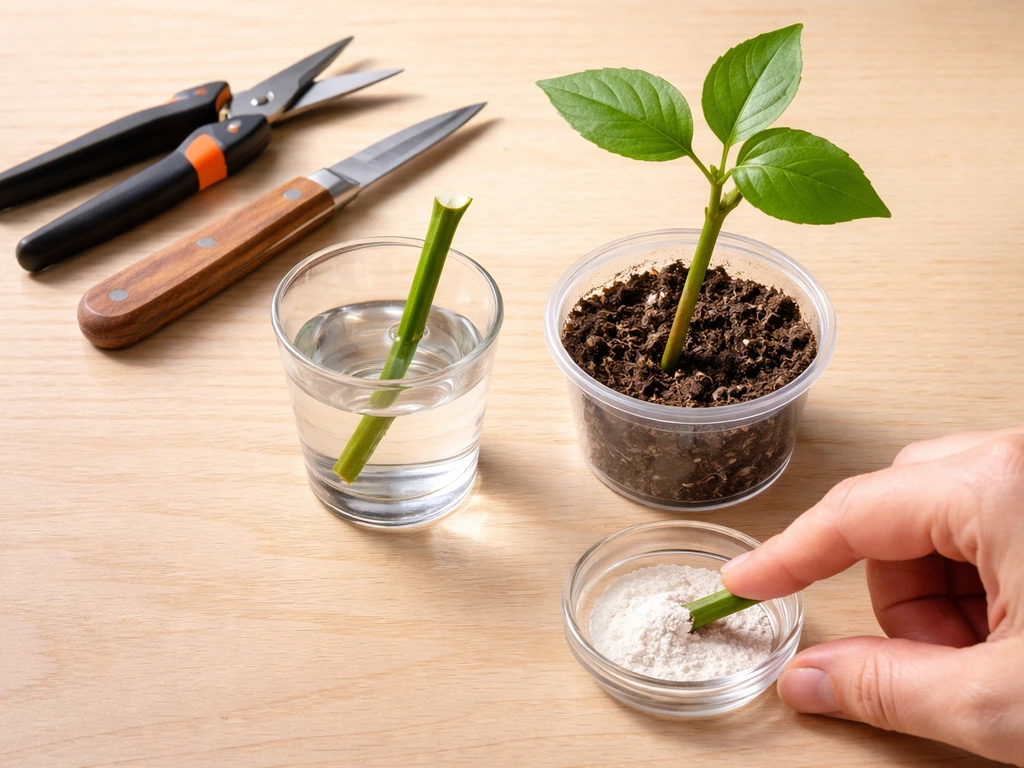
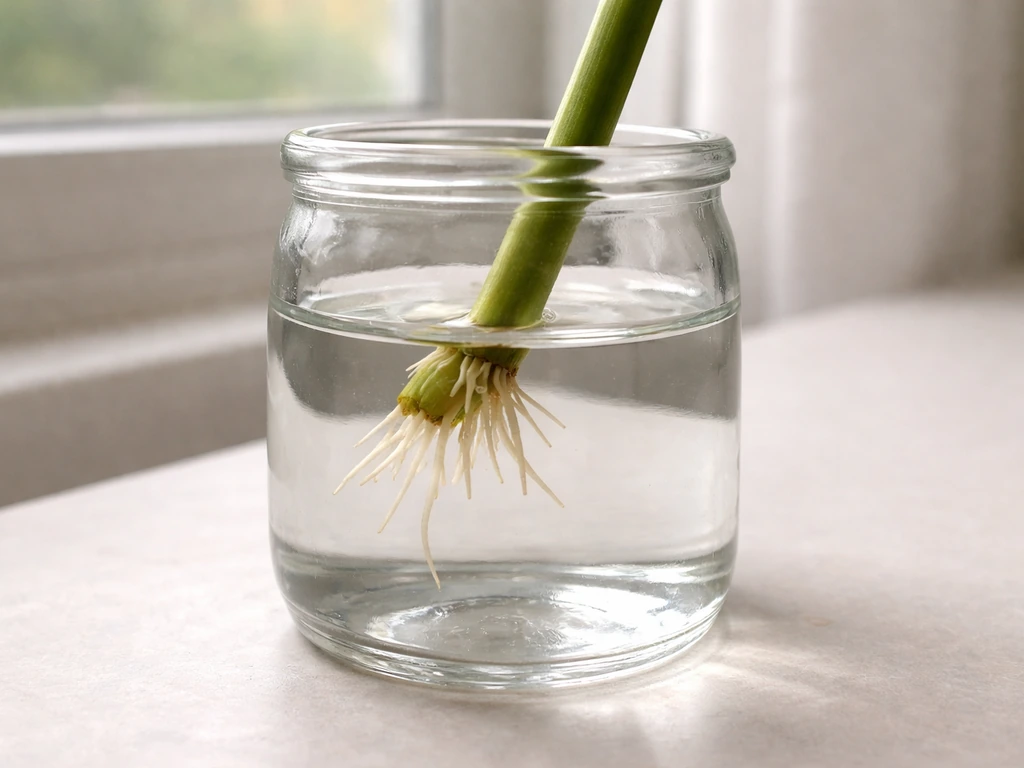
Small plastic pots with drainage holes work best for media rooting. A 3–4 inch pot is ideal for one to two cuttings. Clear plastic cups work well too because you can actually see when roots form along the sides without disturbing the cutting. For water rooting, any narrow-necked glass or jar works, just make sure the leaves stay above the waterline so only the bare stem is submerged.
Rooting medium options
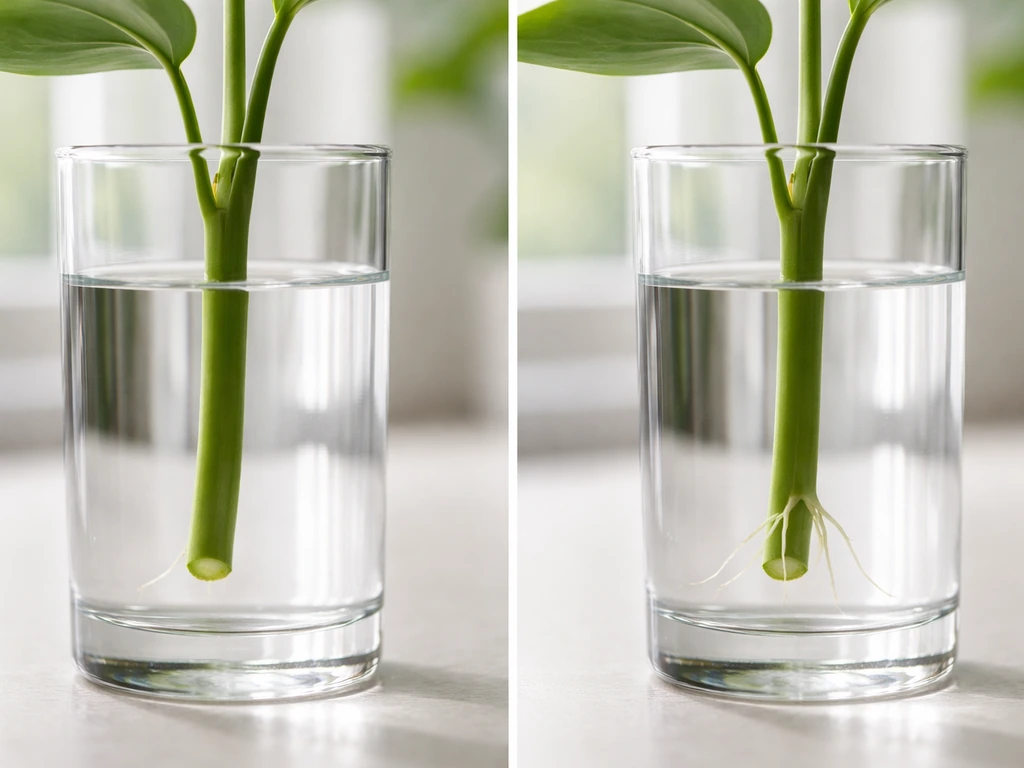
The two main approaches are water rooting and media rooting, and they each have tradeoffs. Water is simple and lets you watch roots develop, but the roots that form in water are structurally different from soil roots and can struggle when you transition the plant. UNR Extension also notes that water rooting can be used as a temporary stage for rooting before moving the cutting to small pots and media water rooting as a temporary stage for rooting prior to potting/media. Media rooting takes a little more setup but gives you stronger, more transplant-ready roots.
| Method | Best For | Pros | Cons |
|---|---|---|---|
| Water rooting | Fast-rooting soft stems (impatiens, coleus) | Easy to monitor, no special materials needed | Water roots are fragile; transition to soil can shock the plant |
| Perlite alone | Most soft and semi-woody stems | Excellent drainage, low rot risk, widely available | No nutrients; need to water carefully |
| Vermiculite alone | Delicate or moisture-sensitive stems | Retains some moisture, sterile, lightweight | Can stay too wet if overwatered |
| 50/50 perlite + peat or coir | General purpose, best all-around mix | Balances moisture retention and drainage well | Peat-based mixes may compact over time |
| Coarse sand | Semi-woody cuttings | Good drainage and aeration | Can dry too fast in warm conditions |
My personal go-to is a 50/50 mix of perlite and coir. It drains well, holds just enough moisture, and I've had consistent results with it across roses, hydrangeas, and coleus. Avoid using regular potting soil or garden soil for rooting. Both retain too much moisture and are not sterile, which invites rot and fungal problems before roots have a chance to establish.
Rooting hormone
Rooting hormone isn't strictly required for easy-rooting plants like impatiens or coleus, but it genuinely speeds things up and improves uniformity on harder-to-root stems like roses. The active ingredient to look for is indole-3-butyric acid (IBA). Products like Garden Safe TakeRoot or Hormex Rooting Powder (their No. 1 formula contains 0.10% IBA) are widely available at garden centers and online. Use powder form for most home gardeners since it's easier to handle safely and apply in small amounts. One important note: use only a small amount. Dipping the cut end lightly into the powder and tapping off the excess is exactly right. Too much hormone can actually slow rooting rather than speed it up.
Step-by-step: how to prepare stems and start rooting
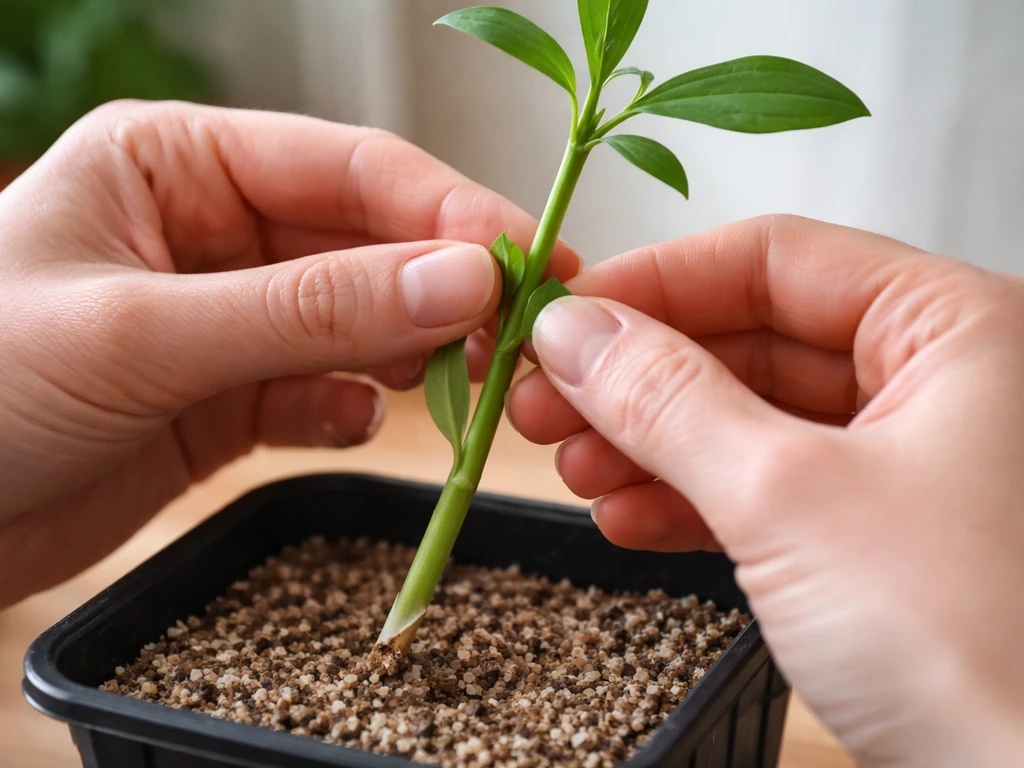
- Choose the right stem. Select a stem that's actively growing and in the mid-maturity range, firm but not woody. It should be from a healthy plant with no signs of disease. For cutting garden flowers, mid-morning is a good time to take cuttings because stems are well-hydrated after overnight recovery.
- Cut to 4–6 inches. Use clean, sharp scissors or pruners. Cut just below a node (the point where a leaf meets the stem) at a 45-degree angle. The angled cut increases surface area for water uptake and root formation. Immediately place the cutting in water or wrap it in a damp paper towel so it doesn't dry out while you work.
- Remove lower leaves. Strip off all leaves from the bottom half of the stem. Leaves left below the medium line will rot and can spread rot to the stem. Leave two to four leaves at the top so the cutting can still photosynthesize.
- Wound the base (optional but helpful). Lightly scrape the bottom inch of the stem with a clean knife to expose the inner tissue. This wounding triggers the cell division that produces new roots. It's especially useful for semi-woody stems like roses.
- Dip in rooting hormone. Moisten the cut end very slightly (just a quick dip in water is enough), then dip it into rooting hormone powder and tap off any excess. Only the bottom half-inch to inch needs to be coated.
- Prepare your medium. If using a rooting mix, pre-moisten it until it holds together when squeezed but doesn't drip. Pour it into your container and make a small hole with a pencil or chopstick before inserting the cutting. This prevents the hormone powder from rubbing off on the medium.
- Insert the cutting. Place the cutting so the bare stem section is buried and at least one node is below the surface. Firm the medium gently around it so it stands upright.
- Create a humidity tent. Cover the pot loosely with a clear plastic bag or place it inside a propagation tray with a humidity dome. This is critical for the first couple of weeks to reduce moisture loss from the leaves while roots haven't formed yet.
- Label and date your cuttings. You'll want to know how long they've been going, especially if you're troubleshooting later.
Aftercare while roots form
Light
Keep cuttings in bright, indirect light. A spot near a window that doesn't get direct afternoon sun is ideal. Direct sun inside a humidity tent creates a greenhouse effect that can cook the cuttings quickly. The cutting still needs light to support basic photosynthesis and fuel the rooting process, but it can't handle the heat stress of full sun at this vulnerable stage.
Temperature
Aim for 65–75°F consistently. Most soft-stemmed cutting garden flowers root well in this range. If you're working with slightly tougher or semi-woody stems, bottom heat helps. A seedling heat mat under the pot set to around 70°F can meaningfully speed up rooting for stubborn types. Avoid cold windowsills in winter, where temperatures near the glass can drop significantly at night.
Watering
This is where most cuttings are lost. The medium needs to stay moist but never soggy. Check every couple of days by pressing a finger into the medium. If it feels damp, leave it alone. If it feels dry below the surface, add a small amount of water. The humidity tent dramatically reduces how often you need to water by slowing evaporation. If you see condensation inside the bag, that's good. If there's standing water or the medium smells off, remove the tent and let it breathe briefly.
Timing expectations
Soft-stemmed flowers like coleus and impatiens can show roots within 7–14 days. Mid-range stems like snapdragons or geraniums typically take 2–4 weeks. Roses and semi-woody stems can take 4–6 weeks or longer. As a general rule, most cutting garden flowers fall in that 3–6 week window. Resist the urge to tug on the stem to test for roots before 3 weeks. You'll likely break any early root formation before it's established.
Troubleshooting common rooting failures
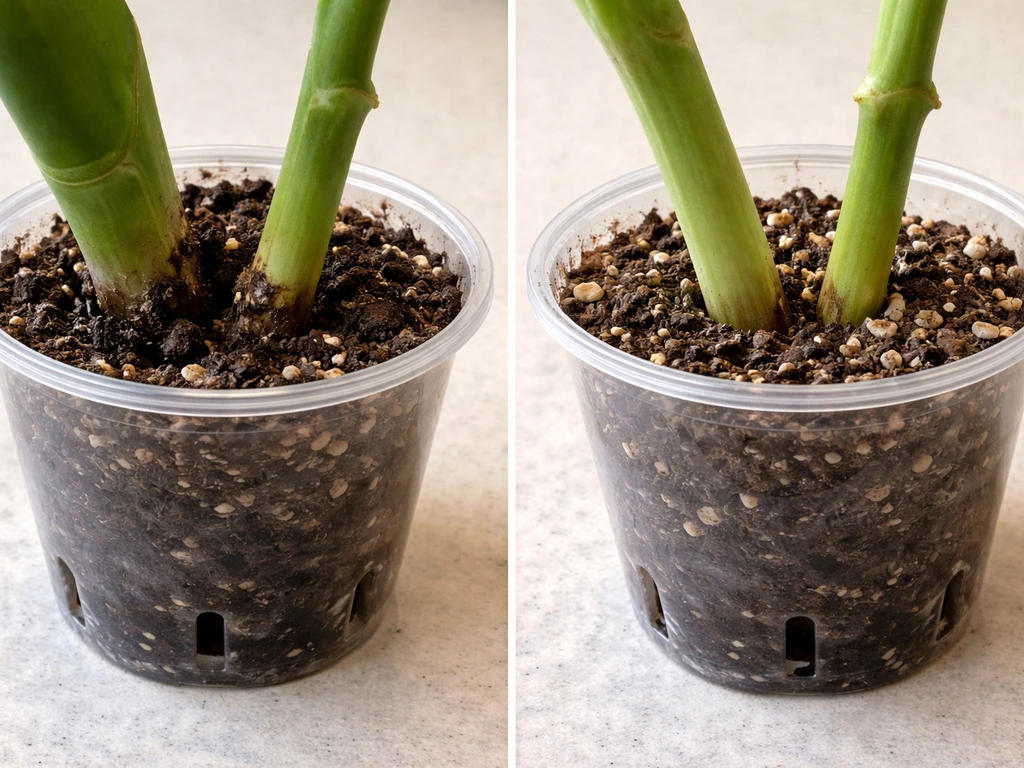
Stem is rotting at the base
Rot at the base is the most common failure, and it almost always comes down to too much moisture combined with not enough drainage or airflow. Check that your container has drainage holes and that the medium isn't staying waterlogged. If you're rooting a succulent-type or thick-stemmed flower like a geranium, try letting the cut end air-dry for an hour or two before sticking it. The brief drying period lets a callus start to form, which resists rot organisms. Remove any visibly rotting stem immediately because it will spread.
White mold or fungus on the medium surface
Surface mold usually means the humidity tent is trapping too much stagnant air. Open the tent for 30 minutes once a day to let fresh air circulate. Make sure you're using sterile medium (not garden soil or old potting mix) and that your containers are clean. A light dusting of ground cinnamon on the medium surface can help, it has mild antifungal properties and won't hurt the cutting.
No roots after 6 weeks
If there are still no roots after 6 weeks, check whether the stem is still firm and green. If it is, it may just be a slow-rooting variety, some roses and woody-based ornamentals take 8–10 weeks. Try adding bottom heat if you haven't already. If the stem is mushy or dried and shriveled, it's not going to root and you should start a fresh cutting. Use rooting hormone on the next attempt if you skipped it the first time.
Leaves yellowing or dropping
Some leaf drop is normal and not a death sentence. A cutting can survive with just one or two leaves while it forms roots. Leaves yellow when the cutting is stressed by low light, inconsistent moisture, or temperature swings. Move the cutting to a steadier environment and make sure it's getting indirect light, not darkness. If all leaves drop before roots form, the cutting is unlikely to survive since it has no way to generate energy.
Cutting wilts severely even inside the humidity tent
Severe wilting inside a humid tent usually means the stem was dehydrated before you even took the cutting, or the cut wasn't clean. A ragged or crushed cut surface can't take up water efficiently. Recut the stem at a fresh 45-degree angle with a sharp, clean blade and return it to the medium immediately. This alone can sometimes rescue a wilting cutting within a few hours.
Transplanting rooted cut flowers and long-term care
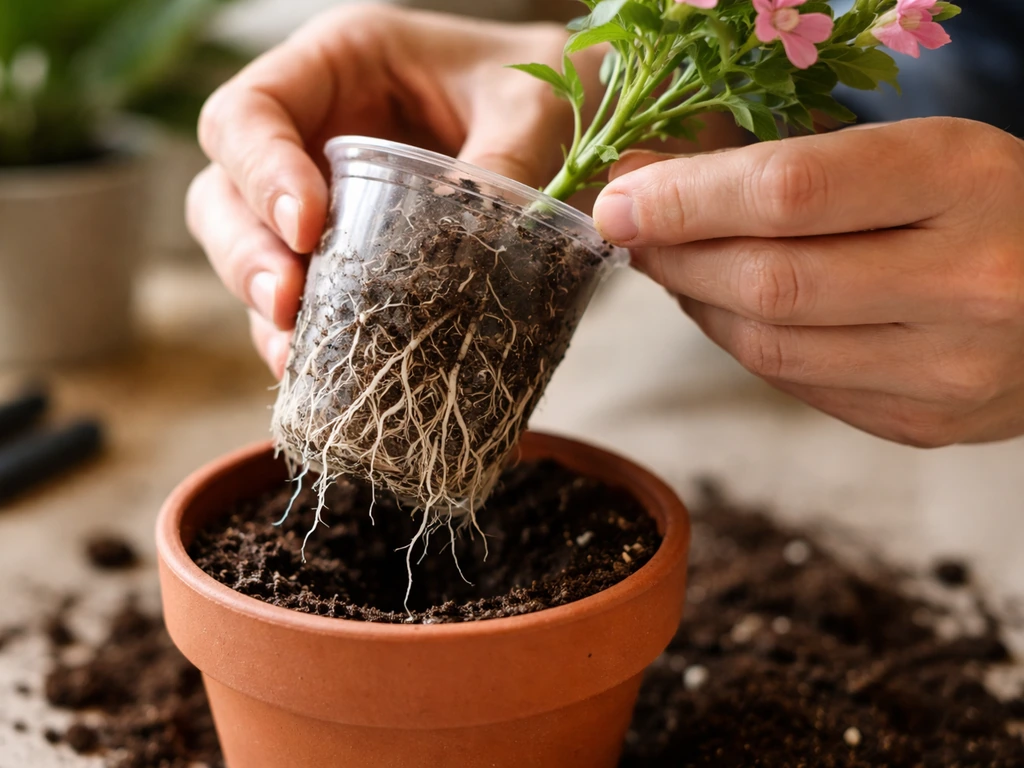
Once you see roots peeking out of the drainage holes or visibly circling the inside of a clear container, you're ready to transplant. Don't rush this step. A good root system for transplanting means multiple roots at least an inch long, not just one fragile thread. For most cutting garden flowers, this point arrives 4–6 weeks after sticking the cutting.
Transplant into a small pot (3–4 inches) filled with regular potting mix first rather than jumping straight to the garden. This intermediate step lets the roots adjust to a richer growing medium gradually. Water the new pot thoroughly at transplanting and then let it settle into normal watering rhythms. Keep it out of harsh direct sun for the first week as the roots adapt.
After 2–3 weeks in the pot and once the plant shows new top growth, it's rooted in and ready to either step up to a larger container or go into the garden. When planting out into the garden, choose a cloudy day or plant in the late afternoon to reduce transplant shock. Water in well and, if your climate is warm and dry, shade it lightly for the first few days with a floating row cover or an upturned pot that lets some light through.
From there, care for the transplant the same way you'd care for any young plant of that species. Pinch the growing tips of flowers like coleus, snapdragons, and geraniums to encourage bushy growth rather than a single leggy stem. Feed lightly with a balanced fertilizer once you see consistent new growth, but hold off on heavy feeding until the plant is well established. Once you have strong, established plants, you can shift your approach toward growing big flowers by focusing on the right light, nutrients, and spacing for your variety how to grow big flowers.
Getting a cut stem all the way to a healthy flowering plant is genuinely satisfying, especially if it came from a flower you loved in someone else's garden. It's one of the most direct ways to multiply your cutting garden for free, and once you've done it a few times, the whole process becomes almost automatic. If you're already interested in growing flowers from scratch, the propagation mindset slots in naturally alongside starting from seed, and it opens up a whole category of plants that are much easier (and cheaper) to grow from cuttings than to buy. If you want the best results, it helps to follow a full plan for how to grow beautiful flowers, not just the rooting steps.
FAQ
My cutting is green but not rooting after 4 to 6 weeks, what should I check before starting over?
If the stem was recently cut but looks dried or mushy, don’t “wait it out.” Make a fresh recut (45-degree angle, straight to the medium immediately) and confirm the base stays buried only to the leaf-removal line. Also check your temperature first, because cold delays root initiation and increases rot risk.
Can I bottom-water cuttings, or will that cause rot?
Yes, but only if you keep the medium oxygenated. Use drainage holes and a light, fast medium (perlite or vermiculite-based mix), and avoid long periods where the base sits in excess water. If you see standing water or a sour smell, empty the tray and restart with slightly drier medium.
Is it okay to use fertilizer or “rooting concentrate” instead of rooting hormone?
Avoid using rooting liquid from fertilizers, because salts can stress cuttings and increase mold. If you want to dip, use only rooting hormone powder (the same product type described in the article) and apply lightly. Too much hormone can inhibit rooting, especially on thicker or semi-woody stems.
How do I move a cutting from water rooting into potting mix without losing the roots?
When transitioning from water to soil, handle the new roots gently. Plant as soon as roots are visible but still short, and keep the new pot in bright, indirect light with steady moisture for about a week. Don’t let the roots dry out during transplanting, and do not fertilize until you see new top growth.
Should I remove all the leaves from a cutting, or can I leave some on top?
Yes, but timing matters. If leaves are still attached, remove bottom leaves so they cannot rot in the medium. Keep remaining leaves, but trim only if they are damaged or overcrowded, and maintain good air flow to prevent fungal issues.
My humidity tent has lots of condensation and surface mold, what do I do the same day?
If you see condensation that doesn’t stop and the medium stays constantly wet, you are likely trapping stagnant air. Open the humidity cover daily for about 30 minutes, water only when the medium is dry below the surface, and consider slightly lowering humidity by using a looser bag fit.
Can I use a heat mat and a humidity tent at the same time without overheating the cutting?
You can, but choose a light-watching approach. If you use a heat mat, keep the pot above the mat surface area enough to prevent overheating the base, and aim for warm root-zone temps rather than hot leaves. If the cutting wilts despite humidity, reduce heat and verify indirect light conditions.
Is wounding the stem required, and how deep should I scrape or nick the base?
Wounding helps, but do it minimally and cleanly. Scrape or nick only near the base where roots will form, avoid cutting deep into the woody core, and recut if the tissue is crushed. After wounding, dip lightly in rooting hormone if you are using it, then insert promptly into the medium.
How can I tell whether my cutting is failing because of rot versus just slow rooting?
Yes, some plants need a “start-over” approach rather than tweaks. If the base is turning brown and soft, it is usually rot, not a delayed rooting stage. Cut back to firm tissue (if any remains), use a new sterile medium, and start with a fresh cutting if the stem is mostly compromised.
My cutting dropped leaves, how do I know if it will still root?
It can be normal for leaves to yellow and drop, but complete leaf loss before roots form is usually fatal. A simple check is firmness: if the cutting remains firm and green at the base, it may still be rooting, but if it is limp and shrinking, humidity is likely mismanaged or the cutting was stressed before rooting.
Next Articles
How to Grow Big Flowers: Step-by-Step for Larger Blooms
Step-by-step tips to grow big ornamental flowers: pick the right varieties, boost soil and light, water, space, and prev
How to Make a Flower Grow Roots: Step-by-Step Guide
Step-by-step rooting guide for cuttings: choose stems, set up water or soil mix, prevent rot, troubleshoot, then pot for
How to Grow Beautiful Flowers: Beginner to Bloom Guide
Step-by-step guide to grow beautiful flowers from seed or sowing to bloom with soil, watering, feeding, and pest fixes.