
Yes, you can grow plants from a bouquet, but the method depends entirely on what flowers you're working with. Some stems root in a glass of water within a few weeks. Others can be grown from seeds saved right off the dried seedheads. And a handful of bouquet favorites like ranunculus and dahlias aren't really propagated from cut stems at all, because they grow from corms or tubers that you plant directly in the ground. The trick is matching the right technique to the right flower, and that's exactly what this guide walks you through. For step-by-step instructions specifically on how to grow store bought flowers, see our guide on how to grow store bought flowers. For a step-by-step walkthrough on how to grow flowers from a bouquet, see how to grow flowers from a bouquet.
How to Grow Plants from a Bouquet: Step-by-Step Guide for Beginners

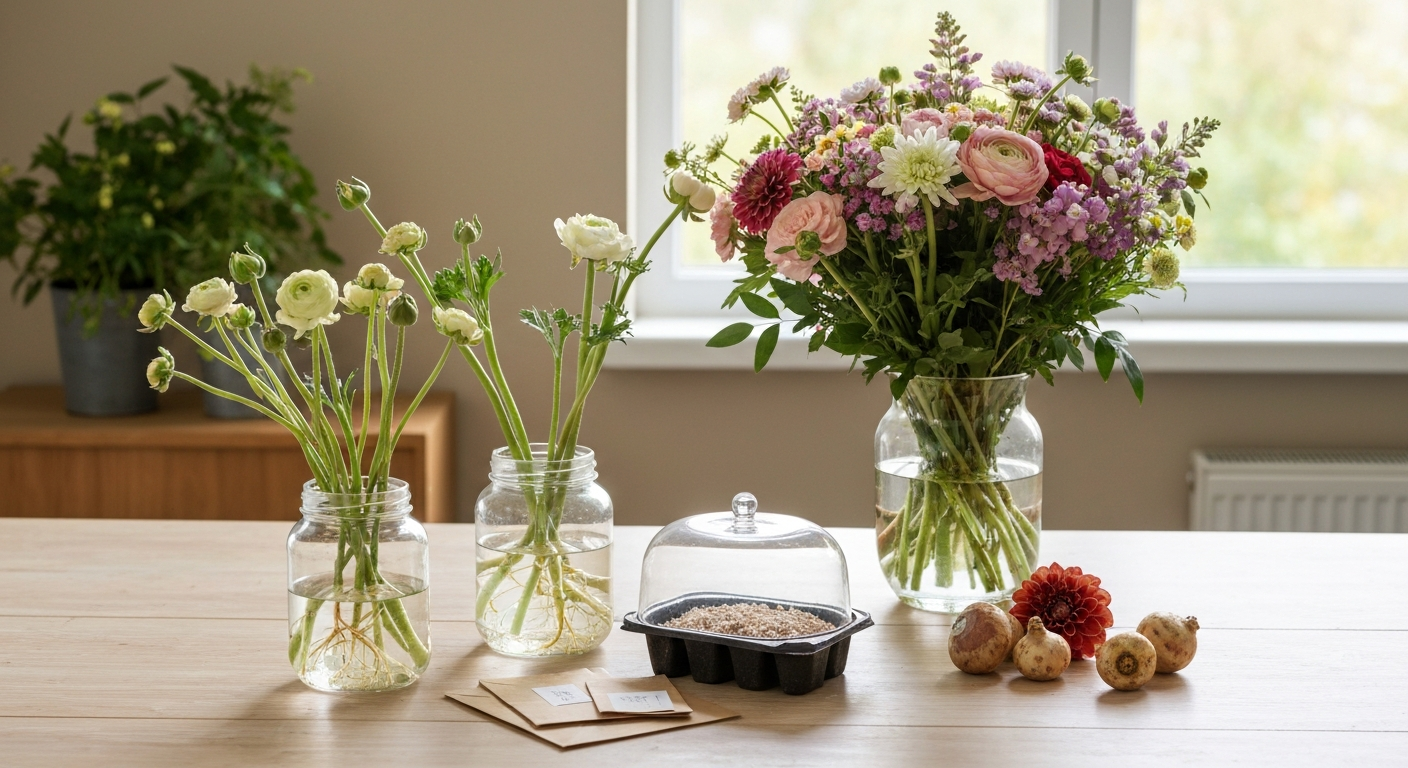
Can you really grow plants from a bouquet? What to expect
I'll be honest with you: not every stem from a grocery store bouquet is going to become a thriving garden plant. Commercially cut flowers are often treated with preservatives, sometimes irradiated to meet import regulations, and cut so far from the root zone that rooting is genuinely difficult. But plenty of bouquet flowers do respond beautifully to home propagation, and I've had real success rooting roses, carnations, and snapdragon stems on my windowsill. The key is having realistic expectations and knowing which flowers are worth your effort.
What you can realistically achieve depends on four things: the species, how fresh the stems are, what propagation method you use, and the conditions you can provide. Soft-stemmed annuals like zinnias and cosmos are almost always better started fresh from seed rather than rooted from cuttings, while woody-stemmed flowers like roses are classic candidates for stem cutting propagation. Ranunculus and dahlias come from underground structures, so when you see them in a bouquet, you're looking at the above-ground part of a plant grown from a corm or tuber that you'd purchase separately.
Even when cuttings fail to root, that's genuinely useful information. It tells you something about that species, that season, or those conditions, and you adjust next time. I've reframed plenty of failed rose cuttings as experiments rather than mistakes, and my success rate has climbed steadily as a result.
Which bouquet flowers are worth trying to regrow (your quick decision guide)
Before you strip every stem in your vase and shove them in soil, use this cheat sheet. It covers the most common bouquet flowers and tells you the best propagation route, whether it's realistic for a home gardener, and what timeline to expect.
| Flower | Best Propagation Method | Realistic for Home Growers? | Approximate Timeline to Bloom | Notes |
|---|---|---|---|---|
| Rose | Stem cutting (semi-hardwood) | Yes, with patience | Several months to establish, then seasonal | Use IBA rooting hormone; store-bought stems sometimes work but success varies |
| Carnation / Dianthus | Softwood stem cutting or layering | Yes | 4–8 weeks to root; blooms next season or same season | Take cuttings from non-flowering shoots |
| Ranunculus | Plant dormant corms | Yes (buy corms separately) | 90–120 days from planting to bloom | Cut stems won't root; source corms from a supplier |
| Dahlia | Divide tubers in spring | Yes | 90–100 days after planting tubers | Dig, divide, and replant; each division needs at least one eye |
| Gladiolus | Plant corms | Yes (buy corms) | 70–100 days from planting | Succession plant every 10–14 days for ongoing blooms |
| Anemone | Plant corms | Yes (buy corms) | 90–110 days from planting | Pointy side up, 2–4 inches deep |
| Zinnia | Seed saving and direct sow | Very easy | 45–75 days from seed | Rooting cuttings is possible but seed is far easier |
| Cosmos | Seed saving and direct sow | Very easy | 70–90 days from seed | Prolific self-seeder; save seeds from open pollinated varieties |
| Marigold | Seed saving and direct sow | Very easy | 60–90 days from seed | Deadhead regularly; save seeds when heads are dry and brown |
| Snapdragon | Seed or softwood cutting | Yes (both methods) | 6–8 weeks from seed to transplant size | Cuttings work for cloning a specific variety |
| Poppy | Seed saving | Very easy | Variable; hardy annuals sown in fall or early spring | Harvest pods when brown and rattling; hybrids may not breed true |
| Gypsophila (Baby's Breath) | Seed or softwood cutting | Moderate | Seed: several months; cuttings root in 2–6 weeks | Perennial types prefer alkaline, well-drained soil |
| Lisianthus | Seed (specialist) or tissue culture | Seed only at home | Slow from seed; 6+ months to bloom | Stem cutting propagation is very difficult without lab conditions |
| Linaria | Seed saving and direct sow | Easy | 45–70 days from sowing | Fairy bouquet types self-seed freely; save from dry seedheads |
One thing I want to flag upfront: if a flower in your bouquet came with a plant breeder's rights (PBR) or plant patent label, vegetative propagation for distribution is legally restricted in many countries. For personal garden use this is rarely an issue, but it's worth being aware of.
Propagation methods explained: which one to use and when
There are six main ways to propagate bouquet plants at home. Some are fast and beginner-friendly. Others take more setup or a longer wait. Here's a plain-language overview of each.
Water rooting
You place a trimmed cutting in a jar of clean water and wait for roots to form before potting it up. This works well for some soft-stemmed flowers and is genuinely satisfying to watch. The downside is that water roots are fragile and need careful handling when you transition the plant to soil. Change the water every 2–3 days to prevent bacterial buildup.
Stem cuttings in rooting medium
This is the most reliable vegetative method for most bouquet flowers. You take a 4–6 inch cutting, prepare the base, apply rooting hormone, and insert it into a sterile, well-draining medium like perlite or a 50:50 perlite and peat mix. A humidity dome keeps moisture in while roots form. Depending on species and season, roots appear in 2–8 weeks.
Seed saving and sowing
For annuals like zinnias, cosmos, poppies, marigolds, linaria, and snapdragons, saving seed from a mature bouquet (or from spent garden plants) is usually the fastest and most rewarding route. You collect dry seedheads, clean and store the seeds, then sow the following season. This is the method that fits most naturally with a seed-to-bloom growing philosophy.
Planting bulbs, corms, and tubers
Ranunculus, anemones, gladiolus, and dahlias all grow from underground storage structures. You can't root the cut stem, but you can source the corm or tuber and plant it directly. This is not technically propagating from the bouquet itself, but it's the right answer when you fall in love with a ranunculus or dahlia in a vase and want to grow more.
Division
Division works for clump-forming perennials. You dig up an established plant in spring or fall, separate it into sections (each with roots and shoots), and replant. Dahlias are divided this way every spring before replanting. Gypsophila can also be divided, though perennial types can be fussy about root disturbance. Gypsophila (baby’s breath) is commonly grown from seed or by softwood stem cuttings; perennial Gypsophila paniculata prefers alkaline, well‑drained soils and can be propagated by seed, cuttings or division, though divisions are sometimes not recommended for certain perennial types, see Gypsophila (Baby's breath) | RHS plant profile.
Layering
Layering involves bending a flexible stem to the ground, wounding it slightly, pinning it in contact with moist soil, and waiting for roots to form while the stem is still attached to the parent plant. Carnations respond well to this method. Once rooted (usually 4–8 weeks), you sever the new plant and grow it on independently.
Supplies you'll need before you start
Having the right tools on hand before you take a single cutting makes the whole process smoother. Nothing derails a propagation session like realizing mid-way that you don't have rooting hormone or that your only pot has no drainage holes. Here's what I keep within reach.
| Item | What to Use | Why It Matters |
|---|---|---|
| Clean, sharp pruners or a craft knife | Bypass pruners or a razor blade | Clean cuts reduce disease entry points and help the cutting take up water |
| Rooting hormone | IBA gel or powder (e.g., Clonex gel or a branded IBA powder) | Indole-3-butyric acid (IBA) stimulates root initiation in most flower species |
| Rooting medium | Perlite, or a 50:50 mix of perlite and peat/coir | Sterile, airy, free-draining medium reduces rot and encourages root growth |
| Humidity dome or clear plastic bag | Any propagation tray dome or a zip-lock bag over a pot | Maintains the high humidity that cuttings need before roots form |
| Small pots or propagation cells (3–4 inch) | Plastic nursery pots or seed trays with individual cells | Right-sized containers prevent overwatering of small cuttings |
| Seed trays (for seeds or corms) | Standard 10x20 flat or individual cell trays | Needed for starting seeds or pre-sprouting corms like ranunculus |
| Seed-starting or fine potting mix | Purpose-made seed-starting compost | Good for sowing small seeds; well-draining and low-nutrient |
| Labels and a waterproof marker | Plastic plant labels and a Sharpie or UV-resistant marker | You will forget what you planted where; label everything |
| Isopropyl alcohol or a dilute bleach solution | 70% isopropyl alcohol spray | Use to sterilize tools between cuttings and prevent disease spread |
| A warm, bright location or heat mat | A bright windowsill (no direct harsh sun) or a seedling heat mat at 65–75°F | Bottom warmth speeds rooting; bright indirect light prevents etiolation |
How to root stem cuttings step by step
This is the method I use most often, and it's the right first move for roses, carnations, snapdragons, and gypsophila. For specific guidance on growing Blushing Bride (a popular gypsophila), see how to grow blushing bride. There are three cutting types to know: softwood (new, flexible spring growth), semi-ripe or semi-hardwood (firmer stem from mid to late summer), and hardwood (dormant wood from late fall through winter). For most bouquet flowers, softwood and semi-ripe cuttings give the best results.
Water rooting method
- Trim the cutting to 4–6 inches, cutting just below a leaf node at a 45-degree angle with a clean, sharp blade.
- Strip all leaves from the bottom half of the stem, leaving 2–3 leaves at the top.
- Place the cutting in a clean glass or jar with about 2 inches of room-temperature water. Make sure no leaves are submerged.
- Position the jar in bright, indirect light. Direct sun will overheat the water and promote algae.
- Change the water every 2–3 days to keep it clean.
- Check for root formation after 2–3 weeks. Roots 1–2 inches long are ready for potting.
- Transition carefully to a small pot of well-draining potting mix. Keep it moist but not soggy for the first 2 weeks while the plant adjusts to soil.
Soil rooting method (recommended for roses, carnations, and semi-ripe cuttings)
- Prepare your rooting medium: fill small pots or cells with moist perlite, or a 50:50 mix of perlite and peat or coir. Water it lightly so it's damp but not saturated.
- Take your cutting: 4–6 inches long, cut just below a leaf node at a slight angle. Use sterilized pruners.
- Remove all leaves from the lower half. For roses, leave 1–2 sets of leaves at the top. For carnations, keep a few leaves near the tip.
- Optional but recommended: lightly wound the bottom inch of the stem by scraping two opposite sides with your knife. This exposes more cambium tissue to the rooting hormone.
- Dip the base of the cutting in IBA rooting gel or powder. Tap off any excess powder to avoid over-application.
- Use a pencil or dibber to make a hole in the medium before inserting the cutting. Pushing the cutting directly in can wipe off the hormone.
- Insert the cutting so at least one node is buried. Firm the medium gently around it.
- Cover with a humidity dome or clear plastic bag. Keep cuttings at 65–75°F in bright indirect light. Bottom heat helps.
- Do not water heavily at this stage. Mist the inside of the dome if it dries out. Condensation on the dome is a good sign.
- Start checking for roots after 3 weeks by gently tugging. If there's resistance, roots have formed. Full root development for roses and carnations typically takes 4–8 weeks.
- Once rooted, harden off by gradually increasing ventilation over a week before moving to normal growing conditions.
One thing I've learned the hard way: don't skip the rooting hormone step when working with roses. The difference in success rate between using IBA and not using it is significant enough that it's simply not worth skipping. A small tube of IBA gel costs very little and it genuinely changes outcomes.
Softwood vs semi-ripe vs hardwood cuttings: what's the difference?
| Cutting Type | When to Take | Stem Feel | Best For | Rooting Time |
|---|---|---|---|---|
| Softwood | Spring to early summer | Soft, flexible, snaps easily | Carnations, snapdragons, gypsophila | 2–4 weeks |
| Semi-ripe (semi-hardwood) | Mid to late summer | Firm at base, soft at tip | Roses, carnations (summer round) | 4–8 weeks |
| Hardwood | Late fall through winter (dormant) | Fully firm and woody | Roses (over-winter method) | 8–16 weeks or longer |
How to harvest, dry, and sow seeds from bouquet seedheads
Seed saving is where things get genuinely exciting for a home grower, and it's especially rewarding with annuals. Poppies, zinnias, cosmos, marigolds, linaria, and snapdragons all produce seeds that you can harvest, dry, store, and sow. The catch: seeds from F1 hybrid varieties won't breed true to the parent plant. Stick to open-pollinated (OP) or heirloom varieties for reliable seed saving.
Step-by-step: harvesting and sowing seeds
- Wait until the seedhead is fully ripe. For poppies, the pod should be papery, brown, and rattle when shaken. For zinnias and marigolds, the flower head should be completely dry and slightly brown at the base. For snapdragons, the small pods behind each floret should be dry and starting to open.
- Harvest on a dry day. Cut the seedhead with 4–6 inches of stem attached and place immediately into a paper bag (not plastic, which traps moisture and encourages mold).
- Label the bag with the species and date. Dry the seedheads indoors in a warm, well-ventilated spot for 1–2 weeks.
- Once fully dry, shake or rub the seedheads over a tray or bowl to release the seeds. Remove debris by gently blowing across the tray or using a fine sieve.
- Store cleaned seeds in labeled paper envelopes inside a cool, dry, dark location. A sealed container in the refrigerator works well for long-term storage.
- For poppies and other hardy annuals: sow directly outdoors in fall for spring germination, or in early spring into a prepared bed. Scatter thinly, press lightly into the soil, and don't cover deeply — poppy seeds need light to germinate.
- For zinnias, cosmos, and marigolds: sow outdoors after the last frost date in your area, or start indoors 4–6 weeks before last frost. Direct sowing is often best for zinnias, which don't love transplanting.
- For linaria: direct sow in fall or very early spring. These are small seeds that need good contact with the soil surface.
Seed-to-bloom timing for common bouquet annuals
| Flower | Sowing Method | Days to Bloom from Seed | Sowing Timing (Temperate Zones) |
|---|---|---|---|
| Zinnia | Direct sow after last frost | 45–75 days | After last frost (typically May in zones 5–7) |
| Cosmos | Direct sow or start indoors 3–4 weeks before last frost | 70–90 days | April–May (zones 5–7) |
| Marigold | Start indoors 6–8 weeks before last frost or direct sow | 60–90 days | March–May depending on variety |
| Snapdragon | Start indoors 6–8 weeks before last frost | ~90 days from seed to bloom | January–February for spring transplanting |
| Poppy (annual) | Direct sow fall or early spring | Variable; ~60–90 days from spring sowing | Fall or as early as soil can be worked |
| Linaria (Fairy Bouquet) | Direct sow fall or early spring | 45–70 days from sowing | Fall or late winter into early spring |
How to plant and grow corms, tubers, and bulbs from bouquet flowers
When you see a glorious ranunculus or dahlia in a florist arrangement and want to grow your own, the answer isn't to root the cut stem. These plants grow from underground storage structures, and you need to source those separately. But once you have the corms or tubers in hand, growing them is very achievable, and the results are spectacular.
Ranunculus corms
Ranunculus asiaticus grows from small, claw-shaped corms that look a bit like dried octopuses. I always get a laugh out of them before they're planted, but what they produce is extraordinary. Pre-soaking the corms for 2–4 hours before planting gives them a head start. For the best results, pre-sprout them in a flat of barely moist coir or peat at around 50–55°F for about 2 weeks before transplanting. This pre-sprouting step means they flower earlier and more reliably.
- Soak dry ranunculus corms in room-temperature water for 2–4 hours until they plump up slightly.
- Pre-sprout in a flat of moist (not wet) coir or peat at 50–55°F for 2 weeks, checking regularly for small sprout nubs.
- Plant pre-sprouted corms 1–2 inches deep with claws pointing down, 4–9 inches apart, in well-draining soil with full sun.
- In mild-winter zones (zones 8–10): plant in fall for spring blooms.
- In temperate zones (zones 5–7): plant in early spring after soil reaches around 50°F.
- Expect your first blooms approximately 90–120 days after planting; pre-sprouted corms bloom on the earlier end of that range.
- After blooms fade and foliage yellows, allow the plants to dry down. In frost-prone areas, dig and store corms in a cool, dry location until next season.
Dahlias
Dahlias grow from tubers, not true bulbs, and they're one of the most rewarding cutting-garden plants you can grow. Plant tubers after your last frost date when the soil has warmed to at least 55–60°F. Plant them 4–6 inches deep with the eyes facing up. Dahlias typically bloom 90–100 days after planting, so timing your planting accordingly is important. In colder climates (zones 4–6), dig tubers before the first hard frost, let them dry for a few days, and store in a cool, frost-free location in slightly moist peat or vermiculite over winter.
Anemones and gladiolus
Anemone coronaria (the poppy anemone often found in spring bouquets) grows from small corms. Plant them pointy side up, 2–4 inches deep, in fall for spring blooms or early spring for summer blooms. They typically take 90–110 days to flower. Gladiolus, another cut-flower classic, grows from corms planted 2–6 inches deep depending on corm size. Most varieties bloom 70–100 days after planting. To extend your cutting season rather than having everything bloom at once, succession-plant gladiolus corms every 10–14 days through late spring.
Layering, division, and other alternatives (for when cuttings aren't the right move)
Sometimes the most practical propagation method isn't the most obvious one. Layering and division are both underused by beginners, and they're genuinely easier in some situations than taking cuttings. Here's when and how to use each.
Layering carnations and dianthus
Carnations are one of the best candidates for layering because their stems are flexible enough to be bent to soil level without snapping. This method is useful in late spring or early summer when you have an established plant in the garden.
- Choose a long, flexible, non-flowering stem from the base of the plant.
- Bend it gently to the ground and identify a node that will sit at soil level.
- At that node, make a shallow wound on the underside of the stem (a small nick or scrape, about half an inch long), or remove the leaf at that node entirely.
- Pin the wounded section into a small depression in the soil using a bent wire or a U-shaped pin. The tip of the stem should curve upward.
- Cover the pinned section with 1–2 inches of moist soil mixed with a little compost.
- Water the area and keep it consistently moist. Don't allow it to dry out.
- After 4–8 weeks, tug the stem gently. If there's resistance, roots have formed.
- Sever the stem between the parent plant and the new rooted section, wait a few days, then lift the new plant and pot it up or transplant it.
Dividing dahlias and clump-forming perennials
Division is a spring job, done just as the growing season begins and shoots are starting to emerge from the crown. For dahlias, this is the primary way to multiply your stock.
- In spring, bring stored tuber clumps out of winter storage and lay them in a warm location for a day or two to encourage eye development, making it easier to see where to cut.
- Using a clean, sharp knife, divide the clump so that each section has at least one visible eye (bud) and a piece of the crown (the central neck area connecting the tubers).
- Dust cut surfaces with sulphur powder or allow to dry for 30 minutes before planting to reduce disease risk.
- Plant divided tubers after last frost, 4–6 inches deep, eyes up.
- For gypsophila and other clump-forming perennials, divide in early spring or early fall. Dig the whole clump, separate it into sections using two garden forks back-to-back, and replant immediately in prepared soil. Water well and keep moist until established.
A note on lisianthus
Lisianthus deserves a special mention because it's a common and gorgeous bouquet flower that tempts many home growers to try rooting the cut stems. I want to save you the frustration: it almost never works at home. Commercial propagation of lisianthus relies on seed or laboratory-grade tissue culture with precise hormone treatments. While published research confirms that IBA treatments can improve rooting rates, the conditions required are well beyond a home windowsill setup. If you want to grow lisianthus, start from specialist seed, and be prepared for it to be slow. It's a long-season crop, typically taking six months or more from seed to bloom.
Troubleshooting: root rot, failed cuttings, and pests
Things will go wrong sometimes. Here are the most common problems and what to do about each one.
- Stem rot at the base of cuttings: usually caused by the rooting medium being too wet or not sterile enough. Always use fresh perlite or a sterile mix, never garden soil. Ensure pots have drainage holes. If you see black, mushy tissue at the base, the cutting is lost — don't try to rescue it, discard and start fresh.
- No roots after 8+ weeks: check that your humidity dome hasn't dried out, that temperatures are in the 65–75°F range, and that you're not in direct harsh sunlight which can cook cuttings. Also consider that some species (especially roses from store-bought stems treated with preservatives) simply have a lower success rate. Try again with fresher material or a different variety.
- Cuttings wilting under the dome: a small amount of wilting is normal as the cutting has no roots to take up water. If wilting is severe, mist the inside of the dome lightly and ensure no direct sun is hitting it.
- Corms or tubers rotting in the ground: almost always a drainage issue. Add grit or perlite to heavy clay soils before planting. Ranunculus especially hate sitting in cold, waterlogged soil — plant them in raised beds or containers if drainage is poor.
- Seeds not germinating: check whether the seed needs light or darkness to germinate (poppies and snapdragons need light, so don't cover them too deeply). Also check the seed is not too old — most annual flower seeds maintain good viability for 1–3 years when stored correctly.
- Aphids on new cuttings or seedlings: a common pest on soft new growth. Knock them off with a stream of water or apply insecticidal soap. Avoid systemic pesticides on plants you intend to grow for cutting.
- Fungal issues (grey mould/botrytis) under humidity dome: improve air circulation by propping the dome open slightly once per day. Remove any dead or yellowing leaves immediately, as they're the primary entry point for botrytis.
Planning bouquet flowers for a wedding or special event
If you're growing flowers for a wedding or big event, propagating from a bouquet or growing from seed is a wonderful way to create something truly personal. For a step-by-step walkthrough on how to grow bridal bouquet plant varieties and timing for blooms, see our guide on how to grow bridal bouquet plant. But it requires real planning. The most common mistake I see is underestimating how many plants you need and how much lead time is required. For a detailed timeline, variety recommendations, and a plant-by-plant plan, see how to grow your own wedding flowers.
For a wedding, work backward from your event date. If you're relying on ranunculus, count back 90–120 days from when you need blooms. If you're growing dahlias, count back 90–100 days from first frost or your cutting season. Snapdragons from seed need 6–8 weeks just to reach transplant size, so factor that in before your target bloom date. Grow at least 30–40 percent more plants than you think you'll need to account for weather, late bloomers, and natural attrition.
Succession sowing is your best friend for cutting garden events. Instead of sowing everything at once, sow batches of zinnias, cosmos, and snapdragons 2–3 weeks apart so blooms arrive in waves rather than all at once. The same principle applies to gladiolus corms: plant a handful every 10–14 days from early spring through early summer for a steady supply of spikes through late summer and fall.
Matching the method to the flower: a final comparison
To pull everything together, here's a straightforward summary of which propagation method suits each type of bouquet flower, so you can make a quick decision whenever you're staring at a vase of something you'd love to grow.
| Propagation Method | Best Bouquet Flowers | Skill Level | Key Success Factor |
|---|---|---|---|
| Stem cutting (water or soil) | Rose, carnation, snapdragon, gypsophila | Beginner to intermediate | Fresh stems, IBA hormone, sterile medium, humidity |
| Seed saving and sowing | Zinnia, cosmos, marigold, poppy, linaria, snapdragon | Beginner | Fully dry seedheads, correct sowing timing, open-pollinated varieties |
| Plant corms | Ranunculus, anemone, gladiolus | Beginner | Pre-soak, correct planting depth, good drainage |
| Plant tubers | Dahlia | Beginner | Soil temperature above 55°F, at least one eye per division |
| Division | Dahlia (tuber clumps), gypsophila, carnation clumps | Beginner to intermediate | Each section must have both roots and growing points |
| Layering | Carnation, dianthus, some roses | Intermediate | Keep the soil node consistently moist until roots form |
| Seed starting (specialist) | Lisianthus | Advanced | Specialist seed, long season, careful temperature management |
Growing plants from a bouquet is one of those projects that sits right at the intersection of thrifty, creative, and deeply satisfying. Not every attempt will succeed, and that's genuinely okay. What you'll find is that each season you get a little better at reading which stems have potential, timing your propagation to the right growth stage, and setting up the conditions that give cuttings and seeds the best chance. Start with the easiest flowers on the list, build confidence, and work your way toward the trickier ones. Before long you'll have a cutting garden full of plants that started as a bouquet on your kitchen table.
FAQ
Can I grow plants from a bouquet I bought or received?
Yes. Many bouquet components can be regrown, but method and success depend on the species. Cut stems of woody or herbaceous plants can sometimes be rooted from stem cuttings; many annuals are easiest to regrow by saving and sowing their seedheads; and flowers that originate from bulbs, corms or tubers (ranunculus, anemones, dahlias, gladiolus) must be started from their resting structures rather than from cut stems. Expect variable success: some flowers root reliably at home (roses, carnations, gypsophila), others are best started from seed or replaced by buying bulbs/corms.
Which common bouquet flowers are worth trying to regrow, and which should I start from seed or buy as bulbs/corms? (Quick decision guide)
Good candidates for stem cuttings: roses, carnations (Dianthus), gypsophila (some types), many woody/herbaceous bridal greenery. Good candidates for seed saving and sowing: marigolds, zinnias, cosmos, snapdragons, linaria, poppies (if not hybrid), many cutting‑garden annuals. Bulb/corm/tuber species to plant from their storage organs: ranunculus (corms), anemone (corms), dahlias (tubers), gladiolus (corms). Hard or tricky to clone from store stems: lisianthus (difficult without tissue culture), many florist hybrids that are highly treated — these are often easier from seed or purchased nursery stock.
How do I decide whether to try rooting a stem cutting, save seed, or plant a bulb/corm from a bouquet flower?
Ask these questions: 1) Is the flower an annual or perennial/bulbous? Annuals are usually easiest from seed. 2) Does the bouquet contain a viable seedhead or spent flowers that are drying? If yes, seed saving is usually simple. 3) Is the original plant known to grow from bulbs/corms/tubers (ranunculus, anemone, dahlia, gladiolus)? If so, source the bulbs/corms/tubers — cut stems won’t regrow them. 4) Is the stem woody or green and healthy, with nodes? Woody or semi-woody stems (roses, carnations) are often rootable as cuttings. 5) Are stems treated with vase chemicals or preservatives? These can reduce rooting success — fresh garden-cut material usually roots better.
Step‑by‑step: rooting a stem cutting at home (general method)
Supplies: sharp sterile snips, rooting hormone (IBA powder/gel), clean propagation medium (perlite, vermiculite, or 50:50 peat:perlite), pots/plug trays, clear plastic bag/dome, spray bottle, bright indirect light, thermometer/heat mat (optional). Steps: 1) Choose healthy, non‑flowering shoots about 4–6 inches long with 2–3 nodes. 2) Make a clean basal cut below a node and strip lower leaves, leaving 1–2 top leaves. 3) Optionally wound the base (light nick) to stimulate rooting. 4) Quick‑dip the basal end in rooting hormone, tap off excess. 5) Insert into moist propagation medium to cover at least one node. 6) Place under bright, indirect light; maintain high humidity with a dome or bag and keep temperature around 65–75°F; provide bottom heat (70–75°F) if available. 7) Mist as needed to prevent wilt but avoid waterlogging. 8) Check for roots in 2–8 weeks; once rooted, harden off and pot on into potting mix.
How to harvest and save seeds from bouquet flowers
Supplies: scissors, paper envelopes or paper bags, labels, tray or drying rack. Steps: 1) Identify spent flower heads that are drying and browning but haven’t been exposed to heavy moisture. 2) Cut seedheads when they are dry on a warm day. 3) Place seedheads in a paper bag or on a tray to finish drying for several days. 4) Gently break open pods or rub heads to release seeds; remove chaff by winnowing with a tray or gentle breeze. 5) Label and store seeds in a cool, dry place in paper envelopes or airtight containers with silica if humid. Note: hybrid seeds may not breed true; papery/small seeds (poppy, cosmos, zinnia) are easy to save. Avoid saving seed from plants grown under heavy vase treatments or that were field‑treated if variety identity is unknown.
How to handle bouquets that include bulbs, corms or tubers (e.g., ranunculus, anemone, dahlia)?
Cut flowers do not carry the corm/tuber in a standard bouquet. To grow these species you must buy dormant corms/tubers or source them from the grower. For ranunculus: presprout corms by soaking/paper‑soaking or place flat in shallow trays at 50–55°F for up to 2 weeks before planting 'claws' down about 1–2 inches deep, 4–9 inches apart; expect blooms roughly 90–120 days from planting. Anemones: plant corms 2–4 inches deep with pointed side up in autumn for spring bloom. Dahlias: plant tubers after last frost with eye/up 4–6 inches deep; expect blooms ~90–100 days. Gladiolus: plant corms at depths matched to corm size; bloom 70–100 days. If you received bulbs/corms in a bouquet (rare), treat and plant as above.
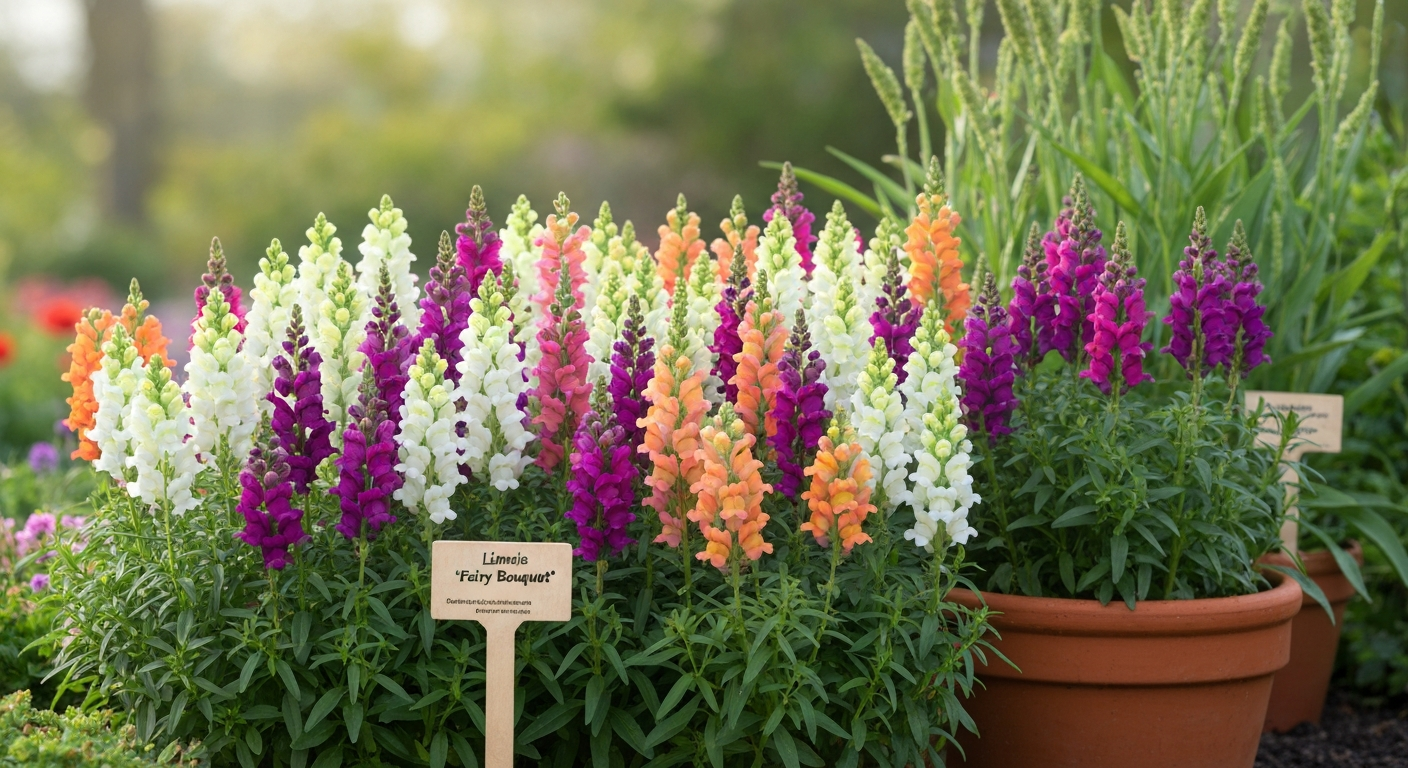
Grow Linaria 'Fairy Bouquet' from seed to vase: step‑by‑step sowing, care, cutting, seed saving & troubleshooting.
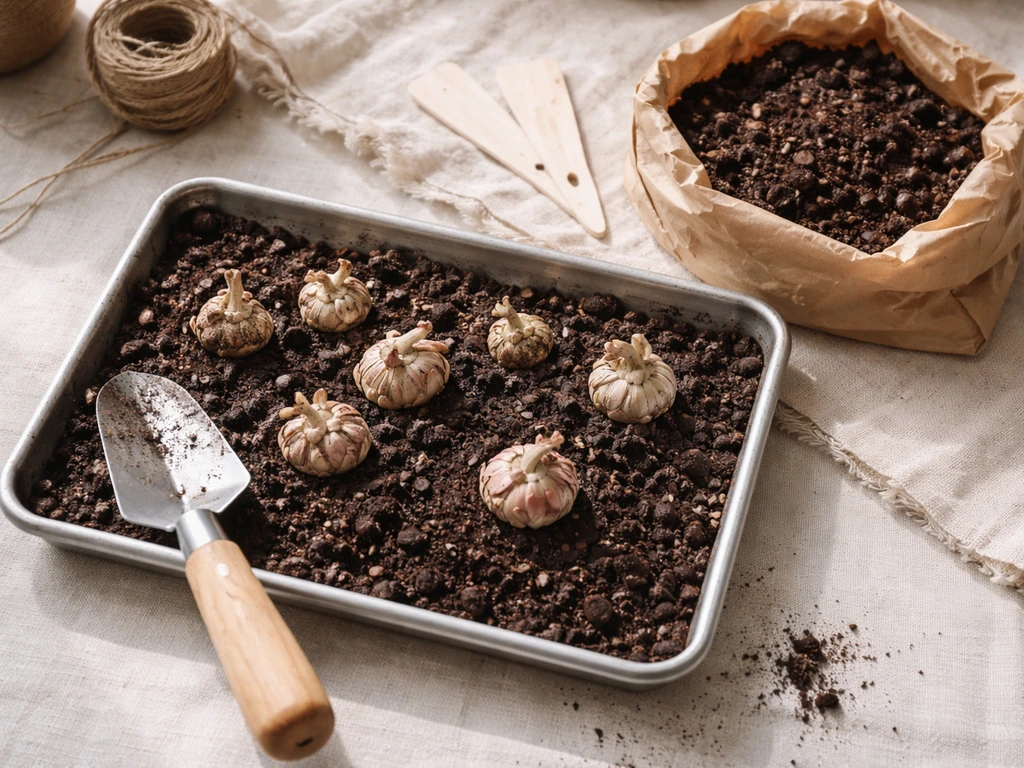
Step-by-step Floret-style ranunculus guide: corm prep, planting, watering, frost care, troubleshooting, and harvest for
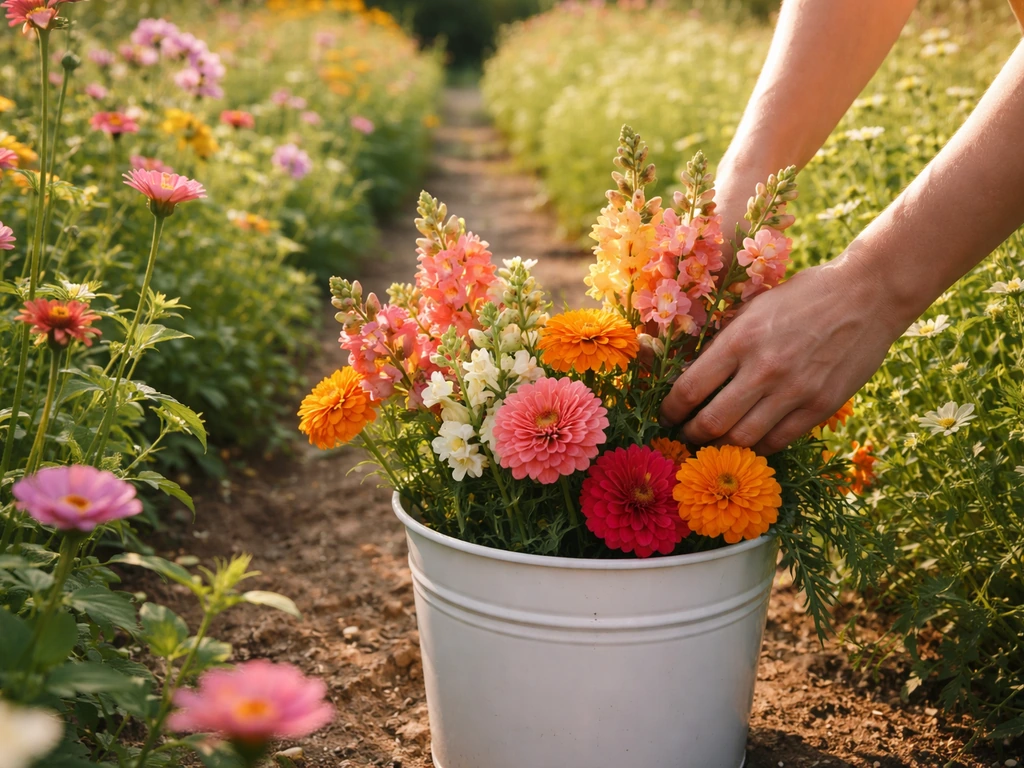
Step-by-step guide to grow bouquet-ready wedding flowers, from planning and sowing dates to harvesting, conditioning, an