Growing beautiful flowers from seed is genuinely one of the most satisfying things you can do in a garden, and it is far more achievable than most beginners expect. For a step-by-step walkthrough on how to grow the best flowers, see the guide how to grow the best flowers. Pick your species wisely, match your sowing method to the plant (direct-sow for poppies, indoor start for snapdragons), get your soil right, and time everything against your local last-frost date rather than a calendar date. Do those four things and you will have marigolds, poppies, wildflowers, snapdragons, and cutting-garden staples blooming reliably from summer into fall, even in your first season.
Beautiful Flowers and How to Grow Them: A Practical Guide
James Holloway
20 Jul 2026
Start by deciding what your garden is actually for
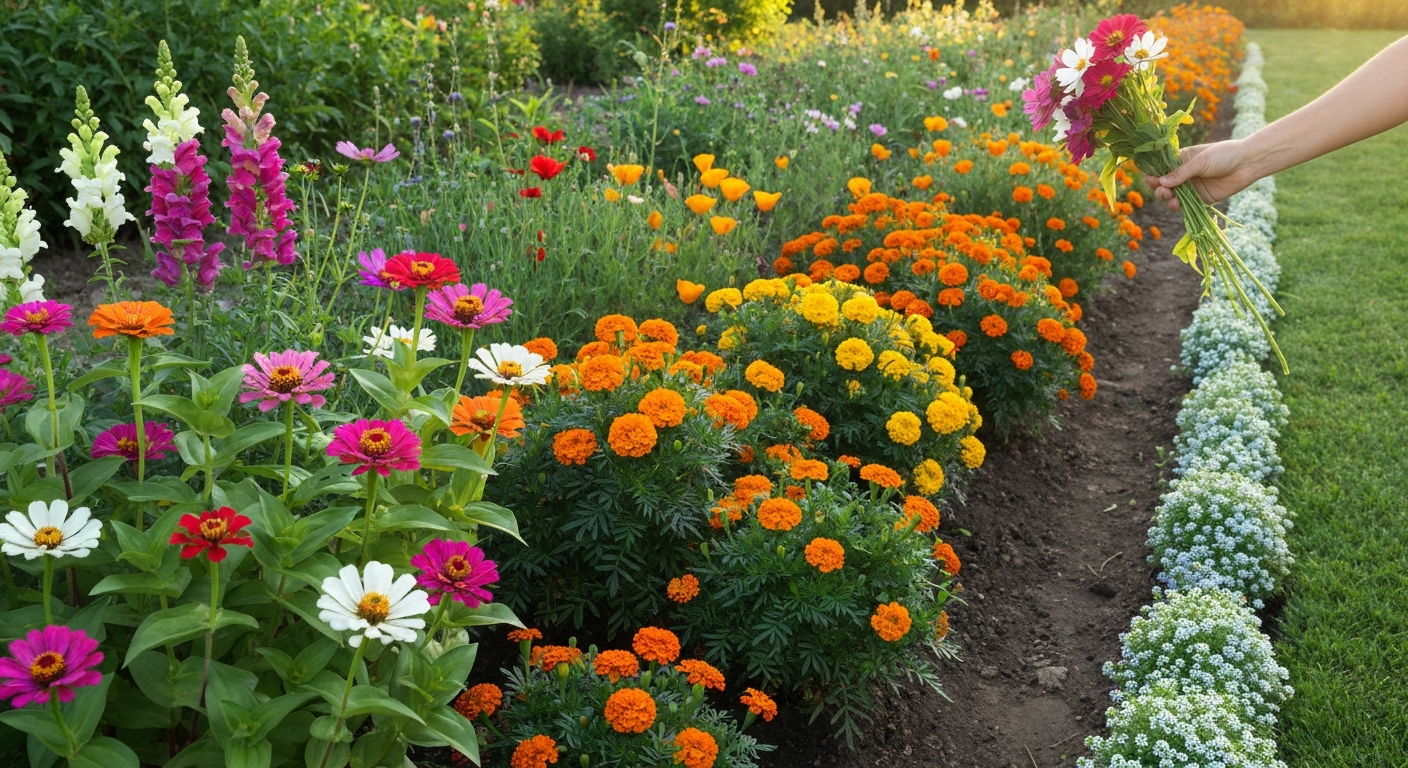
Before you buy a single seed packet, settle on what you want the garden to do. That decision shapes every choice that follows. There are three main goals most ornamental gardeners are working toward, and they call for slightly different plant lists and layouts.
- Cut flower garden: you want stems to bring indoors. Prioritize zinnias, lisianthus, snapdragons, cosmos, and sunflowers. Space generously (12–18 inches between plants) so stems elongate and air circulates, and plan for staggered succession sowings every 2–3 weeks to keep vases full from June through October.
- Border and display beds: the goal is season-long color visible from a path or patio. Marigolds, poppies, wildflower mixes, and sweet alyssum work well here because they produce masses of flowers over a long window. Mix heights so taller plants (African marigolds at 24–36 inches) anchor the back, mid-height fillers go center, and low edging plants front the border.
- Pollinator and bee-friendly patch: if attracting bees, butterflies, and beneficial insects is the priority, lean into single-flowered (not double) varieties of cosmos, California poppy, phacelia, and wildflower mixes. Double-flowered cultivars often have reduced nectar access, so for a true pollinator patch, simple open-faced blooms do far more work.
Most gardens end up being a hybrid of all three, and that is completely fine. I grow a cutting row, a pollinator corner, and a front border simultaneously, and they share seeds, soil prep, and a single watering schedule. The key is deciding upfront so you do not end up with a cutting garden that has no room for stems to stretch, or a pollinator patch stuffed with showy doubles that the bees ignore.
At-a-glance care chart for the most popular ornamental flowers
The table below gives you the core data for the five flower groups covered in this guide. These are the numbers I reach for first when planning a new season.
| Flower | Sow Method | Germination Temp | Days to Germinate | Days to Bloom (from seed) | Sowing Depth | Spacing | Full Sun Required | Notes |
|---|---|---|---|---|---|---|---|---|
| French/African Marigold | Indoor start or direct sow | 68–75°F (20–24°C) | 3–7 days | 50–70 days | ¼ inch | 8–12 in (French); 12–18 in (African) | Yes (6+ hrs) | Very fast germinator; great first flower for beginners |
| California Poppy (Eschscholzia) | Direct sow only | 55–65°F (13–18°C) | 7–21 days | 60–90 days | Surface (press in, do not cover) | 6–9 inches | Yes (6+ hrs) | Needs light to germinate; taproot means no transplanting |
| Wildflower Mix | Direct sow | 55–70°F (13–21°C) | 7–21 days (mix-dependent) | 60–100 days (varies by species) | Surface broadcast | Broadcast, thin to 4–6 in | Yes–partial | Sow in fall or early spring for best germination |
| Snapdragon (Antirrhinum) | Indoor start (8–10 weeks before last frost) | 65–72°F (18–22°C) | 10–14 days | 70–120 days from seed | Surface sow (tiny seed) | 9–12 inches | Full sun to part shade | Slow starter; prefers cool weather for best bloom |
| Zinnia (cutting staple) | Direct sow after last frost | 70–75°F (21–24°C) | 5–10 days | 50–70 days | ¼ inch | 6–12 inches | Yes (6–8 hrs) | Do not start early indoors; hates root disturbance |
| Cosmos (cutting staple) | Direct sow after last frost | 70–75°F (21–24°C) | 5–10 days | 50–70 days | ¼ inch | 12–18 inches | Yes (6+ hrs) | Thrives on neglect; too-rich soil = all foliage, few flowers |
| Lisianthus (cutting staple) | Indoor start (12–14 weeks before transplant) | 75–80°F (24–27°C) | 14–21 days | 150–180 days from seed | Surface sow | 9–12 inches | Yes (6+ hrs) | Notoriously slow; consider buying transplants in year one |
| Sweet Alyssum (border/edge) | Direct sow or indoor start (4–6 weeks) | 60–70°F (15–21°C) | 5–10 days | 40–60 days | Surface or 1/8 inch | 6–8 inches | Full sun to part shade | Excellent bee and beneficial-insect flower |
Your planting calendar: working backward from last frost
The single most useful number in all of flower gardening is your average last spring frost date. Everything else flows from it. The NOAA/Climate.gov interactive freeze map gives you the average date of the last spring freeze for your exact location, and the USDA Plant Hardiness Zone Map tells you which perennials will survive your winters. Use both, but for annual seed timing, the last-frost date is the one you need on a sticky note above your seed shelf.
Once you have that date, here is how to build your personal planting calendar. Count backward for indoor starts and forward for direct-sow timing after frost. The table below uses 'LF' as shorthand for your last frost date.
| Flower | Method | When to Start/Sow | Transplant or Thin Date | Expected First Bloom |
|---|---|---|---|---|
| Snapdragon | Indoor start | 8–10 weeks before LF | At or just before LF (tolerates light frost) | 8–10 weeks after transplant |
| Lisianthus | Indoor start | 12–14 weeks before LF | 1–2 weeks after LF | 14–18 weeks after transplant |
| Marigold (African) | Indoor start | 4–6 weeks before LF | 1–2 weeks after LF (after hardening off) | 6–8 weeks after transplant |
| Marigold (French) | Direct sow OR indoor start | Sow direct 1 week after LF; or start indoors 4 weeks before LF | Direct thin to 8 in; transplant at LF+1 week | 50–60 days from sow/transplant |
| California Poppy | Direct sow (fall or early spring) | Fall: anytime before hard freeze; Spring: 4–6 weeks before LF | Do not transplant — thin in place to 6–9 in | 60–90 days from germination |
| Wildflower Mix | Direct sow | Fall: before hard freeze; Spring: 4–6 weeks before LF | Thin to 4–6 in after 2 true leaves | Varies; earliest species at 60 days |
| Zinnia | Direct sow | 1–2 weeks after LF (soil at 70°F+) | Thin to 6–12 in; no transplanting | 50–70 days from germination |
| Cosmos | Direct sow | On or just after LF | Thin to 12–18 in | 50–70 days from germination |
| Sweet Alyssum | Direct sow or indoor start | Direct sow 2–4 weeks before LF (tolerates light frost); indoor start 4–6 weeks before LF | Thin to 6–8 in or transplant at LF | 40–60 days from sow/transplant |
A practical note: I write my own last-frost date on a piece of tape and stick it inside my seed-storage box lid. Every January I pull out that box, lay out the seed packets, and count backward on a calendar. It takes about 20 minutes and eliminates almost all the timing mistakes I made in my first couple of growing seasons.
Tools and supplies to have ready before you start
You do not need much, but having the right things on hand before sowing day makes the whole process dramatically smoother. Lighting for Indoor Plants and Starting Seeds | University of Minnesota Extension recommends setting grow lights 14–16 hours per day and placing typical fluorescent/LED fixtures about 4–6 inches above seedlings (raising them as the plants grow) Lighting for Indoor Plants and Starting Seeds | University of Minnesota Extension recommends setting grow lights 14–16 hours per day and placing typical fluorescent/LED fixtures about 4–6 inches above seedlings (raising them as the plants grow).. Nothing derails a seed-starting session like hunting for labels while your trays are sitting in wet mix.
- Seed trays and cell inserts: 72-cell or 128-cell trays for small seeds (snapdragons, alyssum); 50-cell or 4-inch pots for larger seeds (marigolds, cosmos). Reusable trays are fine if you sanitize them with a 10% bleach solution between seasons.
- Humidity domes or plastic wrap: maintains surface moisture during germination, especially critical for slow-germinators like snapdragons. Remove as soon as you see sprouts.
- Seed-starting mix: not regular potting soil. You want a fine, low-nutrient mix specifically formulated for germination (see the soil section below for DIY recipes).
- Labels and a waterproof marker: label every single tray the moment you sow it. Memory is not reliable at week 4 when three trays of seedlings all look identical.
- Grow lights: a basic 2-bulb or 4-bulb LED shop light on a timer set for 14–16 hours per day is sufficient for most flower seedlings. Position lights 4–6 inches above the seedling tops and raise the fixture as plants grow.
- Heat mat: optional but genuinely helpful for snapdragons and lisianthus, which germinate faster at consistent 68–75°F. Set the mat under trays during the germination phase only, then remove it once sprouts emerge.
- Spray bottle or gentle watering can with a rose head: bottom-watering (setting trays in a shallow tray of water) is the gold standard for seedlings because it avoids dislodging tiny seeds and reduces fungal issues at the soil surface.
- Pruning snips or small scissors: for thinning seedlings (cut, do not pull) and for deadheading and harvesting blooms later in the season.
- Stakes and soft plant ties or jute twine: tall African marigolds, snapdragons, and most cutting-garden stems benefit from light staking once transplanted, especially in exposed spots.
Getting your soil right: mix recipes and a simple feed schedule
Seed-starting mix recipe
Commercial seed-starting mixes work fine, but making your own is cheaper at scale and lets you control the texture. The classic peat-lite formula, derived from Cornell research, is 50% sphagnum peat moss plus 50% perlite or vermiculite by volume. If you are making a larger batch, add dolomitic lime at roughly 2–3 tablespoons per gallon of dry mix to bring the pH up from peat's natural acidity to around 5.8–6.2, which is the sweet spot for most flower seedlings. This mix drains fast, holds enough moisture for germination, and has almost no nutrients, which is exactly what you want at the seed-starting stage. Seedlings do not need feeding until their first true leaves appear.
If you prefer a compost-enhanced version, use 2 parts sphagnum peat or coir, 1 part screened compost, and 1 part perlite. Sift the compost through a fine screen first to remove clumps and any weed seeds. This mix provides a gentle nutrient buffer that supports seedlings slightly longer before you need to start fertilizing. Either recipe works; I personally use the peat-lite formula for the first tray and the compost blend for potting up into larger containers.
Amending garden soil for beds
Most ornamental flowers prefer loose, well-draining soil with moderate fertility. Heavy clay needs organic matter: work in 3–4 inches of compost and a handful of perlite or coarse grit per square foot before the season begins. Sandy soil needs organic matter too, to improve water retention: 2–3 inches of compost turned into the top 8–10 inches is the standard fix. Most annuals, including marigolds, cosmos, zinnias, and wildflowers, actually perform better in moderately lean soil than in heavily fertilized ground. Overly rich soil produces lush foliage at the expense of flowers, which I learned the hard way with a cosmos bed that grew 5-foot-tall plants with almost no blooms.
A simple fertilizer schedule
- Seed-starting stage (weeks 1–2): no fertilizer. Seeds carry their own nutrient supply for germination.
- Seedling stage, first true leaves (weeks 2–4): begin diluted liquid fertilizer at quarter-strength. A balanced 20-20-20 or an organic fish emulsion at half the label rate works well. Feed once a week.
- Transplant week: no fertilizer the day you transplant; it stresses roots. Resume feeding 1 week after transplanting.
- Active growth and pre-bloom (weeks 5–8): full-strength balanced fertilizer once every 1–2 weeks, or a slow-release granular (10-10-10 or similar) worked into the planting hole at transplant time.
- Bloom stage: switch to a low-nitrogen, higher phosphorus formula (such as 5-10-10 or a bloom booster) to encourage flower production over foliage. Feed every 2 weeks.
- Containers: feed every 7–10 days throughout the season because watering leaches nutrients from pots much faster than from beds.
Step-by-step seed starting: from tray to first true leaves
This is the part that intimidates most beginners, but if you follow these steps in order, it is genuinely hard to go wrong. Work through the process once and you will find it feels routine by the second tray.
- Moisten your seed-starting mix before filling trays. The mix should feel like a wrung-out sponge: damp throughout but not dripping. Dry mix in cells tends to wick moisture away from seeds before they can germinate.
- Fill cells or trays to the top, then gently press the surface flat. Do not compact hard — you want light structure so roots can penetrate easily.
- Sow at the correct depth for each species. Fine seeds like snapdragons and alyssum are surface-sown: press them lightly onto the mix with your fingertip. Medium seeds like marigolds go in at about ¼ inch. Larger seeds like zinnia and cosmos sit at ¼ inch as well. When in doubt, a rough rule is to cover a seed to a depth equal to twice its diameter.
- For surface-sown seeds that need light to germinate (snapdragons, poppies, wildflowers), do not add any cover of mix. Just press them gently into contact with the surface.
- Label each tray immediately with species, variety, and sow date.
- Cover trays with a humidity dome or plastic wrap to keep the surface consistently moist. Place on a heat mat if available, or on top of a refrigerator where temperatures stay around 68–72°F.
- Check trays daily. Once you see the first sprout in any cell, remove the dome immediately. Leaving it on after germination starts encourages damping-off fungus, which is the leading cause of seedling death.
- Move trays under grow lights right away. Set lights 4–6 inches above the seedlings and run 14–16 hours per day on a timer. Seedlings that stretch tall and lean are telling you they need more light or the light source is too far away.
- Water by bottom-watering: set the tray in a shallow container of water and let it soak for 20–30 minutes, then lift and drain. This keeps the surface drier (reducing fungal risk) and encourages roots to grow downward.
- Thin ruthlessly at the two-true-leaf stage. One seedling per cell is the goal. Use scissors to snip extras at soil level — do not pull them out, as you risk disturbing the roots of the keeper. I know it feels wasteful, but crowded seedlings produce weak, leggy plants every time.
Hardening off: do not skip this step
Hardening off is the process of gradually acclimatizing indoor-grown seedlings to outdoor conditions over 7–10 days. Skipping it is the number one reason healthy indoor seedlings die after transplanting. Start by placing trays in a sheltered outdoor spot (morning sun only, out of wind) for 1–2 hours on day one. Add an extra hour each day and progressively expose plants to more sun and breeze. By day 7–10, seedlings should be sitting in full sun outdoors for most of the day and tolerating light wind without wilting. Only then are they ready to transplant. A dedicated Seed-Starting Guide covers the full hardening-off protocol in detail, including what to do if you get a cold snap mid-process.
Transplanting and spacing: getting plants into the ground well
Transplant on a cloudy day or in the late afternoon if possible. Full midday sun on freshly transplanted seedlings is stressful even for hardened-off plants. Water the cell tray thoroughly about an hour before you transplant so roots come out as a cohesive plug rather than crumbling apart. Dig the planting hole to the same depth as the root plug, set the seedling in, firm the soil gently around it (no air pockets), and water in well.
Spacing matters more than most beginners realize. Overcrowded flowers compete for light, water, and nutrients, and poor air circulation is the main precondition for fungal diseases like powdery mildew. Follow the recommended spacings in the care chart. When in doubt, err toward more space rather than less. I consistently get more flowers and healthier plants from well-spaced beds than from packed ones, even though the packed bed looks fuller in week two.
- French marigolds: 8–12 inches apart. Compact enough for edging and containers.
- African marigolds: 12–18 inches apart. These get large; give them room or they will crowd out everything around them.
- Snapdragons: 9–12 inches apart. Plant slightly deeper than the cell plug to encourage a sturdier stem base.
- Zinnias: 6–12 inches depending on variety. Narrow-row cutting zinnias can go as close as 6 inches if you pinch the growing tip at transplant to encourage branching.
- Cosmos: 12–18 inches. They also self-support reasonably well but benefit from neighboring plants for mutual windbreak.
- Lisianthus: 9–12 inches. Extremely sensitive to root disturbance; handle the root plug with great care.
- Cutting stems (sunflowers, larkspur, sweet peas): follow packet spacing, generally 6–12 inches for single-stem production, wider for multi-stem.
For taller plants (African marigolds, snapdragons, tall zinnias), push a stake in at transplanting time rather than waiting. Driving a stake in later risks piercing roots. Use soft jute twine or cloth ties and form a figure-eight loop so the tie does not cut into the stem.
Direct-sow vs. indoor start: the decision guide and species timelines
The choice between direct sowing and starting seeds indoors is not always obvious, but there is a clear logic to it. Direct sowing works best for species that germinate quickly, dislike root disturbance, or actively need cold/fluctuating outdoor temperatures to break dormancy. Indoor starting gives you a head start on long-season flowers that would not have time to bloom if you waited for outdoor conditions to be right.
Direct-sow these species
- California poppy (Eschscholzia californica): always direct sow. The plant develops a deep taproot very early and does not transplant well. Sow in fall (before hard freeze) for a natural chilling period, or very early spring 4–6 weeks before your last frost. Broadcast seeds on bare soil and press them into the surface — do not cover them, as they need light to germinate. Expect germination in 7–21 days depending on soil temperature.
- Wildflower mixes: direct sow in fall or early spring (same timing as California poppy). Surface broadcast onto prepared, weed-free soil, rake very lightly, and water in. Most native wildflower and annual mix species germinate poorly when transplanted.
- Zinnia: direct sow after all frost danger has passed and soil has warmed to at least 70°F, typically 1–2 weeks after last frost. Zinnias germinate so fast (5–10 days) that there is almost no benefit to indoor starting, and they resent any root disturbance.
- Cosmos: direct sow on or just after last frost date. Like zinnias, they are fast, frost-tender, and dislike transplanting.
- Larkspur and bachelor's button: direct sow in fall or very early spring. Both benefit from a cold period and actually germinate better with fluctuating spring temperatures than in a warm indoor environment.
- Sweet alyssum: can be direct sown 2–4 weeks before last frost; tolerates light frost well.
Start these species indoors
- Snapdragons: start 8–10 weeks before your last frost date. They are slow, need cool conditions to bloom well, and benefit enormously from that early indoor head start. Surface sow (tiny seeds, light-dependent), keep at 65–72°F, expect 10–14 days to germination.
- African marigolds: start indoors 4–6 weeks before last frost. They germinate in 3–7 days at 68–75°F and grow quickly, so do not start them much earlier or they will outgrow cells before transplant time.
- Lisianthus: start 12–14 weeks before your expected transplant date. This is one of the most demanding flower seeds for timing; many first-year growers buy transplants instead, which is a completely sensible shortcut.
- Stocks and statice: start 6–8 weeks before last frost.
- Celosia: start 4–6 weeks before last frost in cells; warm temperatures (75–80°F) needed for germination.
Watering, light, and pruning for more blooms
Most ornamental flower beds need about 1–2 inches of water per week, whether from rain or irrigation. Rather than watering a little every day, give a thorough deep soak 1–2 times per week so moisture reaches 6–8 inches down and encourages deeper root development. The finger test is your most reliable tool: push a finger 1–2 inches into the soil near the plant base. If it feels dry at that depth, water. If it still feels moist, wait. Containers dry out much faster than beds, especially in summer heat, and may need daily watering or even twice-daily checks when temperatures exceed 85°F.
Sunlight requirements are non-negotiable for most of these flowers. Marigolds, zinnias, cosmos, California poppies, and snapdragons all need a minimum of 6 hours of direct sun per day to bloom well. Less than that and you get foliage with few flowers. Snapdragons tolerate part shade better than the others and actually appreciate afternoon shade in hot-summer climates (zones 7–9) where heat can shut down their bloom cycle.
Deadheading and pinching to maximize blooms
This is where a lot of beginners leave performance on the table. Deadheading, which means removing spent flowers before they set seed, signals the plant to keep producing new flowers rather than putting energy into seed production. For marigolds, snap or cut off faded blooms at the stem junction every few days. For zinnias and cosmos, cut back to a set of leaves or a lateral bud. For snapdragons, cut the spent spike back to a side shoot to encourage a second and even third flush.
Pinching is a related technique used early in the plant's life to encourage bushier growth and more stems. When a young zinnia or cosmos transplant reaches 8–12 inches tall, pinch out the growing tip just above a leaf node. The plant responds by sending up two or more lateral stems instead of one, which means double (or more) the flowers. I pinch my zinnias at transplant and again at about 3 weeks in, and the difference in flower count by midsummer is dramatic compared to unpinched plants.
Growing flowers in containers and small spaces
You do not need a full garden bed to grow beautiful flowers. A 12-inch pot holds a thriving French marigold or sweet alyssum. A window box can carry a cutting row of zinnias. The constraints are drainage and soil volume: always use containers with drainage holes, never use garden soil in pots (it compacts and drains poorly), and use a quality potting mix rather than seed-starting mix for container growing.
For a small pollinator-focused pocket garden or balcony container, the most productive combination I have found is a central tall plant (cosmos, snapdragon, or a compact sunflower variety), surrounded by French marigolds and sweet alyssum as edge plants. For step-by-step instructions on creating a pollinator-focused pocket garden, see how to grow flowers in pocket bees. The alyssum fills in at the base, the marigolds add season-long color and deter some aphids, and the cosmos or snapdragon gives height and cut stems. Feed this combination every 7–10 days with a diluted bloom-booster fertilizer once flowers begin, and deadhead twice a week for continuous production.
Bee-friendly and pollinator planting tips
Flowers that are genuinely useful to pollinators share a few key traits: accessible pollen and nectar (so single-flowered, open-faced varieties outperform doubles), a long bloom window, and ideally a succession of flowering times across the season. Planting a range of flower shapes also matters, since bumblebees, honeybees, butterflies, and hoverflies all have different tongue lengths and feeding preferences. For more on choosing and growing bee-friendly flowers, see Bee's Friend: how to grow.
- California poppy: one of the best single-season bee plants you can grow. The open, flat flower shape gives bees direct pollen access. It blooms prolifically from spring through early summer and self-seeds readily for repeat coverage in subsequent years.
- Phacelia and wildflower mixes: native mixes that include phacelia, echinacea, black-eyed Susan, and native asters provide sequential bloom times from early spring through fall. A 4 x 4 foot wildflower patch can support dozens of bee and butterfly species throughout the season.
- French marigold (single-flowered varieties): single-flowered French marigolds like 'Disco' or 'Single Gold' attract far more pollinators than the fully double pom-pom types. They also deter aphids and whiteflies near vegetable beds as a bonus.
- Sweet alyssum: the honey-scented small flowers are intensely attractive to hoverflies and small bees, and it flowers for months. It also acts as a beneficial insect banker plant, harboring predatory hoverfly larvae that feed on aphids.
- Cosmos: supremely easy and beloved by bees, butterflies, and beneficial wasps. Let a few plants go to seed at the end of season and they will self-sow for next year.
Hybrids vs. open-pollinated seeds: what to know before you save seed
When you see 'F1' on a seed packet, that means the seeds are a first-generation hybrid produced by crossing two specific parent lines. F1 hybrids are bred for uniformity, vigor, and specific traits like disease resistance or a particular flower color. They perform very reliably from purchased seed. However, if you save seed from an F1 hybrid and replant it, the resulting plants will not look like the parent. They will revert to a mix of traits from the grandparent lines, so you will get variable and often disappointing plants. The practical rule: if you want to save seed and replant true-to-type plants next season, grow open-pollinated (OP) or heirloom varieties. If you want the best commercial performance and do not mind buying fresh seed each year, F1 hybrids are excellent.
For the species in this guide, California poppies and most wildflowers are open-pollinated and self-seed freely, which makes them great seed-saving candidates. Cosmos and marigolds also have widely available OP varieties (look for 'Sensation Mix' cosmos or 'Crackerjack' marigold). Snapdragon varieties sold commercially are often F1 hybrids, so check the packet before planning to save seed. For anyone wanting to grow hybrid flowers specifically and understand what to expect from seed-saving, dedicated hybrid growing guides go deeper into crossing techniques and expectations. For anyone wanting to grow hybrid flowers specifically and understand what to expect from seed-saving, see our guide on how to grow hybrid flowers (b04a30c6-c421-4488-adcd-08fdee0df64a).
Troubleshooting: why your flowers might not be growing
Most flower-growing problems fall into a handful of categories, and working through them systematically almost always turns up the answer. If your flowers are not performing, run through this checklist before assuming your seeds are bad or your soil is hopeless.
| Problem | Likely Cause | Fix |
|---|---|---|
| Seeds not germinating | Too cold, too deep, or old seed | Check soil temp (most annuals need 65–75°F); verify sowing depth; test seed viability by placing 10 seeds on a damp paper towel in a warm spot for 1 week — fewer than 6 sprouting means low viability |
| Seedlings falling over (damping off) | Fungal rot at soil surface from overwatering or poor air circulation | Reduce watering frequency; remove humidity dome immediately at germination; add a small fan for airflow; use sterile seed-starting mix |
| Leggy, stretched seedlings | Insufficient light or lights too far away | Lower grow lights to 4–6 inches above seedlings; extend photoperiod to 14–16 hrs/day |
| Flowers but no blooms | Too much nitrogen fertilizer, or insufficient sunlight | Switch to low-nitrogen bloom fertilizer; ensure 6+ hours of direct sun; verify you are deadheading regularly |
| Yellow leaves | Overwatering, nutrient deficiency, or compacted/waterlogged soil | Check drainage; do finger test before watering; apply balanced fertilizer if not fed recently |
| Stunted growth after transplanting | Transplant shock or skipped hardening-off | Water consistently; do not fertilize for 1 week post-transplant; ensure plants were hardened off over 7–10 days |
| Pests (aphids, spider mites, whiteflies) | Warm, dry conditions favor pest outbreaks; stressed plants attract more pests | Blast with water to knock off aphids; insecticidal soap spray for persistent infestations; introduce beneficial insects; marigolds and alyssum nearby deter some species |
| Wilting despite regular watering | Root rot from overwatering, or compacted soil restricting drainage | Check roots for brown mushiness indicating rot; improve drainage; allow soil to dry between waterings |
| California poppies not germinating | Seeds covered too deeply or soil too warm | Surface sow, press seeds into contact with soil but do not cover; sow in cool season (early spring or fall); they need light to germinate |
Seed viability is worth checking before you invest a full season of care. Old seed does not always fail completely, but germination rates drop significantly after the packet expiration date, especially for onion family plants and parsnips. For flowers, marigold, zinnia, and cosmos seed stays viable for 2–3 years stored cool and dry. Snapdragon and poppy seed is best used within 1–2 years. If you are unsure whether your flowers are struggling because of the seed or the growing conditions, a dedicated troubleshooting guide on why flowers will not grow can help you work through the diagnosis more systematically.
Variety recommendations that actually deliver
Generic 'mixed' packets are fine for pollinator patches and wildflower fills, but if you want reliable, predictable results, named varieties almost always outperform anonymous mixes. Here are the varieties I return to every season and recommend without hesitation.
| Flower | Recommended Variety | Why It Works |
|---|---|---|
| French Marigold | Bonanza Series or Disco Series (single) | Bonanza is compact (10–12 in), extremely free-flowering, and available in deep orange/mahogany. Disco Series (single-flowered) is the best for pollinators. |
| African Marigold | Crackerjack Mix or Inca II Series | Crackerjack (OP) produces large 3–4 in blooms on 24–36 in stems — great for cutting. Inca II is F1, more uniform, slightly earlier. |
| California Poppy | Mixture or Thai Silk Series | The standard species mix self-seeds reliably. Thai Silk has semi-double, silky-textured blooms in a wider color range. |
| Snapdragon | Rocket Series or Madame Butterfly Mix | Rocket Series (tall, 24–36 in) is the cutting-garden standard. Madame Butterfly produces open, azalea-type flowers that bees can access easily. |
| Zinnia | Benary's Giant Mix or Zinderella Series | Benary's Giant produces 4–5 in blooms on strong 24–30 in stems — the benchmark cut zinnia. Zinderella is a dahlia-flowered type with exceptional vase life. |
| Cosmos | Sensation Mix (OP) or Rubenza | Sensation is the reliable open-pollinated standard, easily saved for next year. Rubenza is a rich ruby-red single-colored variety with intense pigment. |
| Lisianthus | Echo Series | Echo is the most forgiving lisianthus series for home growers — earlier to bloom than most, with good uniformity. Still challenging; buy transplants in year one. |
| Sweet Alyssum | Snow Crystals or Easter Bonnet Mix | Snow Crystals is a vigorous pure white with a strong honey fragrance. Easter Bonnet mix adds lavender and pink tones to the edging. |
Keep going: your first bloom is closer than you think
If you take one thing from this guide, let it be this: the timing is the hardest part, and once you work out your local last-frost date and count backward from it, everything else becomes a practical sequence of small steps. For step-by-step tips on boosting bloom production, see our guide on how to grow more flowers. Start with one or two species in your first season. Marigolds and zinnias are the most forgiving, fastest, and most rewarding for beginners. If you're playing Don't Starve, see our concise how to grow flowers don't starve guide for game-specific tips and mechanics. Add snapdragons and poppies in year two once you have a feel for the rhythm. Each season you will get better at reading your plants, catching problems early, and knowing when to push and when to back off. That is not failure and recovery, that is just how gardening works, and it is part of what makes the first blooms feel so genuinely satisfying.
FAQ
What is the fastest way for a beginner to get reliable blooms from marigolds, snapdragons, poppies, wildflower mixes and cutting‑garden staples?
Follow species‑specific timing and simple steps: check your USDA zone and average last frost, choose direct‑sow for poppies and many wildflowers, start marigolds and most snapdragons indoors 4–8 weeks before last frost (snapdragons sometimes need 8–12 weeks), use a sterile seed‑starting mix, keep soil 65–75°F for germination, give seedlings 14–16 hours of light, transplant after hardening off when nights stay above frost, and deadhead regularly to maximize blooms. See internal link: [Seed‑Starting Guide].
How do I decide direct‑sow vs. indoor start for each species?
Rule of thumb: sow species that dislike root disturbance (California poppy, many wildflowers) directly outdoors in fall or very early spring. Sow marigolds, zinnias, cosmos often indoors 3–6 weeks before last frost or direct‑sow after frost for quick summer blooms. Snapdragons and longer‑season cut flowers benefit from 8–12+ weeks indoors. Base the decision on packet days‑to‑flower plus your average last‑frost date (NOAA/extension frost data). See internal link: [Planting Calendars & Zone Timing].
What exact indoor seed‑starting steps should I follow (step‑by‑step)?
1) Choose trays with drainage and sterile seed mix (peat/coir + perlite or peat+perlite 50:50). 2) Moisten mix and fill cells. 3) Sow seeds at recommended depth (surface for poppy/wildflower; 1/8–1/4" for zinnia; 1/4" or surface for marigold per packet). 4) Label trays. 5) Keep medium 65–75°F until germination (use heat mat if needed). 6) Provide 14–16 hours light 4–6" from seedlings. 7) Thin to 1 strong seedling per cell once true leaves appear. 8) Fertilize lightly at first true‑leaf stage with half‑strength balanced soluble feed. 9) Harden off 7–10 days before transplanting outdoors. See internal link: [Detailed Seed‑Starting Guide].
What soil and fertilizer recipes work best for flower seedlings and beds?
Seedlings: sterile mix recipe — 1 part sphagnum peat moss or coconut coir + 1 part perlite + 1 part screened compost (optional) or use 50:50 peat:perlite with dolomitic lime to buffer pH. Beds/containers: loamy, well‑draining mix with 40% topsoil/compost + 40% coarse compost or aged manure + 20% coarse sand or perlite for drainage. Fertilizer: incorporate a balanced slow‑release granular (e.g., 10‑10‑10) at label rates into beds, and feed containers with a water‑soluble balanced fertilizer (NPK 10‑10‑10 or bloom‑boosting 5‑10‑10) every 2–4 weeks. Adjust based on plant vigor and soil test. See internal link: [Soil & Fertility Recipes].
How much light and water do seedlings and mature flowers need?
Seedlings: 14–16 hours/day under grow lights at ~4–6" distance; maintain ~200–300 µmol·m⁻²·s⁻¹ if measuring. Water gently to keep surface moist but not soggy; avoid prolonged saturation to prevent damping‑off. Mature beds: most ornamentals need about 1–2 inches water/week (split, deeper soakings preferred). Containers dry faster—check top 1–2" and water when dry. Increase water frequency in hot weather. See internal link: [Watering & Light Rules].
What pruning, deadheading and training techniques increase bloom production?
Deadhead spent flowers promptly to prevent seed set and encourage more blooms (pinch or snip back to first healthy leaf node). For tall varieties, pinch growing tips early to promote branching. Remove weak/leggy stems; for snapdragons, cut stems after first flush to encourage repeat bloom. For cutting gardens, harvest in the cool morning and leave several leaves on the plant. Regular light fertilizer after heavy harvests helps rebloom. See internal link: [Pruning & Deadheading Techniques].},{
Next Articles
How to Grow More Flowers: Practical Seed-to-Bloom Guide
How to grow more flowers: step-by-step, practical tips to boost bloom counts, extend seasons, and simplify schedules.
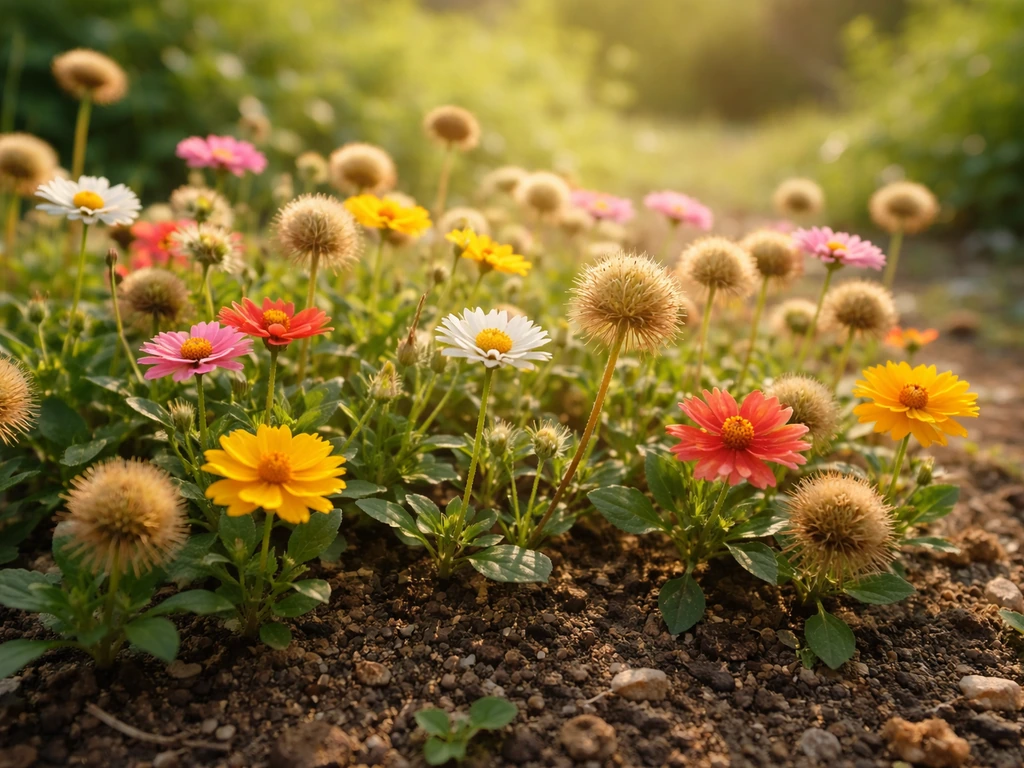
How to Grow Flowers for Pocket Bees Step by Step
Step-by-step guide to grow pocket-bee friendly flowers from seed to bloom with year-round planting and maintenance.
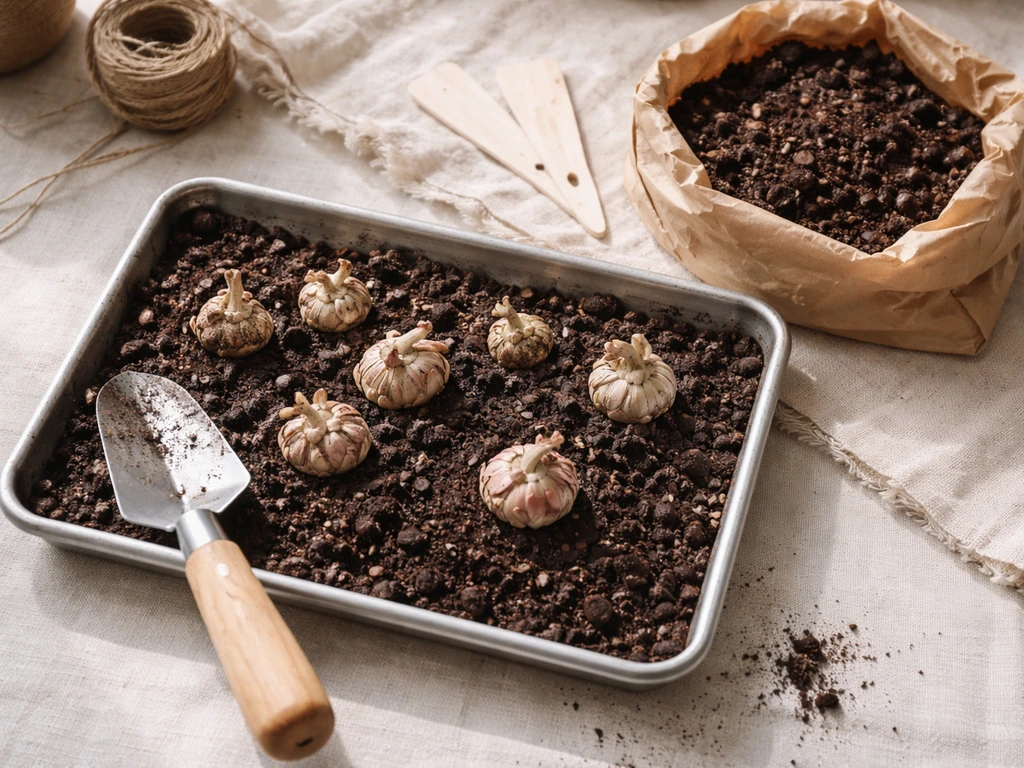
Floret How to Grow Ranunculus: Step-by-Step Guide
Step-by-step Floret-style ranunculus guide: corm prep, planting, watering, frost care, troubleshooting, and harvest for