Growing THCA-rich cannabis flower at home is genuinely achievable for a careful beginner, but it requires honest groundwork before you touch a single seed. The most important thing to know: THCA is the raw, non-psychoactive acid form of THC found in the living plant, and whether your grow is legal depends entirely on your local laws and the tested THC concentration of your finished product, not on what the seed packet says. Get the legal side sorted first, then follow the practical steps below and you will have a realistic shot at a healthy, potent harvest.
How to Grow THCA Flower Reddit Guide: Legal, Step-by-Step
James Holloway
8 Aug 2026
Read this first: Legal, safety, and privacy considerations
I know it is tempting to skip straight to the grow tips, but please do not. Under federal law, cannabis containing more than 0.3% delta-9 THC on a dry weight basis remains a Schedule I controlled substance under the Controlled Substances Act. The 2018 Farm Bill created a legal carve-out for hemp, defined as Cannabis sativa L. with a delta-9 THC concentration at or below 0.3% dry weight, and that is the only federally lawful path for home cultivation without a state cannabis license.
Here is where it gets tricky with THCA flower specifically. USDA regulations require that total THC be calculated using the conversion formula: Total THC = (0.877 x THCA) + delta-9 THC. So a plant with very high THCA can still exceed the 0.3% total THC threshold even if the raw delta-9 THC number looks low. If your crop tests above that threshold, USDA rules classify it as marijuana, not hemp, and disposal or negligent-violation consequences apply. Always request a third-party COA (certificate of analysis) from an accredited lab before assuming your flower is compliant.
State and local laws vary enormously. Some states permit adults to grow a limited number of cannabis plants at home; others make home cultivation a felony regardless of intent. The National Conference of State Legislatures maintains a state-by-state tracker that is a useful starting point, but always confirm directly with your state regulator and your municipal code, because local penalties can be stricter than state law. NCSL, State cannabis laws (state-by-state guide) provides an authoritative, regularly updated state-by-state summary useful as a starting point for checking legality and regulator rules NCSL — State cannabis laws (state-by-state guide). Do not rely on Reddit threads for legal advice on your specific address.
On the safety side, indoor cannabis cultivation carries real physical hazards. The CDC and NIOSH documented electrical risks, CO2 buildup, HVAC and humidity-driven mold, and chemical or pesticide exposure in indoor grow facilities. At home scale, that translates to: use properly rated electrical circuits for your lights and fans, never run CO2 supplementation without a monitor and alarm, keep humidity controlled to prevent dangerous mold, and avoid unlabeled or unregistered pesticides. NFPA is developing a cannabis-specific fire safety standard (NFPA 420), but in the meantime follow standard NEC and local AHJ electrical codes. Privacy is also a practical concern: keep your grow discreet, know your local plant-count limits, and never discuss exact addresses or counts in public forums.
What is THCA flower? A brief primer for beginners
THCA stands for tetrahydrocannabinolic acid. It is the compound the cannabis plant actually produces as it grows, long before any heat is applied. In a fresh or dried flower, most of the cannabinoid content exists as THCA rather than as delta-9 THC. The conversion from THCA to THC happens through decarboxylation, which is triggered by heat, UV light, and extended exposure to oxygen over time. That is why a lab-tested flower can show, say, 25% THCA and only 1% delta-9 THC on a raw COA: most of the THC potential is still locked in acid form.
For the grower, this matters in two ways. First, it affects how your harvest is classified legally (see the total THC formula above). Second, it affects how you handle and store the dried flower after harvest. Research published in Forensic Science International and confirmed by a 2022 controlled study shows that THCA degrades faster at higher temperatures, under UV light, and when exposed to oxygen. Cold, dark, airtight storage measurably slows that degradation. So growing for maximum THCA is not just about genetics and nutrients during the grow; it carries all the way through to how you dry, cure, and store the final product.
Planning your THCA grow: goals, yield expectations, and indoor vs outdoor decisions
Before buying anything, write down a realistic goal. Are you growing to experiment with the cultivation process, to produce a legally compliant hemp flower, or for personal use in a state where adult home cultivation is permitted? Your goal shapes every decision that follows. Someone growing two plants in a closet to learn the craft has completely different needs than someone trying to maximize yield in a 4x4 tent.
Yield expectations from beginner growers are almost always too optimistic. A well-run 4x4 indoor tent under a quality 600-watt equivalent LED can realistically produce 3 to 6 ounces of dried, cured flower per photoperiod plant in a first grow, and possibly more with training and experience. Outdoor plants in a long, warm season (zones 7-10 in the United States, with last frost before mid-April and first fall frost after mid-October) can produce significantly more per plant, sometimes 4 to 16 ounces or beyond for a large, well-fed photoperiod plant. Autoflowering varieties are more forgiving for beginners and finish faster, but typically yield less per plant.
| Factor | Indoor | Outdoor |
|---|---|---|
| Climate control | Full control over temp and humidity | Weather-dependent; frost and heat are risks |
| Light cycle control | You set the schedule | Governed by natural day length |
| Startup cost | Higher (lights, fans, tent) | Lower (soil, containers, or ground plot) |
| Privacy | Easier to keep discreet | Visible to neighbors; higher legal risk |
| Yield potential | 3-6 oz per plant (4x4 tent) | 4-16+ oz per plant in warm zone |
| Pest and disease pressure | Lower but not zero | Higher; more varied pest exposure |
| Strain flexibility | Any strain | Photoperiod strains tied to local season |
Choosing seeds and strains: THCA-rich varieties, seed types, and reputable sources
Seed selection is where a lot of beginners get burned, sometimes literally in terms of wasted money. Seed banks routinely publish THCA or THC potency claims that independent analysis has shown to be frequently overstated. The best practice is to demand downloadable, third-party COAs tied to the specific seed or harvest lot before you buy. Reputable breeders will also provide genetic validation data from services like Phylos Bioscience or Medicinal Genomics, which helps confirm that what you are planting is actually the labeled cultivar.
For seed types, you have three main categories. Regular seeds produce both male and female plants, which requires sexing and removing males before they pollinate your females. Feminized seeds are bred to produce almost exclusively female plants (the ones that produce flower), making them the standard choice for beginners. Autoflowering seeds flower based on age rather than light schedule, making them faster and more forgiving but generally yielding less. For a first indoor THCA grow, feminized photoperiod or feminized autoflowering seeds are both reasonable starting points.
When choosing strains for high THCA, look for cultivars with documented harvest COAs showing THCA percentages above 20% in lab-verified grows. Popular categories in the community include varieties bred from Wedding Cake, Runtz, and Gelato lineages for indoor growing, and more heat-tolerant, mold-resistant strains like Durban Poison or early-finishing sativa-indica crosses for outdoor grows in northern climates. Always cross-reference strain recommendations with actual grow diaries from verifiable sources rather than relying solely on breeder marketing.
- Choose feminized seeds to avoid wasting time on male plants
- Ask the seed bank for a downloadable third-party COA from a harvest lot, not just a marketing claim
- Check grow diary communities for real-world results with specific strains before purchasing
- For first-time growers, autoflowering feminized seeds reduce complexity around light scheduling
- Verify that any hemp seed you purchase from a licensed source includes documentation confirming the variety tests within 0.3% total THC compliance
Grow space and lighting options: tents, closets, outdoor plots, LEDs vs HPS, and light schedules
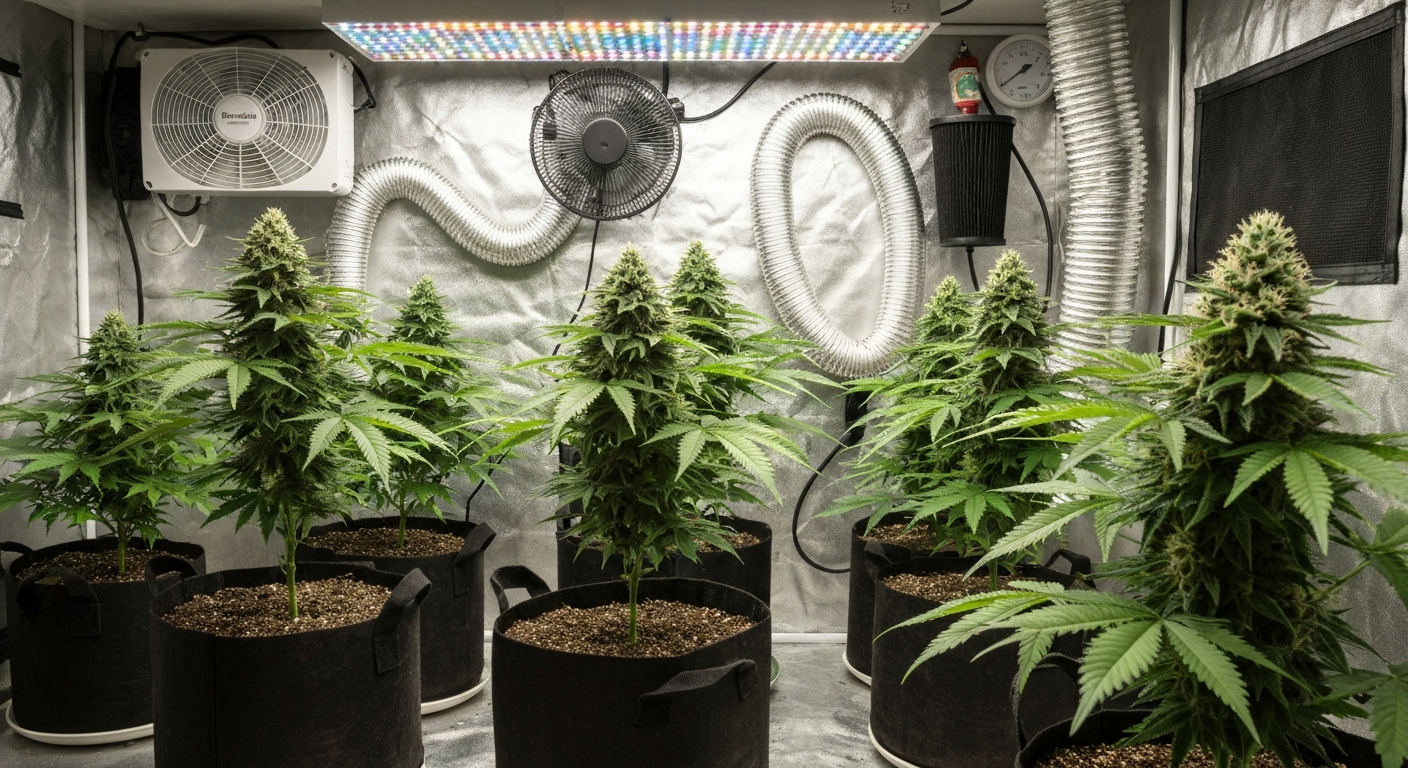
For most beginners, a grow tent is the easiest starting point indoors. Tents come in standard sizes from 2x2 feet (one or two small plants) up to 4x8 feet and beyond. A 4x4 tent is the sweet spot for a first serious grow: large enough to fit 2 to 4 plants comfortably, small enough to manage environmental controls without a huge investment. Make sure your tent has reflective interior walls, port openings for ducting and cables, and a sturdy frame to hang lights.
Lighting is the single biggest factor in indoor yield and quality. High-pressure sodium (HPS) lights have been the industry standard for decades and still produce excellent results, but they generate significant heat and consume more electricity than modern alternatives. Full-spectrum LED grow lights have improved dramatically and are now the preferred choice for most home growers. A quality quantum board LED rated at 200 to 400 actual watts is sufficient for a 4x4 space, runs cooler, and uses roughly 40 to 50% less electricity than equivalent HPS. Cheap blurple LEDs from generic online sellers are not the same thing; look for reputable brands with published PPFD (photosynthetic photon flux density) charts.
Light schedules depend on whether you are growing photoperiod or autoflowering plants. Photoperiod plants stay in vegetative growth under 18 hours of light and 6 hours of dark (18/6), then switch to flowering when you drop the schedule to 12 hours light and 12 hours dark (12/12). Autoflowering plants flower based on age regardless of light schedule; most growers run autos at 18/6 or even 20/4 throughout their entire life. Outdoors, photoperiod plants will begin flowering naturally as day length drops below roughly 13 to 14 hours in late summer, which in most of the continental United States means flowers initiate in August and harvest falls in October.
For outdoor plots, choose a location that receives at least 6 to 8 hours of direct sunlight daily, is protected from strong winds, and has good drainage. Raised beds or large containers give you more control over soil quality than planting directly in native ground. In colder climates (zones 5-6), start seedlings indoors 4 to 6 weeks before your last frost date and transplant out once nighttime temperatures stay reliably above 50 degrees Fahrenheit.
Media and pots: soil vs soilless vs hydro, container sizes, and airflow
For beginners, high-quality amended cannabis-specific soil is the most forgiving growing medium. A well-formulated living soil or a quality commercial potting mix amended with perlite (around 30% by volume for drainage) gives plants a natural buffer against pH swings and nutrient imbalances. Soilless media like coco coir offer faster growth and more direct nutrient control but require more attentive feeding since they hold almost no nutrients on their own. Hydroponic systems (DWC, ebb and flow, NFT) can produce the fastest growth and highest yields but have a steeper learning curve and less room for error; I would not recommend hydro as a starting point unless you enjoy troubleshooting systems.
Container size has a direct relationship to plant size and root health. Starting seeds or clones in a small container (1-gallon) and transplanting up as the plant grows is a common approach. Final container size for an indoor photoperiod plant is typically 3 to 5 gallons; outdoor plants benefit from 7 to 15-gallon containers or direct ground planting. Fabric pots are widely recommended in the growing community because they air-prune roots, preventing root-bound circling and promoting a healthier, denser root zone. That air-pruning effect also improves oxygen availability at the root zone, which directly supports nutrient uptake.
| Medium | Difficulty | pH target | Best for |
|---|---|---|---|
| Amended soil | Low | 6.0-7.0 | Beginners; forgiving buffer |
| Coco coir | Medium | 5.5-6.5 | Faster growth; more control |
| Peat/perlite mix | Medium | 5.8-6.5 | Good drainage; widely available |
| Deep water culture (DWC) | High | 5.5-6.2 | Maximum growth; experienced growers |
| NFT/ebb and flow hydro | High | 5.5-6.2 | Commercial-style yields; not beginner-friendly |
Airflow inside your grow space is non-negotiable. A small oscillating fan blowing gently across the canopy strengthens stems (a process called thigmomorphogenesis), reduces hot spots under lights, and most importantly prevents the stagnant air pockets where mold and powdery mildew love to develop. A separate inline fan with carbon filter exhausting air out of the tent manages odor and keeps temperature and humidity in the target range. For a 4x4 tent, a 4-inch or 6-inch inline fan with a matching carbon filter is standard.
Nutrients and watering: pH, feeding strategies, and a compact feeding/timing table
Overwatering kills more beginner plants than any nutrient problem. The rule of thumb is to water thoroughly, then wait until the top inch or two of soil is dry before watering again. In fabric pots, you can also lift the container: a light pot means the plant is ready for water. When you do water, water to 10 to 20% runoff to prevent salt buildup in the medium. Always check and adjust your water pH before feeding. In soil, target 6.0 to 7.0 pH; in coco or hydro, target 5.5 to 6.5. pH meters are inexpensive and essential; pH paper is not accurate enough for cannabis.
Nutrient needs shift significantly across the plant's life stages. Seedlings need very little additional nutrition if you are using an amended soil. The vegetative phase calls for higher nitrogen to support leafy growth. As the plant transitions to flowering, it needs less nitrogen and more phosphorus and potassium to support bud development. Many growers also add cal-mag (calcium and magnesium) supplementation, particularly when using filtered or reverse-osmosis water that has had minerals stripped out. Do not push nutrient concentrations aggressively in the first grow; nutrient burn (brown leaf tips) is easier to prevent than to fix.
| Stage | Weeks | N-P-K ratio emphasis | Watering frequency | Target pH (soil) | Notes |
|---|---|---|---|---|---|
| Seedling | Weeks 1-2 | Low / none | Every 2-3 days (small amounts) | 6.0-7.0 | No added nutrients in amended soil |
| Early veg | Weeks 3-5 | High N, low P/K | Every 2-3 days | 6.0-7.0 | Increase as plant grows |
| Late veg | Weeks 6-8 | High N, moderate P/K | Every 1-2 days | 6.0-7.0 | Begin training; watch for deficiencies |
| Transition (flip) | Weeks 9-10 | Moderate N, increasing P/K | Every 1-2 days | 6.0-7.0 | 12/12 light flip for photoperiod |
| Early flower | Weeks 11-14 | Low N, high P/K | Every 1-2 days | 6.2-6.8 | Bud sites forming; reduce nitrogen |
| Mid-late flower | Weeks 15-18 | Very low N, high P/K | Every 1-2 days | 6.2-6.8 | Trichome development; push potassium |
| Flush/pre-harvest | Last 1-2 weeks | Plain water or flush solution | Every 1-2 days | 6.0-7.0 | Improves final flavor; watch trichomes |
Common nutrient deficiency symptoms to watch for: yellowing between leaf veins (magnesium deficiency), brown leaf edges (potassium deficiency or nutrient burn), uniform yellowing of older leaves (nitrogen deficiency), and purple stems combined with slow growth (phosphorus deficiency in cool temperatures). Always rule out pH problems before adding more nutrients; a pH that is off by even half a point can lock out multiple nutrients even when they are present in the medium.
Vegetative and flowering phases: timelines, light flips, and autoflower specifics
The vegetative phase is when your plant builds its structure: roots, stems, and leaves. For indoor photoperiod plants, you control how long this phase lasts by keeping the light at 18/6. Most beginner growers veg for 4 to 8 weeks from the time the seedling has established. A longer veg period produces a larger plant and potentially more bud sites, but it also means more time, space, and resources before harvest. A common beginner-friendly approach is to veg until the plant is roughly 12 to 18 inches tall, then flip to 12/12 to initiate flowering. The plant will typically stretch (grow another 50 to 100% in height) during the first 2 to 3 weeks of flowering, so account for your available vertical space.
The flowering phase for most indica-dominant and hybrid strains runs 8 to 10 weeks from the light flip; some sativa-dominant or tropical strains can run 12 to 14 weeks. You will know harvest is approaching when the white pistils (hairs) on the buds turn orange or red and the trichomes (the tiny resin glands) shift from clear to milky white. A jeweler's loupe or digital microscope (both are inexpensive) lets you inspect trichome color directly. Milky white trichomes with some amber mixed in is the general target for peak THCA content before significant degradation to CBN begins.
Autoflowering plants simplify this considerably. They typically go from seedling to harvest in 8 to 12 weeks total regardless of light schedule. The trade-off is that you cannot extend their vegetative phase the way you can with photoperiod plants, so training must be gentle and timely. Low-stress training (LST) using soft plant ties to bend and spread branches works well with autos; aggressive topping or high-stress techniques are riskier because the plant has less time to recover.
Training and pruning to maximize bud sites
Training is about getting light to more of the plant's bud sites. The most accessible technique for beginners is low-stress training (LST): gently bending the main stem and tying it down so side branches can grow upward and receive more light. This creates a more even canopy and significantly increases overall yield compared to a single untrained cola. Start LST early in the vegetative phase when stems are still flexible.
Topping, which means cutting off the main growing tip to create two main colas instead of one, is a higher-stress technique that works well with photoperiod plants given enough veg time to recover. Many experienced growers combine topping with LST to create a flat, wide canopy (a technique called SCROG, or screen of green, when a trellis net is used). Lollipopping, which involves removing lower growth that receives little light, is done just before or at the start of flowering to redirect the plant's energy into the upper canopy bud sites.
Pests, disease, and the mold problem
The most common problems I have seen new growers encounter, in rough order of frequency: overwatering and root rot, powdery mildew, spider mites, fungus gnats, and bud rot (Botrytis). Most of these are preventable with consistent environmental management.
- Keep relative humidity between 40-60% during veg and drop it to 40-50% during flowering to discourage mold
- Maintain daytime temperatures between 70-85°F (21-29°C) in the canopy; cooler nights are fine but avoid drops below 60°F
- Inspect the undersides of leaves weekly for spider mite webbing or tiny moving dots
- Yellow sticky traps catch fungus gnats and help you monitor pressure before it becomes an infestation
- Allow the soil surface to dry between waterings to break the fungus gnat lifecycle
- If you see powdery mildew (white powder on leaves), remove affected leaves immediately, improve airflow, and lower humidity
- Bud rot starts inside dense buds; gently open suspicious buds and look for grey-brown mold inside
- For pest control, use only registered, label-compliant products and stop spraying at least 2 weeks before harvest
Harvest, drying, and curing to preserve THCA
Harvest timing has a direct impact on THCA content. Research confirms that THCA degrades through decarboxylation at a rate determined by temperature, light, and oxygen exposure. Harvesting when trichomes are predominantly milky white with a minority (10 to 20%) turning amber gives you the highest THCA concentration before significant conversion or degradation begins.
After harvest, the drying environment matters enormously. Dry your trimmed branches in a dark space at 60 to 65°F (15 to 18°C) and 55 to 60% relative humidity. Slow drying over 10 to 14 days, rather than the fast 3 to 5 day approach some guides suggest, produces noticeably better flavor and a smoother cure. When small stems snap rather than bend, the flower is ready to move to glass mason jars for curing.
Curing in sealed glass jars for a minimum of 2 to 4 weeks, with daily burping (opening the jars for 15 minutes) during the first week, allows moisture to equalize and chlorophyll to break down. For long-term THCA preservation, the science is clear: store cured flower in airtight, opaque containers in a refrigerator or cool, dark space. A 2022 controlled study found refrigerated storage measurably preserved cannabinoid concentrations over time compared to room temperature storage. Vacuum sealing before refrigeration offers additional protection against oxidation.
Reading a COA: what to check before trusting a harvest result
Whether you test your own harvest or are evaluating seeds from a vendor, a Certificate of Analysis (COA) from an ISO/IEC 17025-accredited laboratory is the only reliable way to know actual THCA and delta-9 THC concentrations. Washington Administrative Code (WAC), Cannabis laboratory quality standards and COA reporting requires testing labs to be ISO/IEC 17025‑accredited and to report COAs with method details, percent dry weight units, total THC using the 0.877 conversion, and measurement uncertainty Washington Administrative Code (WAC) — Cannabis laboratory quality standards and COA reporting. A trustworthy COA should show the laboratory name and accreditation number, sample collection date and chain of custody, the analytical method used (HPLC is preferred over GC for cannabinoids because GC heat can cause decarboxylation artifacts), THCA and delta-9 THC results in percent dry weight, the total THC calculation using the 0.877 formula, limits of quantification and detection, and measurement uncertainty. If any of those elements are missing, treat the COA with skepticism.
Common troubleshooting at a glance
| Symptom | Likely cause | Quick fix |
|---|---|---|
| Brown leaf tips | Nutrient burn or potassium deficiency | Flush medium; reduce feed concentration |
| Yellow leaves between veins | Magnesium deficiency | Add cal-mag; check pH |
| Uniform yellow lower leaves | Nitrogen deficiency | Increase N in next feeding |
| Wilting despite wet soil | Overwatering / root rot | Let medium dry; improve drainage |
| White powder on leaves | Powdery mildew | Remove leaves; lower humidity; increase airflow |
| Slow growth, pale seedling | Low light or cold temps | Move light closer; raise room temperature |
| Buds not forming after light flip | Light leak during dark period | Seal tent; check for any light intrusion |
| Stretchy, thin stems | Light too far away (etiolation) | Lower light by 2-4 inches and monitor |
Dos and don'ts: community-tested advice
- Do verify your local laws before starting anything, every single time, because laws change
- Do invest in a quality pH meter and calibrate it weekly
- Do keep a grow journal with photos and dates so you can diagnose problems by looking back at when they started
- Do buy seeds from sources that publish verifiable third-party COAs
- Don't overwater; when in doubt, wait another day
- Don't assume a higher nutrient dose fixes a problem that is actually caused by pH lockout
- Don't harvest based on calendar weeks alone; use trichome inspection to confirm timing
- Don't dry quickly with heat; slow drying in a cool, dark space is worth the wait
- Don't store finished flower in a warm, lit location; cold, dark, and airtight preserves THCA
Building your growing skills beyond cannabis
One thing I genuinely believe is that the fundamentals of successful growing transfer across plant types more than most people realize. If you are new to starting plants from seed, working with ornamental flowers first is a genuinely low-stakes way to build instincts for watering, light management, and seedling care before you invest time and money into a cannabis grow. If you want a specific beginner-friendly example, see our concise guide on how to grow Tibetan bell flowers for step-by-step tips on seeds, soil, and care. For a simple, beginner-friendly example, see a guide on how to grow basket flower to practice seed-to-bloom care. The seed-to-bloom progression for flowers like snapdragons, marigolds, and cutting garden staples teaches you to read plant signals, manage transplant stress, and calibrate watering habits in a forgiving environment. For a concrete example, see a step-by-step guide on how to grow Samanthi flower for seed-to-bloom tips that translate well to cannabis seedling and transplant care. For a simple starter project, try how to grow Indian blanket flower to practice seed-to-bloom care. The skills carry over directly.
Your next steps
- Confirm whether home cultivation is legal in your state and municipality using the NCSL state tracker and your local government website
- Decide on indoor or outdoor based on your available space, climate zone, and privacy situation
- Choose feminized seeds from a source that provides downloadable third-party COAs; verify the specific strain has documented THCA results
- Gather your equipment before germinating: pH meter, growing medium, containers, lights (for indoor), and ventilation
- Germinate in a small container, transplant up as the plant grows, and keep a dated photo journal from day one
- Follow the feeding and watering schedule in the table above, adjusting based on your plant's response
- Plan your drying and curing setup before harvest so you are not improvising at the last minute
- After your first harvest, get a COA from an accredited lab to verify actual THCA and total THC content
FAQ
Is it legal for me to grow THCA-rich cannabis at home?
It depends. Under U.S. federal law marijuana remains illegal, while hemp (Cannabis sativa L.) with total delta‑9 THC ≤ 0.3% d.w. is federally legal under the 2018 Farm Bill and USDA rules. State and local laws vary widely — some states allow licensed home cultivation of marijuana, some allow hemp cultivation under registration/limits, and some prohibit home grows. Always check your state and local statutes, the state hemp/cannabis regulator, and municipal codes before planning a grow. When in doubt, consult a lawyer or regulatory authority.
What's the difference between THCA and Δ9‑THC, and why does that matter for growing and handling flower?
THCA is the acidic, non‑intoxicating precursor produced in live cannabis trichomes; it converts to Δ9‑THC when heated (decarboxylation). Legally, many hemp programs report 'total delta‑9 THC' using the conversion Total THC = 0.877×THCA + Δ9‑THC, so high THCA plants can push a crop over the 0.3% limit post‑decarboxylation. For growers this matters for strain selection, testing, harvest timing, and post‑harvest handling to avoid regulatory noncompliance and to preserve cannabinoid profiles.
How should a beginner choose strains and seeds if the goal is THCA-rich flower but also legal compliance?
Choose varieties with documented COAs and reputable lineage that match your legal target (hemp vs licensed marijuana). For hemp targets, prioritize cultivars advertised as low total‑THC and backed by third‑party, lot‑specific COAs and genotyping where possible. Ask breeders for harvest COAs, search grow diaries and lab‑verified reports on forums like Reddit, and prefer ISO/17025 lab‑tested seeds or clones. Beware optimistic seed‑bank potency claims — third‑party COAs and community verification reduce risk.
Should I grow indoors or outdoors to maximize THCA and control compliance risk?
Both work but have tradeoffs. Indoor grows give more control over light, temperature, humidity and harvest timing — which helps maintain THCA and avoid stress‑driven THC spikes — but increase fire, electrical, and ventilation hazards and cost. Outdoor grows are lower cost and can yield large crops but are subject to environmental variability, cross‑pollination, and less precise harvest timing. For compliance-minded beginners, a small indoor or greenhouse setup with good environmental control is often safest.
What basic grow space, lighting, media, and pot recommendations should a beginner follow?
Keep it simple and compliant: - Space: start small (2×2–4×4 ft) to learn. - Lighting: full‑spectrum LED for efficiency and low heat; follow manufacturer PPFD recommendations (e.g., 300–600 μmol/m²/s for veg, 600–900 for flower depending on canopy). - Media: quality soil mixes for beginners (light, airy, good drainage) or coco for faster response; avoid untested 'super soils' that can mask deficiencies. - Pots: 3–7 gal for single plants indoors; larger for outdoor/long veg. Prioritize safe electrical setup, proper ventilation and odor control per local rules.
What are practical nutrient and watering schedules for beginners aiming for THCA preservation?
Follow a conservative feeding plan and avoid overfertilization which stresses plants and can affect cannabinoid production. Basic approach: - Veg: balanced NPK with microelements; start at 25–50% of manufacturer strength, gradually increase over 1–2 weeks. - Flower: switch to bloom formulas higher in P and K after 1–2 weeks of preflower. - Watering: water when top 1–2 inches of media dry; avoid waterlogging. - Flush before harvest only if appropriate for your medium and cultivar. Use a simple calendar (see community‑sourced compact feeding/timing table in article) and monitor EC/PPM and pH (5.8–6.5 depending on medium). Keep records.
Next Articles
How to Grow Samanthi Flower: Complete Seed-to-Bloom Guide
How to grow samanthi flower: step-by-step seed-to-bloom guide with planting calendar, troubleshooting and seed-saving
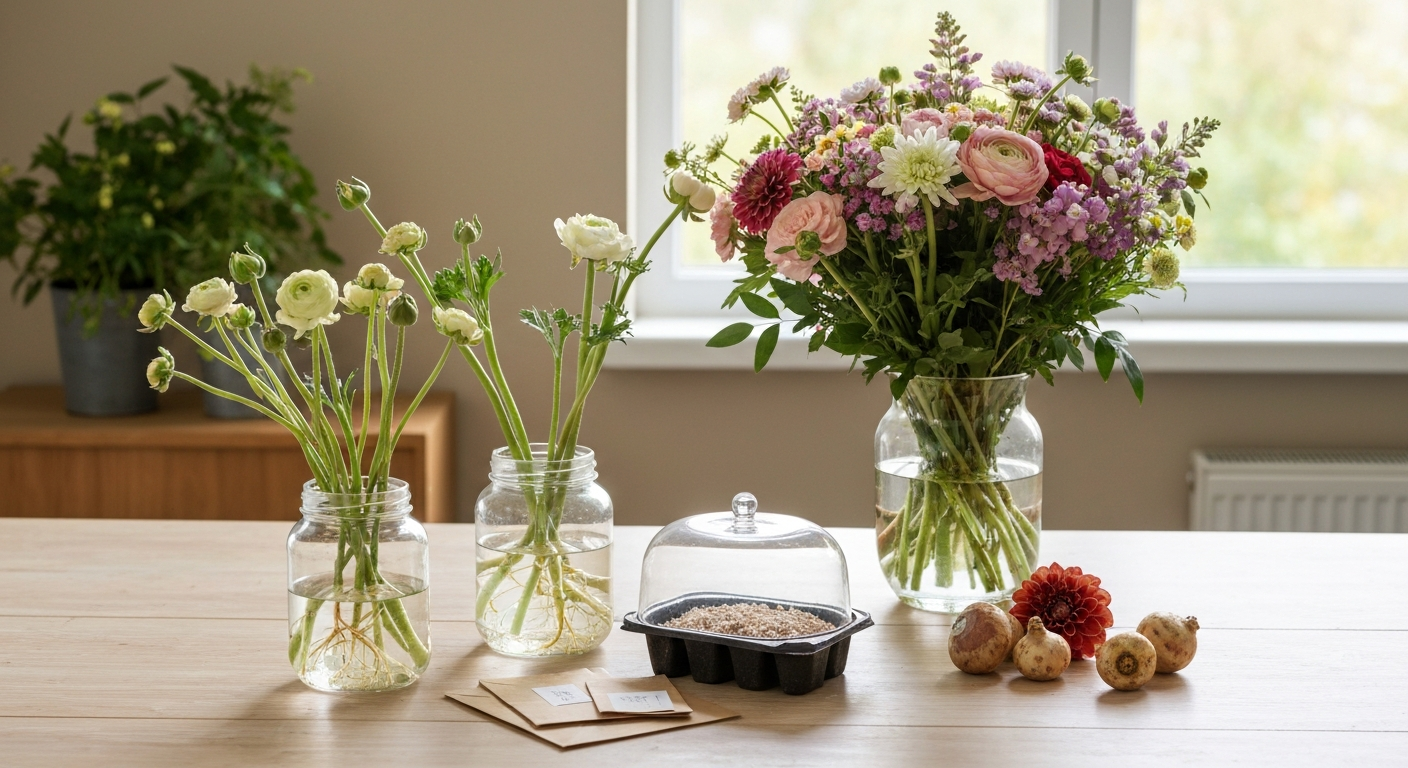
How to Grow Plants from a Bouquet: Step-by-Step Guide for Beginners
How to grow plants from bouquet: step-by-step rooting, seed saving, bulbs, timelines and troubleshooting
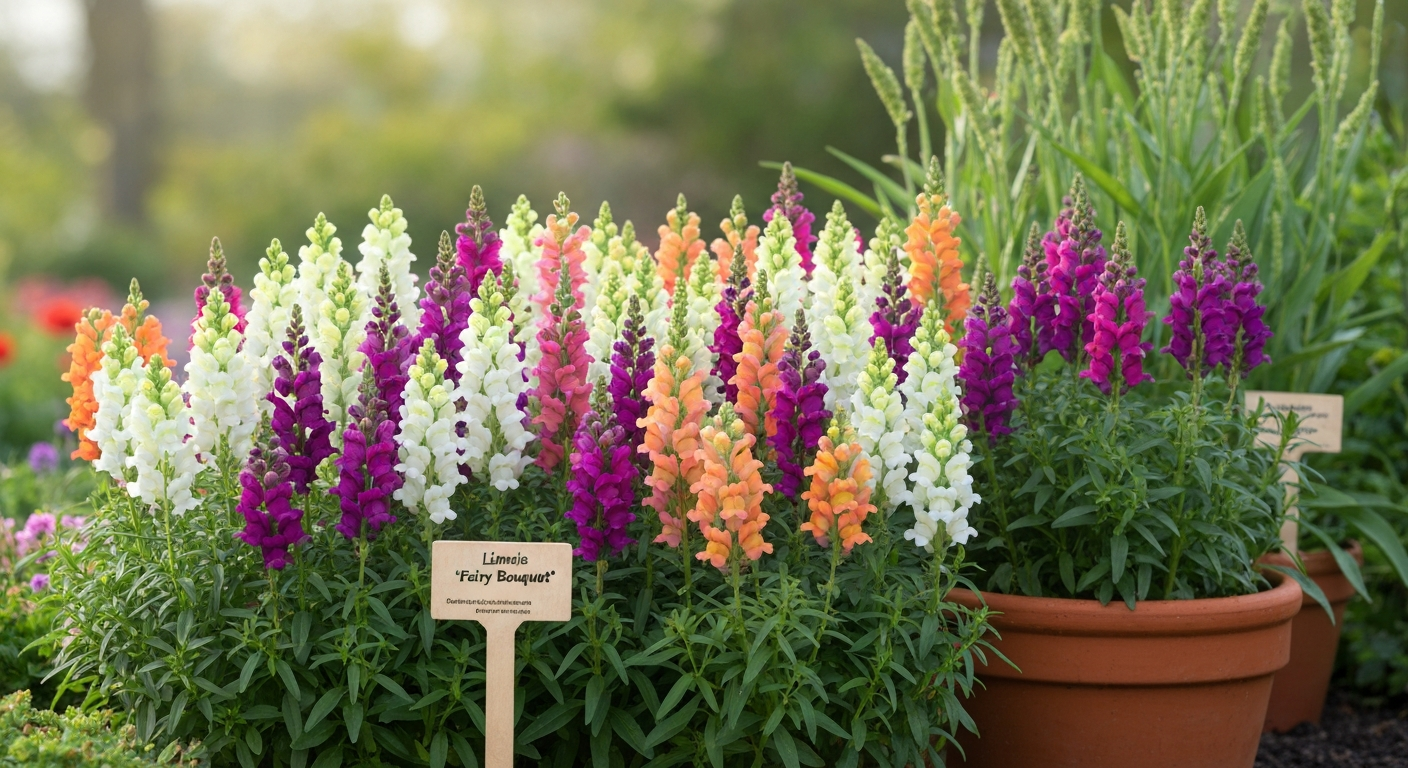
Linaria 'Fairy Bouquet' How to Grow: Seed to Cut Flowers
Grow Linaria 'Fairy Bouquet' from seed to vase: step‑by‑step sowing, care, cutting, seed saving & troubleshooting.