Perennial flowers come back year after year from the same root system, which means the effort you put in during year one pays dividends for many seasons to come. The key to growing them well is understanding that they operate on a longer timeline than annuals: you plant them, help them establish, and often wait until year two or three before you see their full potential. Get the variety, site, timing, and planting method right upfront, and they'll reward you with almost no effort afterward.
How to Grow Perennial Flowers From Seed to Establishment
James Holloway
11 May 2026
What "perennial" actually means and how to pick the right flowers
A perennial is simply a plant that lives more than two years and regrows each spring. In practical gardening terms, most people use the word to mean herbaceous perennials: plants whose tops die back to the ground in winter while the root system survives underground and pushes up new growth when temperatures warm again. Woody plants like shrubs technically qualify as perennials too, but when you're planning a flower bed, you're almost always dealing with the herbaceous kind.
One thing that trips up beginners is confusing perennials with biennials. A biennial (like foxglove or hollyhock) grows foliage in its first year, flowers in its second, then dies. It can look like a perennial because it self-seeds so reliably, but the original plant won't come back a third time. This distinction matters because you'd be disappointed waiting for a biennial to behave like a coneflower. If in doubt, check the label or seed packet carefully.
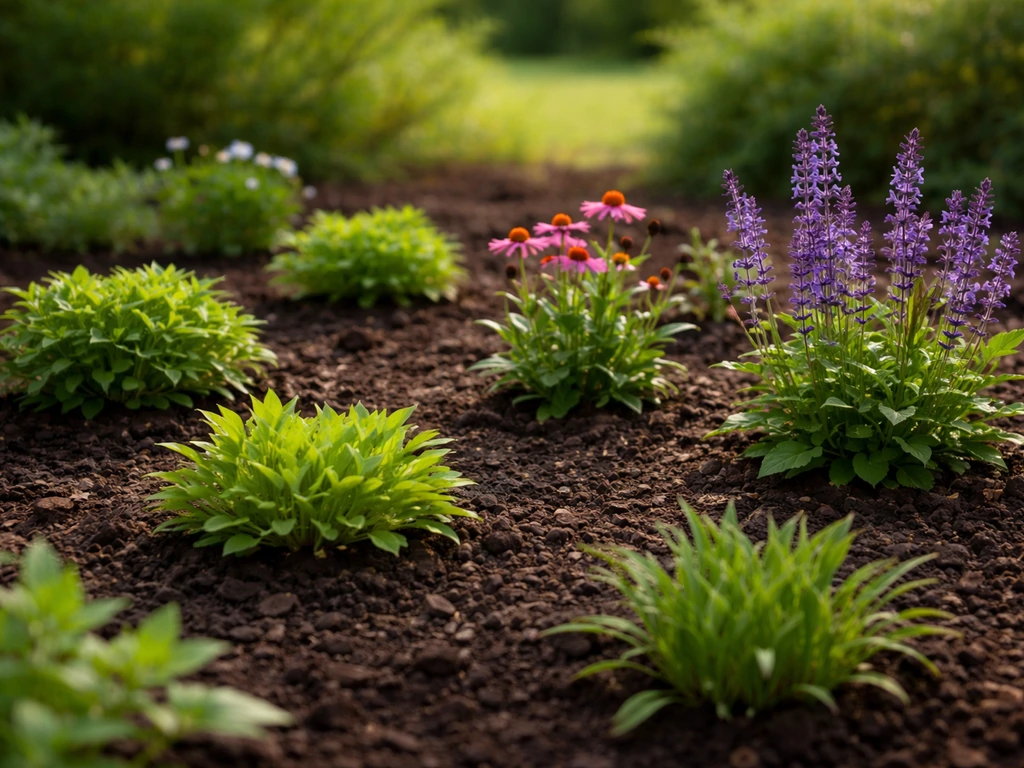
For beginners, I always recommend starting with varieties that are well-proven in a range of climates. Purple coneflower (Echinacea purpurea) is one of the best starter perennials around: it's hardy in zones 3 through 9, grows 2 to 4 feet tall with a 1. 5 to 2. 5 foot spread, tolerates full sun to light shade, and blooms all summer long.
English lavender (Lavandula angustifolia) is another excellent choice if you have full sun and decent drainage. Panicle hydrangeas like 'Limelight' work beautifully if you want something larger, reaching 6 to 10 feet and blooming from summer into early fall in zones 3 to 9. The common thread in all these choices: they're tough, forgiving, and don't need fussing to thrive once established.
When choosing varieties, match the plant to your hardiness zone first, then think about your specific conditions: how much sun does the spot get, how does your soil drain, and how much maintenance are you willing to do? A plant perfectly suited to your conditions will outperform an exotic variety you're fighting to keep alive.
Setting up your site and soil before anything goes in the ground
Most flowering perennials want at least six hours of direct sun per day. There are shade-tolerant exceptions, but if you're starting out, choosing a sunny spot and sun-loving plants stacks the odds in your favor. Walk your intended bed throughout the day a few times before planting to understand what you're actually working with, not just what you assume.
Drainage is the factor most beginners underestimate. Perennial roots sitting in waterlogged soil over winter is one of the main reasons plants don't come back the following spring. Before you plant, dig a hole about 12 inches deep, fill it with water, and check how long it takes to drain. If it's still sitting there an hour later, you've got a drainage problem to address before anything else. The fix is usually adding generous amounts of compost to loosen heavy clay, or building a raised bed. If you want to try wildflowers in a raised bed, focus on good drainage and choose varieties suited to your sun and climate.
For most perennials, aim for a slightly acidic to neutral soil pH of around 6.0 to 7.0. Lavender prefers a range of 6.5 to 7.5 and genuinely needs low-fertility, well-drained soil to thrive. One interesting exception worth knowing: if you're growing blue-flowering hydrangeas, soil pH affects the color directly. The blue pigment depends on aluminum uptake, which is facilitated by acidic soil. More alkaline soil produces pink flowers. This doesn't matter much for getting them established, but it's useful to know so you're not surprised when the color shifts.
Before planting, work 2 to 4 inches of compost into the top 12 inches of your bed. This improves drainage in clay soils, improves water retention in sandy soils, and adds some slow-release nutrition without the risk of overfeeding. Skip the synthetic fertilizer at planting time; a well-amended bed is all you need to start.
When to plant: timing by season, method, and region
The planting window for perennials is more flexible than for annuals, but timing still matters a lot for establishment success. The two best windows are early spring (4 to 6 weeks before your last frost date) and late summer to early fall (at least 6 weeks before the ground freezes). Both give roots time to settle in before the plant faces its first real stress, whether that's summer heat or winter cold.
Spring planting works well for most perennials and is the most intuitive starting point. Plants have the whole growing season ahead of them to develop a strong root system. Fall planting is underused by beginners, but it's genuinely excellent: soil is still warm enough for root growth, air temperatures are cooler so the plant isn't stressed, and by spring you've got an established plant rather than one that's just gone in the ground. The rule for fall division or fall-planted perennials is simple: get them in at least 4 to 6 weeks before the ground freezes so the roots can anchor before dormancy.
If you're starting from seed rather than transplants, the timing shifts. Many perennial seeds need a cold stratification period to break dormancy, so the practical approach is to either sow them outdoors in fall (letting natural winter conditions do the stratification work for you) or start them indoors in late winter with artificial stratification. More on that in the next section.
Gardeners in zones 3 to 5 should prioritize fall planting before mid-September and spring planting as soon as the soil is workable. In zones 7 to 9, you have more flexibility, but avoid planting during peak summer heat when temperatures routinely exceed 90 degrees; early fall is often the ideal window in warmer climates.
Growing from seed, buying seedlings, or dividing clumps
There are three ways to get perennials into your garden, and each has real trade-offs. Which one makes sense depends on your budget, patience, and what plants you're after.
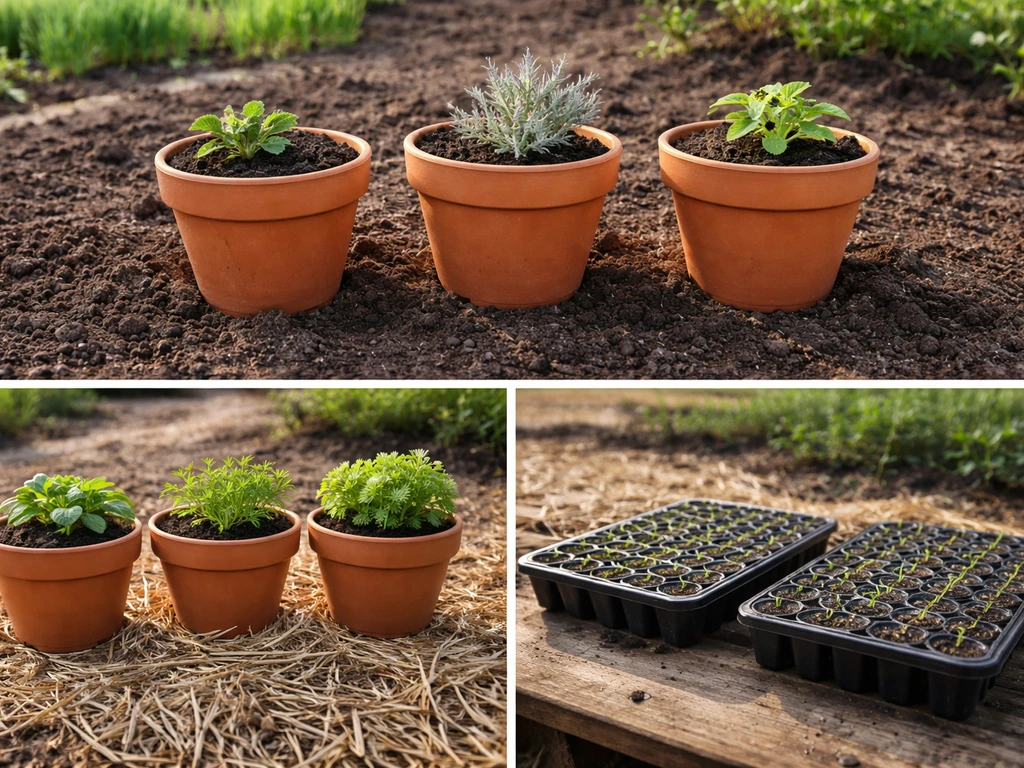
Starting perennials from seed
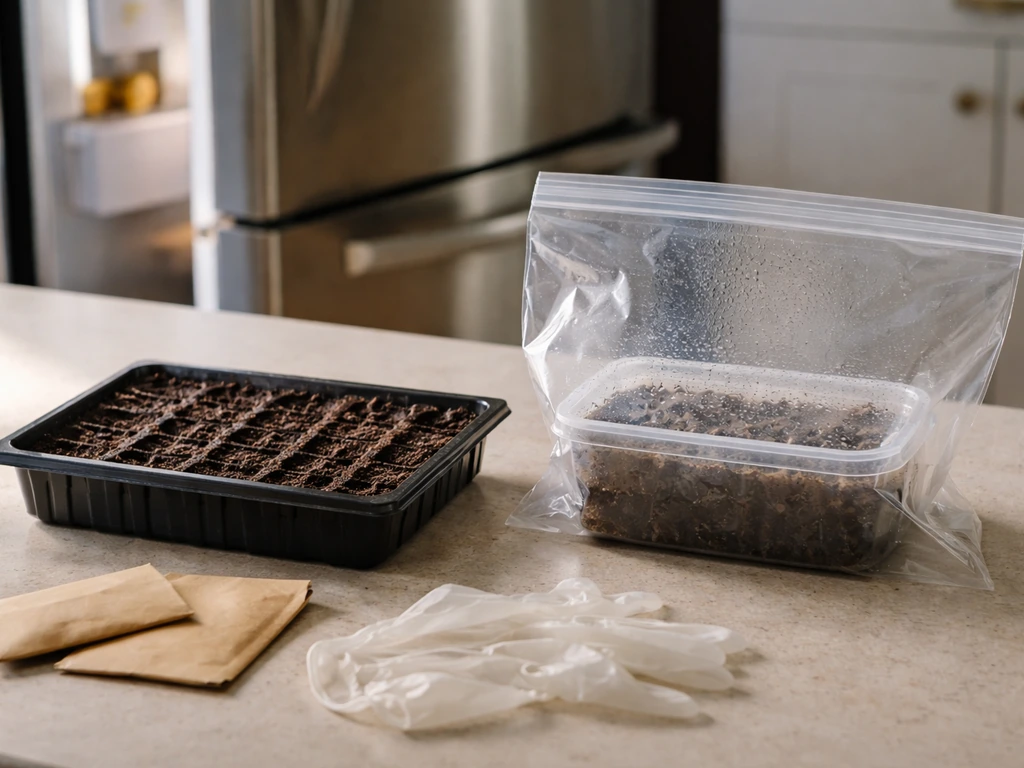
This is the most affordable method and gives you access to the widest variety selection, but it requires the most patience. Many perennial seeds need cold stratification: a period of cold, moist conditions that mimics winter before germination can occur. [Iowa State University Extension recommends stratifying most perennial seeds at 32 to 40 degrees for 3 to 4 months. ](https://yardandgarden.
extension. iastate. edu/how-to/how-grow-perennials-seed) The practical way to do this indoors is to place seeds in a sealed bag with a small amount of moist medium (like damp peat or vermiculite) and put them in the refrigerator for the required period. After stratification, move them to a warm spot to germinate, which typically happens in 9 to 12 days for many species, though some can take 3 to 4 weeks.
If the indoor stratification process feels complicated, the simpler outdoor method works well: sow seeds directly into a nursery bed or their permanent spot in fall, and let the natural freeze-thaw cycle of winter handle stratification. This is exactly what happens in nature, and it works reliably for species like coneflower, black-eyed Susan, and lavender. The tradeoff is that you're waiting longer to see results.
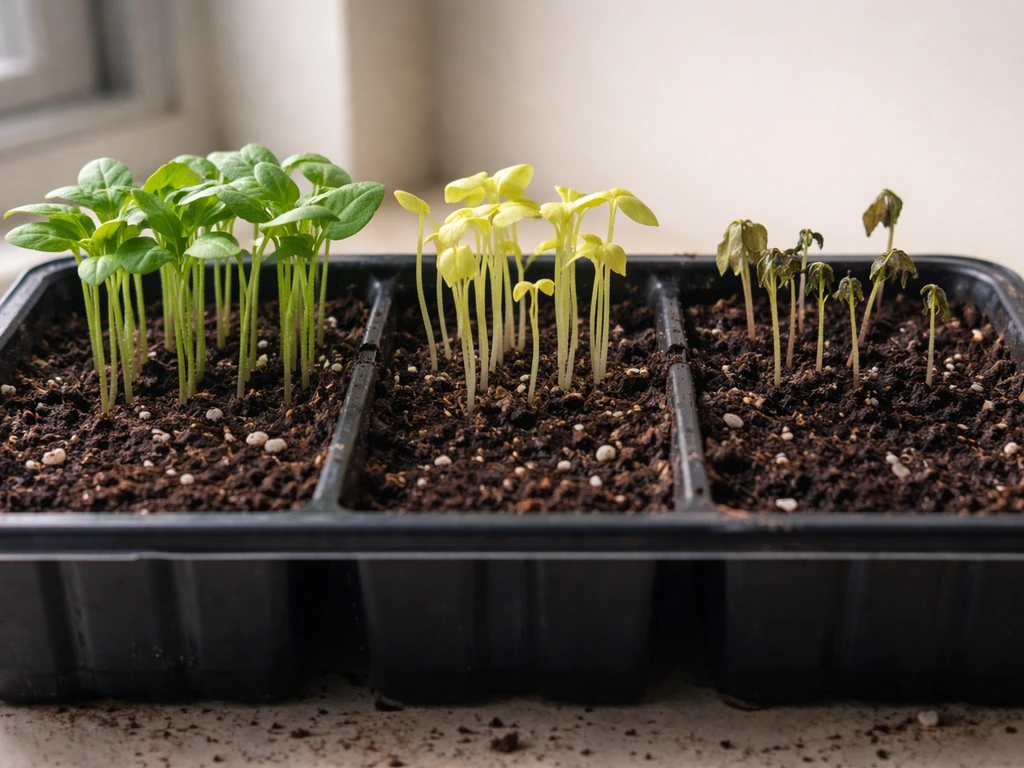
One important caution: seeds will not germinate in dry soil. Keep the seeding area consistently moist (not waterlogged) during germination. A light mist rather than a heavy stream prevents washing seeds out of position. And before moving any seedlings outdoors, harden them off by gradually increasing their outdoor exposure over 7 to 10 days so they adjust to sun, wind, and temperature fluctuations.
Realistic expectation from seed: most perennials started from seed won't bloom until their second year. The first year is all about root development. Don't be disheartened if you get minimal or no flowers in year one. That's normal, not failure.
Buying nursery seedlings or potted plants
This is the easiest and most reliable method for beginners. You skip the germination phase entirely and plant something that's already been growing for months. Nursery plants cost more than seed, but they bloom sooner (often in their first season if planted early enough in spring) and have a much higher establishment success rate. When buying, look for plants that are well-rooted but not severely pot-bound, with healthy green foliage and no signs of disease or pest damage. Smaller, younger plants in 4-inch pots often establish faster than large, stressed plants in gallon containers.
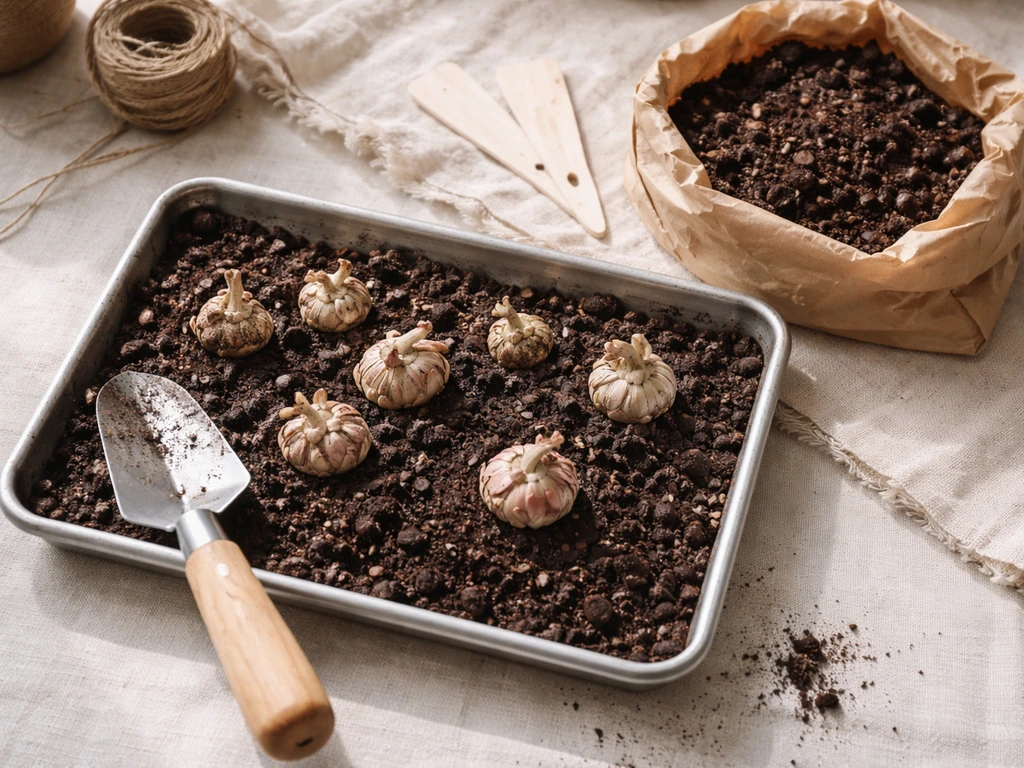
Dividing established clumps
If you have an established perennial or know someone who does, division is a free and fast way to multiply your plants. Most clump-forming perennials benefit from being divided every 3 to 5 years anyway to stay vigorous. For spring- and summer-blooming perennials, divide in fall (at least 4 to 6 weeks before the ground freezes) or in early spring before growth gets going. Dig up the whole clump, cut or pull it apart into sections with healthy roots and shoots, and replant at the same depth. Water well and keep moist for the first few weeks.
| Method | Cost | Time to Bloom | Difficulty | Best For |
|---|---|---|---|---|
| Seed | Very low | Year 2 or later | Moderate to high | Budget gardeners, rare varieties |
| Nursery seedlings | Medium to high | Year 1 (often) | Low | Beginners wanting reliable results |
| Division | Free | Year 1 or 2 | Low to moderate | Expanding existing perennials |
Watering, feeding, mulching, and spacing during establishment
The first growing season after planting is the most critical period for perennials. Their root systems are shallow and limited, so they need consistent moisture to establish. A good rule of thumb: if the soil is dry 2 inches below the surface, it's time to water. Most established perennial beds need roughly 1 inch of water per week, but newly planted perennials may need more frequent checks, especially during hot or windy weather. Water at the base of the plant rather than overhead when possible, and water deeply and less frequently rather than shallowly every day. Deep watering encourages roots to grow down, which makes plants more drought-tolerant later.
Adjust watering frequency based on your soil type. Sandy soil drains fast and dries out quickly, so you'll water more often. Clay soil holds water longer, so you can stretch the intervals but must watch carefully for waterlogging. The finger-two-inches-deep test takes five seconds and is always more reliable than a watering schedule.
When it comes to fertilizing, less is genuinely more with established perennials. Michigan State University Extension research has found that perennials generally don't have high fertilizer requirements and can actually react negatively to routine feeding. A generous compost amendment at planting time is usually sufficient for the first year. If you want to fertilize, use a balanced slow-release granular fertilizer in spring, once, at half the recommended rate. Avoid high-nitrogen fertilizers, which push lush leafy growth at the expense of flowers and root development, and make plants more susceptible to pests and disease.
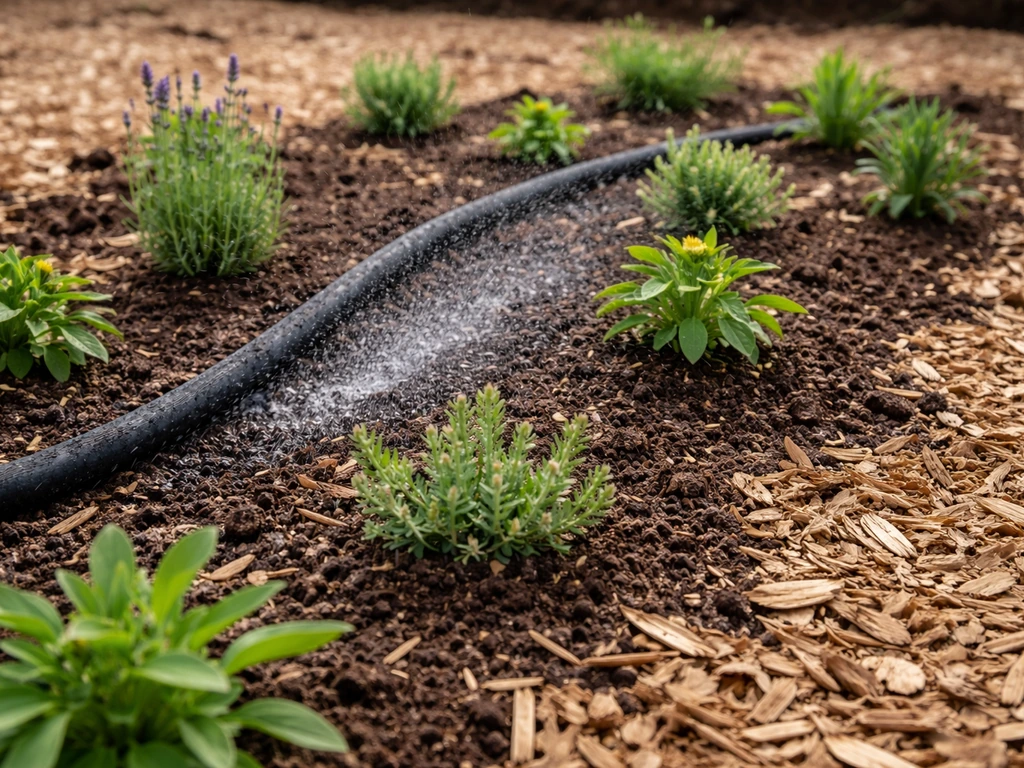
Mulching is one of the most valuable things you can do for a perennial bed, especially in the first year. Apply 2 to 3 inches of organic mulch (shredded bark, wood chips, or straw) around your plants, keeping it a few inches away from the crown to prevent rot. Mulch retains soil moisture, moderates soil temperature, suppresses weeds, and breaks down slowly to improve soil structure. In winter, a light mulch layer helps protect roots from freeze-thaw cycles, which is particularly important for marginally hardy plants in zones 5 and below.
Spacing matters more than most beginners expect. Overcrowding reduces air circulation and increases disease pressure, and it means plants compete for water and nutrients. Follow the spread dimensions on the plant tag: if a coneflower spreads 1.5 to 2.5 feet, space them at least 18 to 24 inches apart. Yes, the bed will look sparse in year one. By year two or three, you'll be glad you gave them room.
Ongoing seasonal care and keeping blooms coming
Once your perennials are established, maintaining them becomes much less work. The key tasks shift from establishment care to keeping them productive, healthy, and attractive through the seasons.
Spring
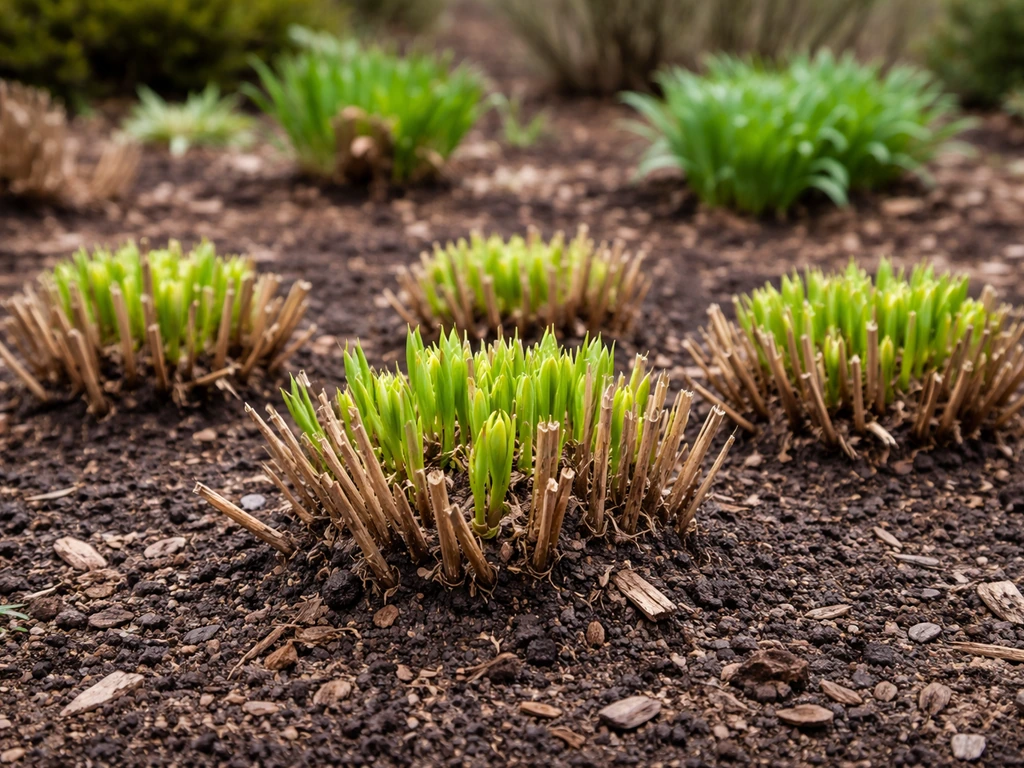
In early spring, resist the urge to cut everything back immediately. Wait until you can see new growth emerging from the base, then cut back last year's dead stems to just above the new growth, typically 3 to 6 inches above the soil. This timing matters because leaving stems over winter provides insulation for the crown and, for species like coneflower, the hollow dead stems can shelter native bees overwinter. Once new growth is visible, pull back any winter mulch from directly over the crown to prevent rot. Top-dress with a thin layer of compost around (not on top of) the plants.
Summer
Deadheading (removing spent flowers) extends the blooming period for many perennials by redirecting the plant's energy from seed production back into flower production. It's worth doing for coneflowers, black-eyed Susans, and salvia. For plants like ornamental grasses or coneflowers you want to self-seed or provide winter interest, skip deadheading and let the seed heads develop. Monitor for pests (aphids, Japanese beetles) and signs of fungal disease (powdery mildew, rust) and address them early before they spread.
Fall
Fall is actually a great time to add new perennials to your garden, divide overcrowded clumps, and do light cleanup. Cut back any stems that are diseased or pest-damaged to prevent problems from overwintering. Leave healthy stems and seed heads standing on most plants; Purdue Extension guidance confirms that leaving tops over winter is often preferable for plant health, and it provides wildlife value. Apply a 2 to 3 inch mulch layer over the bed after the ground has cooled but before it freezes, especially for newly planted perennials in colder zones.
Winter
For most hardy perennials in their established zones, winter care is minimal. The mulch layer you applied in fall does most of the work. In zones 3 to 5 with newly planted or marginally hardy perennials, an extra layer of straw or evergreen boughs after the ground freezes adds insurance. Check in late winter or early spring for frost heaving (roots pushed up by freeze-thaw cycles) and gently press any lifted plants back into the soil.
Common problems and how to fix them
Most perennial problems fall into a handful of categories, and most of them are fixable once you know what you're looking at.
- Poor germination from seed: The most common causes are seeds that weren't cold-stratified when they needed to be, soil that dried out during germination, or seeds sown too deep. Most perennial seeds need only a light covering of soil, barely a quarter inch. Review the specific stratification requirements for your variety and try again.
- No flowers in year one: This is normal for seed-grown perennials and common for transplants that put their energy into root establishment. Don't panic. Year two is almost always when they perform.
- Leggy or floppy growth: Usually caused by insufficient sunlight or too much nitrogen fertilizer. Move plants to a sunnier spot (in fall) or cut back on fertilizing. Pinching back tall plants by one-third in late spring can encourage bushier, sturdier growth.
- Plants not returning in spring (winter kill): Check for waterlogged soil, which is the most common culprit. Also consider whether the plant was truly rated for your hardiness zone, and whether it had adequate mulch protection. Marginally hardy plants in zone edge conditions need extra care.
- Yellowing leaves or stunted growth: Could be overwatering, underwatering, compacted soil, or nutrient deficiency. Do the two-inch soil moisture test first. If moisture isn't the issue, check drainage and soil compaction.
- Powdery mildew or fungal spots: Improve air circulation by thinning overcrowded plants and watering at the base rather than overhead. Remove affected foliage and dispose of it (don't compost it). Choose mildew-resistant varieties next time.
- Aphids or other soft-bodied insects: A strong stream of water knocks them off most plants. Insecticidal soap spray handles persistent infestations without harming beneficial insects when used carefully.
Planning your perennial bed and getting started
The most important step in planning a perennial bed is keeping it manageable. A 4-by-8 foot bed with five to seven well-chosen varieties is far more satisfying to maintain than an ambitious 20-foot border that becomes overwhelming. Start small, learn what works in your specific conditions, and expand from there.
When selecting plants for a bed, think about layering by height (taller plants at the back, shorter ones at the front), staggering bloom times so something is always flowering from spring through fall, and mixing textures and foliage shapes so the bed looks interesting even between bloom cycles. A simple combination of coneflower (mid-height, summer blooming), lavender (low and fragrant, early summer), and a panicle hydrangea at the back (tall, late summer) gives you structure, fragrance, and a long season of interest with minimal maintenance.
If you're drawn to more informal, naturalistic plantings, perennials mix beautifully with wildflowers, and many of the same establishment principles apply across both styles of planting. When you learn how to grow wildflowers, you can apply the same site, soil, and establishment principles to create a colorful, low-maintenance planting.
Your simple starter checklist
- Choose 3 to 5 perennial varieties rated for your hardiness zone and matched to your sun and soil conditions.
- Test your drainage with a hole-and-water test before planting anything.
- Amend the soil with 2 to 4 inches of compost worked into the top 12 inches.
- Decide on your propagation method: seed (for budget and variety), nursery transplants (for reliability), or division (if you have a source).
- If starting from seed, check stratification requirements and begin the cold stratification process in late winter or sow outdoors in fall.
- Plant in early spring or early fall, at the correct spacing per plant label.
- Water deeply after planting and monitor soil moisture 2 inches down throughout the first season.
- Apply 2 to 3 inches of mulch around (not on) the crowns.
- Skip heavy fertilizing in year one; let the compost do the work.
- In fall, mulch newly planted perennials for winter protection and leave healthy stems standing.
- Be patient: expect modest growth in year one and full performance in years two and three.
Growing perennials is genuinely one of the most rewarding things you can do in a garden. The upfront investment of time and care in year one builds something that gets easier and more beautiful every year after. Get the basics right, be patient with the timeline, and you'll have a bed that pays you back season after season with almost no replanting required.
FAQ
How deep should I plant perennial seeds compared to transplants?
Use the seed packet as the authority, but as a general rule, perennial seeds are planted shallowly (often a light covering only). For transplants, set the crown at the same height it was in the pot, not deeper, and avoid burying crowns under mulch or soil because that increases rot risk.
Why aren’t my perennial seeds germinating even though I kept them moist?
Cold stratification timing is the most common culprit, also light requirements for certain species (some need light to germinate). Check that the seeds received the correct stratification temperature window and that the medium stayed evenly damp, not soggy, during that period.
Can I grow perennials from seed in containers on a balcony or patio?
Yes, but focus on plants that can handle your container size and drainage. Use a large pot with real drainage holes, keep the container from drying out in heat, and plan for winter protection in colder climates since container roots freeze faster than in-ground roots.
What’s the easiest way to tell if my soil drains too slowly for perennials?
Besides a drain-time test, watch how the area behaves after heavy rain. If water stands longer than a few hours or puddles repeatedly, choose raised beds or amend with compost plus extra grit, then re-test before planting.
How often should I water newly planted perennials during the first month?
Instead of following a calendar, check moisture consistently. If the top few inches dry out quickly or wilt appears during hot afternoons, water more frequently in smaller, thorough doses until roots establish. Once you see steady new growth, taper toward deeper, less frequent watering.
Should I fertilize perennial seedlings and young plants?
Usually not at high rates. Many young perennials do best with compost or a light feeding only if growth looks pale and slow, and if you fertilize, use a balanced product at a reduced dose to avoid encouraging soft growth that invites pests and mildew.
When should I deadhead perennials, and when should I leave seed heads?
Deadhead after the first flush to encourage additional blooms, but leave seed heads on plants where you want winter structure or self-seeding. If you want wildlife value, keep some seed heads until late fall, then tidy only if needed to prevent unwanted spreading.
Is it safe to cut back perennials in winter?
For most herbaceous perennials, leave stems over winter to protect crowns and support overwintering habitat. If a plant has disease or you see obvious rot, remove only the affected parts, discard debris, and avoid cutting healthy plants right before freeze-thaw cycles.
Why do my plants heave out of the ground in spring?
Frost heaving often happens when the soil repeatedly freezes and thaws, combined with loose soil contact around roots or insufficient mulching. Press lifted plants back in place gently, firm the soil around them, and consider a thicker mulch layer for marginally hardy varieties.
What’s the best spacing for a perennial bed if I’m unsure about the plant’s mature size?
Start with the spread listed on the tag, then add a safety buffer if your conditions are especially rich or you see plants growing larger in your area. Overcrowding usually shows up as poor airflow and faster disease pressure by year two or three, so under-spacing is harder to fix later than planning extra room.
Do I need to rotate or replace perennials in a bed over time?
Many perennials can stay for years, but clump-formers often decline if they become crowded. Plan on dividing every few years (commonly every 3 to 5 for many species), and if a bed develops persistent problems in the same spots, consider replacing rather than repeatedly replanting.
Next Articles

How to Grow Wildflowers: Step-by-Step Guide for Success
Step-by-step how to grow wildflowers from seed to bloom with site prep, sowing, watering, and troubleshooting for any sp
Floret How to Grow Ranunculus: Step-by-Step Guide
Step-by-step Floret-style ranunculus guide: corm prep, planting, watering, frost care, troubleshooting, and harvest for
How to Grow Your Own Wedding Flowers Step by Step
Step-by-step guide to grow bouquet-ready wedding flowers, from planning and sowing dates to harvesting, conditioning, an