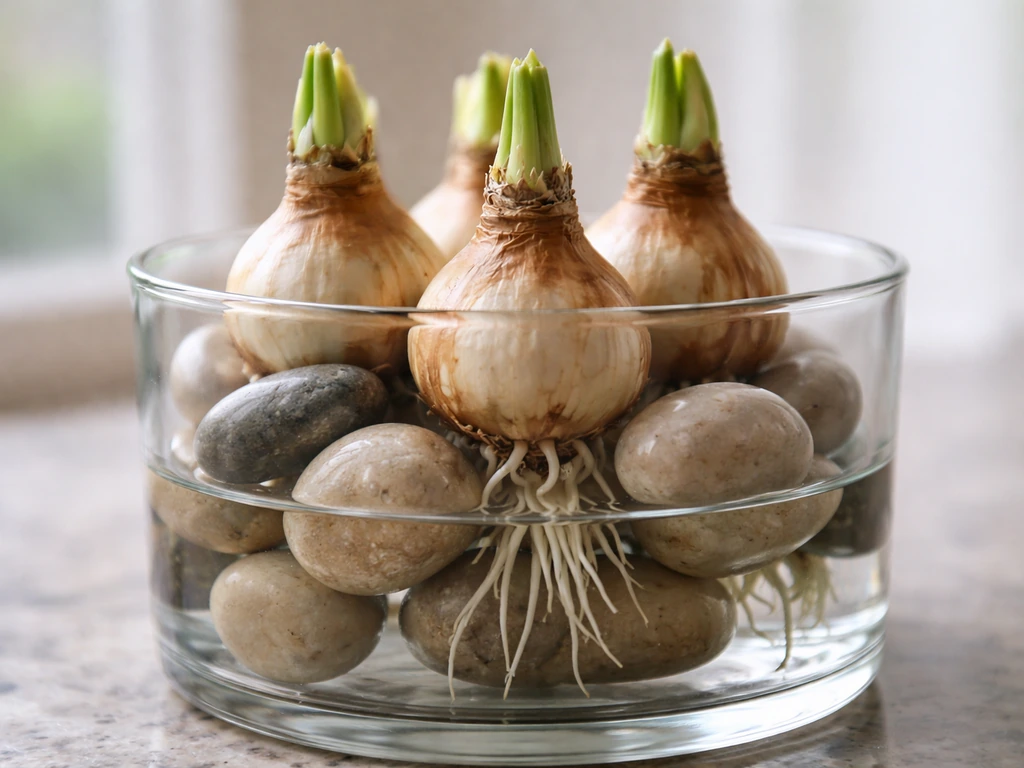
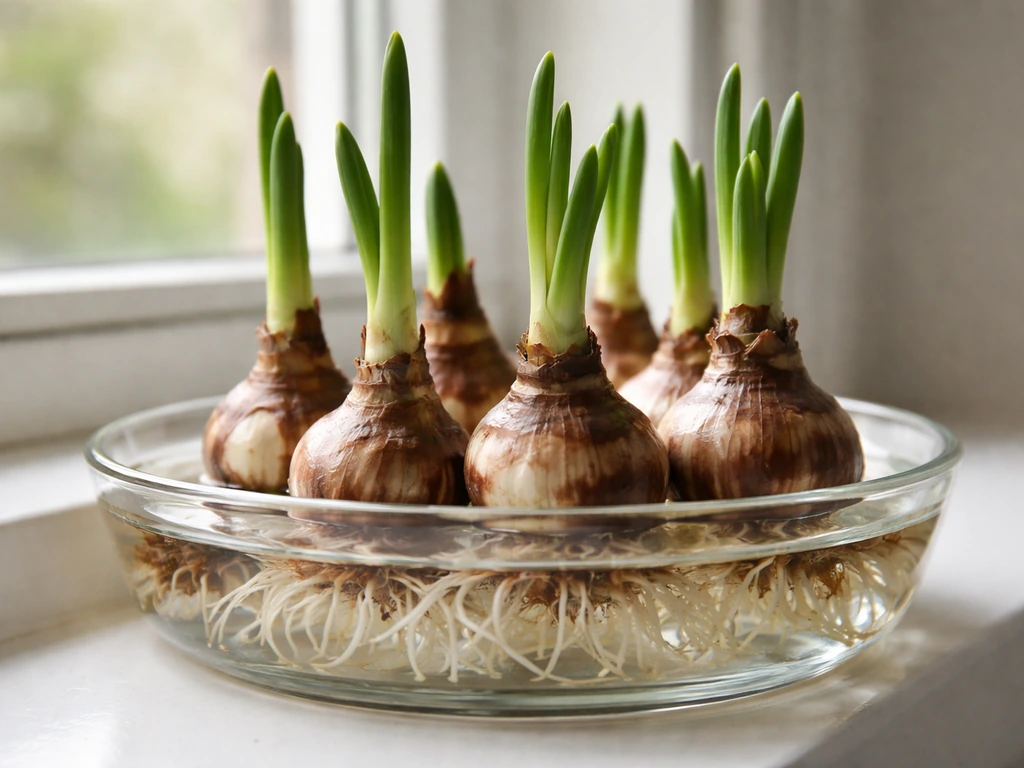
Set your paperwhite bulbs on top of a layer of rocks in a shallow container, fill with water until it just kisses the base of each bulb, and you're basically done. The whole trick is keeping roots wet while the bulb itself stays dry. As long as you nail that water level, you'll have fragrant blooms in about 4 to 6 weeks with almost zero effort.
How to Grow Paperwhites in Rocks: Step-by-Step Guide

James Holloway
22 May 2026

Why paperwhites work in rocks (and what you'll need)
Rocks do two things well: they hold the bulbs upright without soil, and they let water sit below the bulb while roots grow down into it. Paperwhites are one of the only bulbs that genuinely thrive with this method because they don't need a cold chilling period before they'll bloom. That means you can set them up on a windowsill in October and have flowers by Thanksgiving. No garden, no soil, no special equipment required.
Here's everything you need to get started:
- Paperwhite bulbs (fresh and firm)
- A shallow waterproof container with no drainage holes, at least 3 to 4 inches deep
- Rocks, pebbles, or stones (more on which kinds below)
- Room-temperature water
- A bright spot away from direct afternoon sun
That's it. No potting mix, no fertilizer, no fuss. The simplicity is exactly why this method is so satisfying for beginners and so popular as a holiday project.
Choosing bulbs and timing for bloom
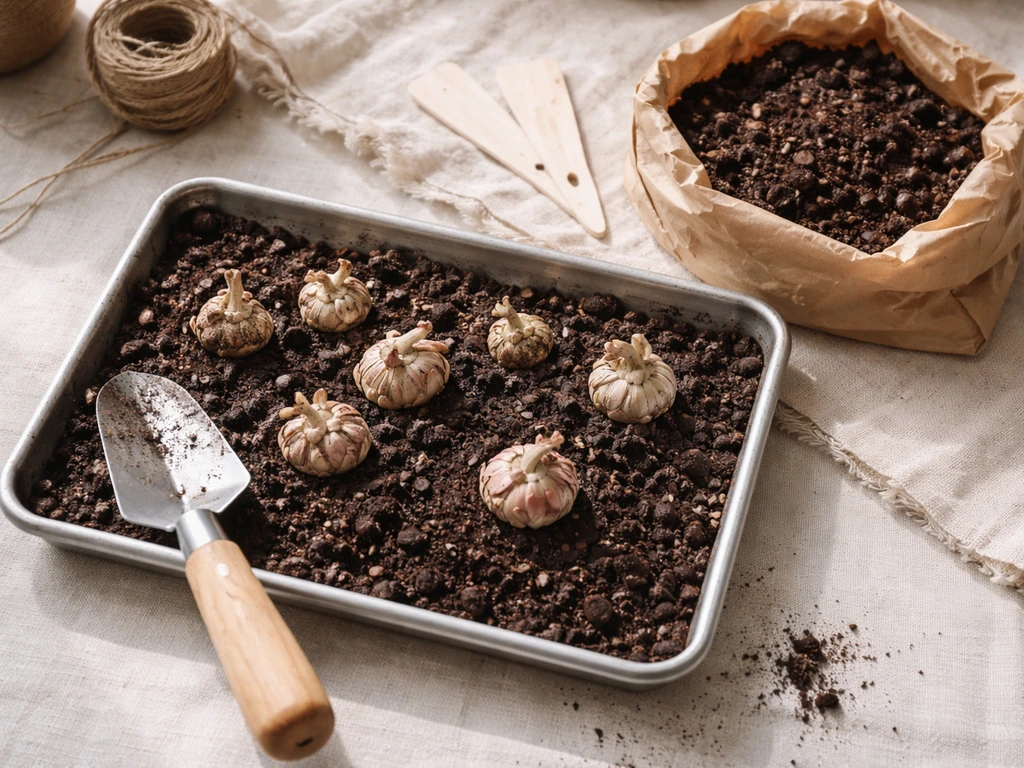
Start with the best bulbs you can find. You're looking for bulbs that are firm all the way through when you give them a gentle squeeze. If any part feels spongy or soft, skip it. Blemish-free outer skin is another good sign. Soft, mushy spots on the base are especially bad news since that's where basal rot starts. Buying from a reputable bulb supplier rather than a discount bin makes a real difference here.
For timing, paperwhites bloom roughly 4 to 6 weeks after you plant them, though some sources put it closer to 3 to 5 weeks if your house is warm. PlantTalk Colorado also notes that paperwhites are forced for indoor bloom from December to March and typically bloom about 4 to 8 weeks after potting or starting forcing 1322. If you want blooms for a specific date, count back from that date and plant accordingly. Because there's no chilling requirement, you can start them any time from mid-October onward. One of my favorite tricks is staggering plantings two weeks apart starting in October. You'll get a steady parade of blooms indoors from Thanksgiving all the way through late March.
One thing worth knowing before you invest too much hope in keeping these bulbs: paperwhites are essentially single-use when forced indoors. Getting them to rebloom is genuinely difficult, and if it happens at all outdoors, it can take up to three years. Most growers compost them after the flowers fade, and there's nothing wrong with that approach.
Picking and prepping rocks, stones, and containers
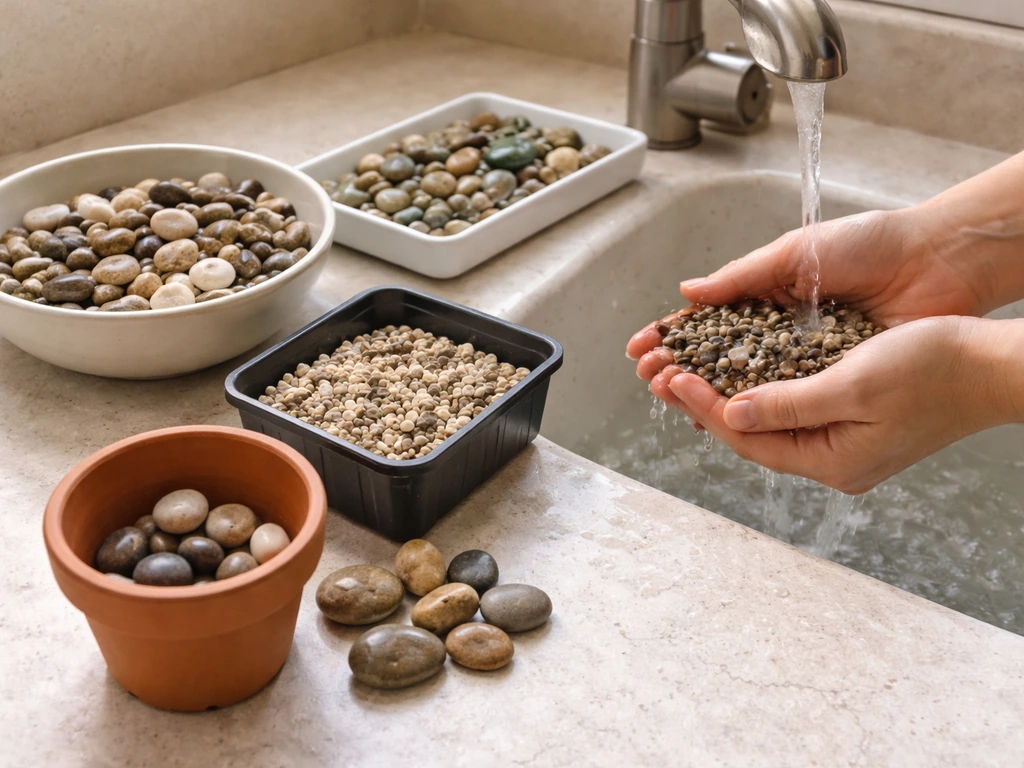
For rocks, you want something with a little texture and enough weight to actually anchor the bulbs. River pebbles, decorative gravel, tumbled stones, and aquarium gravel all work well. Aim for stones that are roughly half an inch to one inch in diameter. They're small enough to pack tightly around the bulb base but large enough that water can move freely between them.
What to avoid: very fine sand or tiny gravel that compacts too tightly and restricts airflow around the roots. Avoid anything with sharp edges that could damage the root plate. Avoid stones that have been treated with dyes or chemicals unless they're specifically labeled safe for plants and water.
For containers, choose something with no drainage holes so you can control the water level precisely. Glass containers are especially satisfying because you can see the roots growing and monitor the water level without tipping anything over. A low glass bowl, a wide-mouthed vase, or even a ceramic cachepot all work. The container should be deep enough to hold 2 to 3 inches of rocks plus the bulb, with the top of the bulb sitting at or near the rim.
Before planting, rinse your rocks to remove dust and debris. If you're reusing rocks from a previous season, soak them in a diluted bleach solution (about one part bleach to nine parts water) for 10 minutes, then rinse well. This kills any lingering mold spores or fungal residue.
Step-by-step planting and water level
This is the heart of the whole process, and the step where most people either get it right or accidentally set themselves up for rot. Follow this carefully.
- Add a 2-inch base layer of rocks to your container.
- Place your bulbs on top of the rock layer with the pointed growing tip facing straight up and the flat root plate facing down.
- Pack more rocks around the sides of each bulb to hold it upright. The bulbs should feel stable, not wobbly. Leave the top half of each bulb exposed above the rocks.
- Slowly pour room-temperature water into the container until the water level reaches just below the base of the bulbs. The goal is for water to touch the very bottom of the root plate but not climb up onto the bulb body itself.
- Double-check by looking at the water line. If any part of the bulb above the root plate is sitting in water, carefully tip out a little water until the level drops below it.
- Place the container in a cool, dark spot (around 45 to 50°F) for 2 to 3 weeks to encourage strong root development before the stems emerge. A garage, basement, or even a dark closet works.
- Once roots are visible and green shoots are an inch or two tall, move the container to a bright spot with indirect light.
The cool, dark rooting phase is optional if you're short on time or space, but it genuinely produces stronger, more anchored plants. Skipping it means you'll often end up with taller, floppier stems. It's worth doing if you can manage it.
| What to do | What to avoid |
|---|---|
| Keep water level just below the bulb base | Let the bulb body sit in standing water |
| Pack rocks firmly around the bulb sides | Leave bulbs loose and unstable |
| Keep the top half of each bulb exposed | Bury the bulb completely in rocks |
| Start in a cool, dark spot to encourage roots | Put straight into a warm, sunny window |
| Use clean, rinsed rocks | Use chemically treated or very fine-grained gravel |
Light, temperature, and watering schedule
Once you move your bulbs out of the dark rooting phase, bright indirect light is your best friend. A spot near a window that gets morning sun or filtered daylight is ideal. Avoid harsh afternoon direct sun once the flowers open because it shortens bloom time. Cooler room temperatures (somewhere in the 60s°F) will help the flowers last longer, sometimes 1 to 2 weeks once fully open. The warmer and sunnier the spot, the faster the blooms come and go.
For watering, check the water level daily, especially once the stems are actively growing. Roots drink faster as the plant gets taller. Top up as needed to keep water just at the base of the bulb. You're not trying to soak the bulb or flood the container, just maintaining that steady just-below-the-base level. In dry indoor winter air, you may find yourself adding a splash of water every day or two. In cooler conditions, every 2 to 3 days might be enough. Let what you see guide you rather than following a rigid schedule.
Troubleshooting: rot, fungus, weak growth, and leggy stems
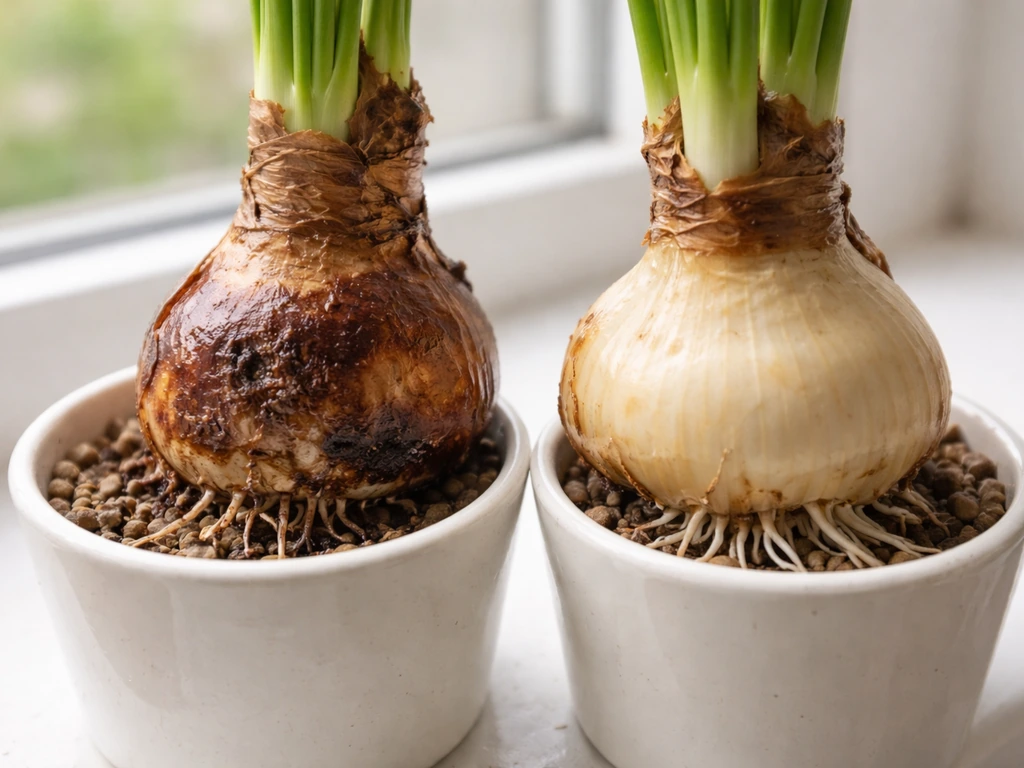
Rot and fungus
Basal rot is the most common serious problem with water-forced paperwhites. It starts at the root plate and works its way up through the bulb. Signs include a soft, mushy base, dark or dying roots, and sometimes a pinkish-white fungal growth on the bulb surface. The main cause is almost always the same: the bulb has been sitting in water rather than above it. If you catch it early and only one bulb is affected, remove that bulb immediately and rinse the rocks before continuing with the rest. If the rot is widespread, it's safer to start fresh with new bulbs and a clean container.
Weak or slow growth
If shoots are barely moving after 3 to 4 weeks, a few things could be going on. The bulbs may have been low quality to begin with (soft spots, lightweight, or older stock). The location may be too dark or too cold. Try moving the container to a slightly warmer, brighter spot and giving it another week before writing them off. Also check that the water level hasn't been dropping so low that the roots are completely drying out between checks.
Leggy and floppy stems
This is probably the most common complaint with indoor paperwhites, and it's usually caused by too much heat, too little light, or skipping the cool rooting phase. Stems reach for light and grow tall and weak instead of short and sturdy. A few things help: first, make sure the container is rotated every day or two so all sides face the light source equally. Second, if stems are already getting floppy, use bamboo skewers and soft twine to create a loose support ring around the cluster. Third, if you're planning future batches, do the cool dark rooting phase. It makes a noticeable difference in stem strength.
There's also a well-known trick where you replace the plain water with a diluted alcohol solution (about 5% isopropyl or rubbing alcohol diluted to around 4 to 5% with water) once the shoots are about an inch tall. Some growers swear it keeps stems shorter and sturdier. It doesn't affect bloom quality, and it's worth trying if leggy stems are a recurring frustration for you.
Finishing up: when to stop watering and what to do after bloom
Once the flowers are fully open, the blooms typically last 1 to 2 weeks before they start to fade. Keep the water level maintained during this time because the plant is still actively using moisture. When the flowers start to brown and drop, you can stop adding water and let the container dry out naturally.
After blooming, the honest truth is there's not much reason to try saving indoor-forced paperwhite bulbs. They've spent everything they had on that one indoor performance, and getting them to bloom again is genuinely hard. Most growers simply compost the spent bulbs and rocks at this point. If you want to try planting them outdoors in a warm enough climate (USDA zones 8 to 11), you can, but realistic expectations are important: it may take 2 to 3 years to see another bloom, if ever.
The better move is to plan ahead and stagger your next batch. If you started one container in late October, start another in mid-November. You'll have a continuous rotation of blooms through winter without any of the heartbreak of trying to revive tired bulbs. Growing paperwhites in rocks is one of those projects that's genuinely repeatable and reliably rewarding when you set up each batch correctly from the start. If you enjoy this method and want to explore variations, the same basic principles apply whether you're using a jar or a vase instead of a wide rock-filled bowl.
FAQ
Can I grow paperwhites in rocks if my container has a drainage hole?
It is still possible, but it defeats the main advantage, precise control of the water level. If you use a container with drainage, you will need a watertight inner vessel or a liner so water can sit below the bulb base without leaking out. Otherwise the water will drop too fast and roots may dry between checks, increasing rot risk and slowing growth.
How can I tell the correct water level without overfilling?
The goal is that water sits just at the bottom of the bulb base, roots in water, bulb itself above it. If you see any water climbing onto the bulb or pooling against the bulb’s skin, pour off a little and refill. A quick test after setup helps, mark the water line with tape or a marker on the container so you can return to the same level each day.
Do paperwhites in rocks need any fertilizer or plant food?
For typical indoor forcing, fertilizer is usually unnecessary. The bulb supplies what the plant needs for the 4 to 6 week cycle. Adding fertilizer can encourage excess soft growth and can make it harder to diagnose problems like rot, especially since the bulb should not be kept saturated beyond the root zone.
Is it okay to reuse the same rocks every year?
Yes, but you must clean them well and control any leftover moisture residues. After removing spent bulbs, rinse thoroughly, then soak in a diluted bleach solution for about 10 minutes and rinse again. Also inspect for sharp edges or dyed stones. If the rocks smell musty or feel slimy, discard them rather than trying to fix the issue.
What water should I use, tap versus distilled?
Tap water is fine for most people as long as you keep the water level consistent and do not let the bulb sit in water. If your tap water is very hard, extremely mineral-heavy, or you notice white crust forming on rocks, switch to filtered or distilled water to reduce buildup and keep the root zone cleaner.
Will paperwhites grow in rocks in complete darkness?
A dark, cool rooting phase helps, but complete darkness for the entire growth period is not the goal. Darkness is for strengthening early rooting, once you see active shoots, move to bright indirect light. If you keep them dark too long, stems may become weak and growth may stall.
How many bulbs can I plant in one rock-filled container?
Avoid overcrowding. Space bulbs so their bases and roots can access water without the bulbs touching each other’s skin for long periods. Good airflow between bulbs reduces rot risk. If bulbs are touching, reduce the number next batch or use a wider container.
My paperwhites are flowering early, sometimes in about 3 weeks. Is that a problem?
Early flowering usually means warmer indoor conditions or strong light, and it is not inherently harmful. The tradeoff is often shorter overall bloom life. If you want longer-lasting blooms, move the container to a cooler spot once flowers open and keep light bright but indirect.
What should I do if only one bulb starts rotting?
Remove the affected bulb immediately to stop spread and reduce the chance the container remains contaminated. Rinse the rocks, discard any mushy or compromised bulb material, then restart with the healthy bulbs. If rot has spread to multiple bulbs or you see fungal growth, it is safer to start fresh with clean rocks and a clean container.
Can I keep the same paperwhite bulb after it flowers and try to rebloom indoors?
Usually no, at least not reliably. Forced indoor paperwhites typically perform as single-use bulbs because the bulb is depleted. If you want another indoor cycle, plan a fresh batch rather than expecting repeat flowering from the same bulb.
What if the stems are leaning toward the window, even if I rotate the container?
Rotation every day or two helps, but stems can still become uneven if light intensity is very low. Move to a brighter spot with filtered daylight or morning sun. If you still need support, add a loose support ring (like skewers plus soft twine) early, before stems become fully floppy.
Next Articles
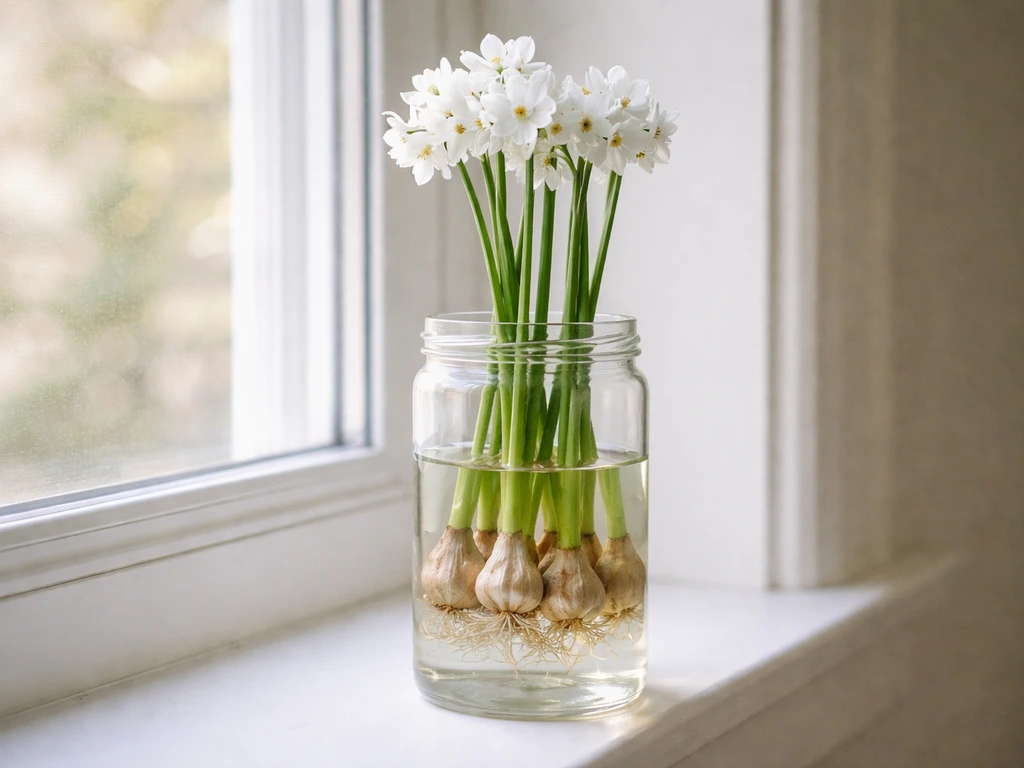
How to Grow Paperwhites in a Jar: Step-by-Step Guide
Step-by-step how to grow paperwhites in a jar with water level, light, and timing to get fast, straight blooms plus fixe
How to Grow Paperwhites Indoors: Step by Step Guide
Step-by-step indoor guide to grow paperwhites: bulb choice, planting in water or soil, care, timing, and flop prevention
Floret How to Grow Ranunculus: Step-by-Step Guide
Step-by-step Floret-style ranunculus guide: corm prep, planting, watering, frost care, troubleshooting, and harvest for