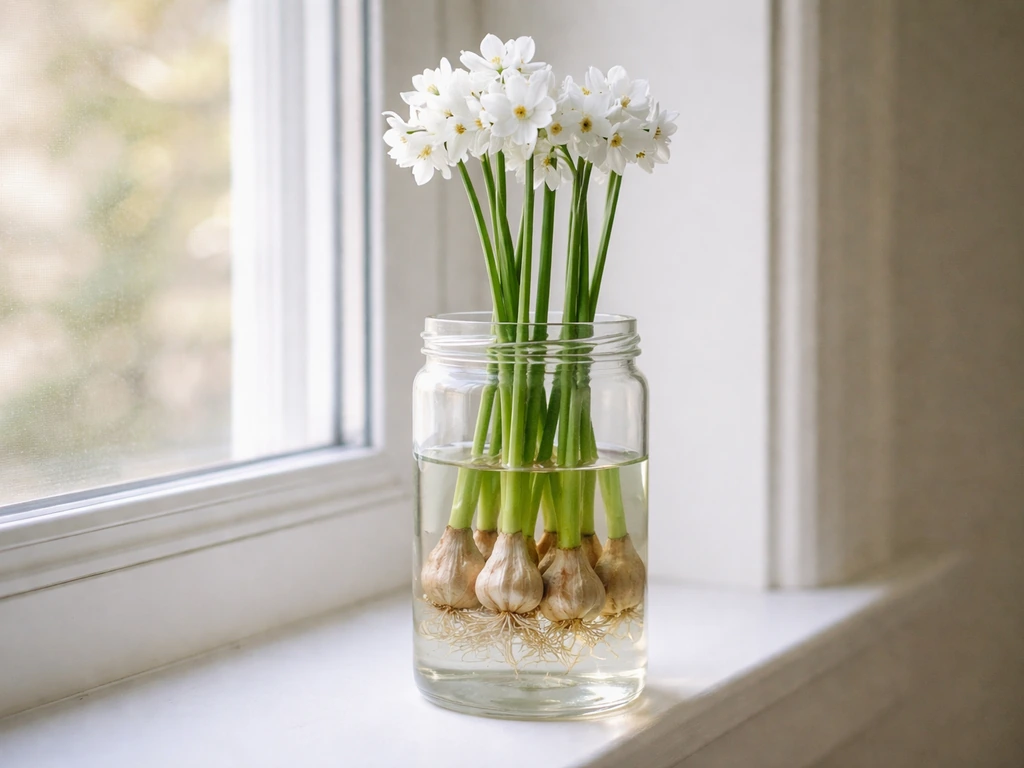
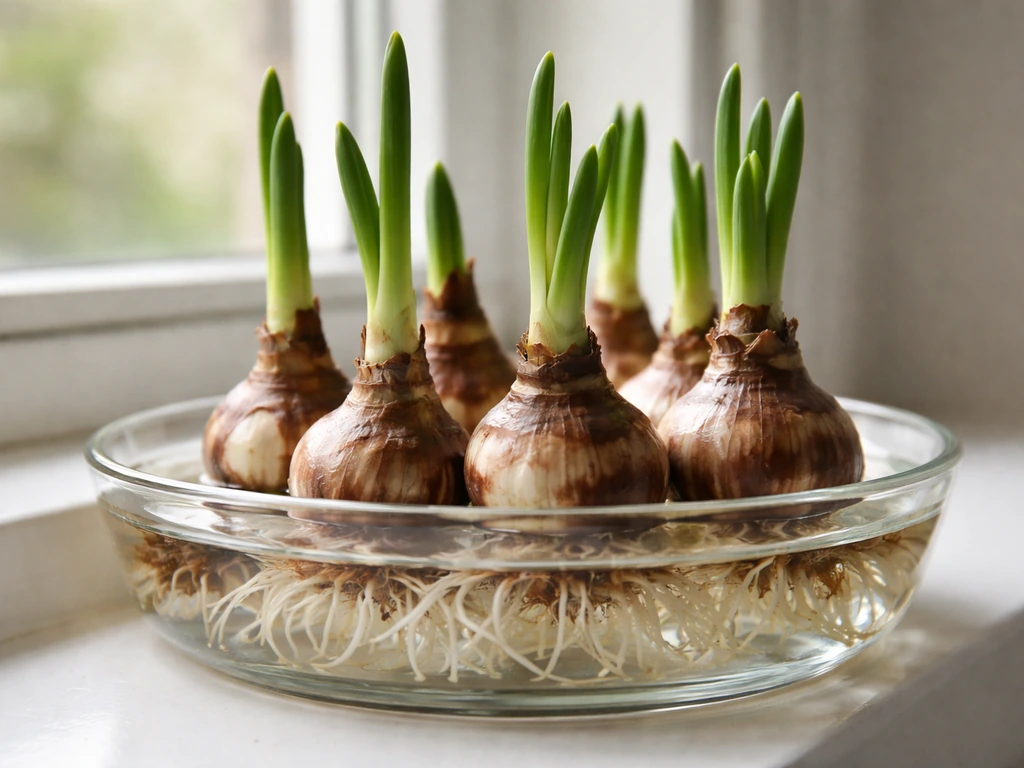
Fill a jar with a few inches of pebbles, nestle your paperwhite bulbs on top, add water just to the base of the bulbs (not over them), then set the whole thing somewhere cool and bright. In about four to six weeks you'll have flowers. That's genuinely it. The mistakes that trip people up are almost always about water level and light, not anything complicated, and once you understand those two things you'll get reliable blooms every single time.
How to Grow Paperwhites in a Jar: Step-by-Step Guide

James Holloway
13 May 2026
Best paperwhite varieties for jar forcing
If you just want blooms fast, start with 'Ziva'. It's the most widely available variety, it's one of the fastest from bulb to flower, and it produces the classic pure white clusters that look great in any jar setup. Most forcing guides default to 'Ziva' for a reason. The trade-off is the fragrance, which is strong and musky. If you love that, great. If you find it overwhelming, you're not alone.
The other variety worth knowing is 'Grand Soleil d'Or', which produces clusters of 10 to 20 small yellow-and-orange blooms per stem and has a sweeter, less musky scent than 'Ziva'. It also takes about four to six weeks to bloom after planting, so the timing is similar. For people who are sensitive to the classic paperwhite smell, 'Grand Soleil d'Or' is genuinely a better pick. Both are excellent for water-forcing in jars.
| Variety | Flower Color | Fragrance | Bloom Time After Planting | Best For |
|---|---|---|---|---|
| Ziva | Pure white | Strong, musky | 4–6 weeks | Speed, classic look, wide availability |
| Grand Soleil d'Or | Yellow with orange cup | Sweeter, lighter | 4–6 weeks | Fragrance-sensitive households, color variety |
What you need before you start
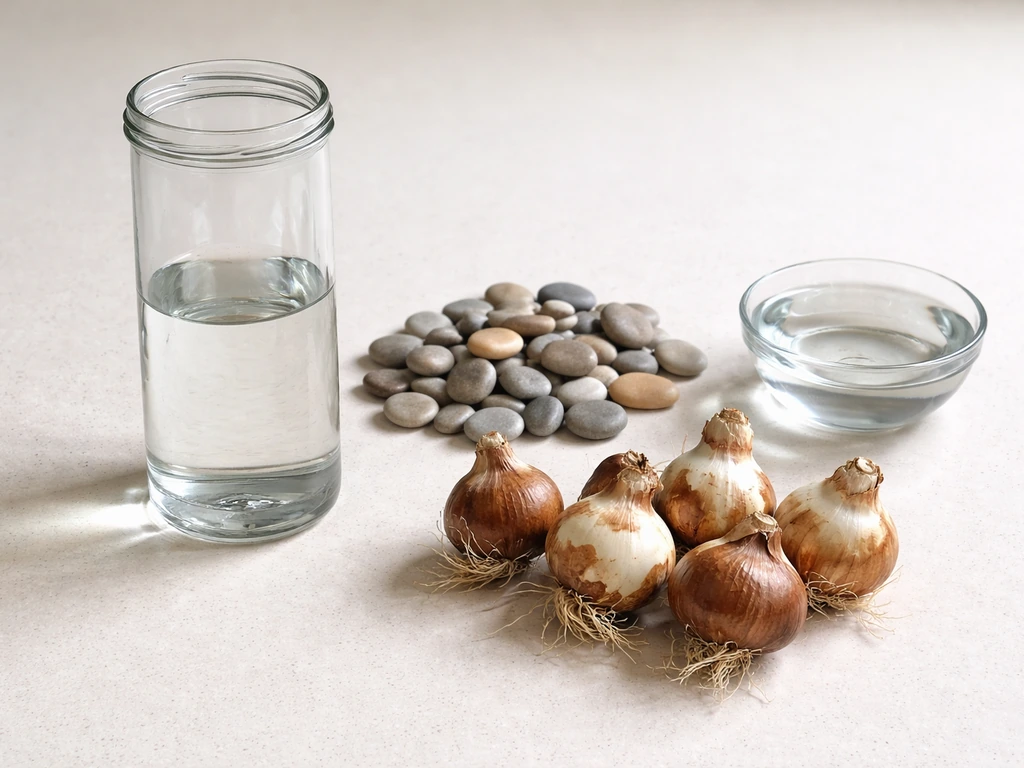
You don't need much, which is one of the best things about growing paperwhites in a jar. Here's what to gather before you start planting.
- A clear glass jar or vase: tall and narrow works best because it supports the stems as they grow. Aim for something at least 4 to 6 inches tall. A wide-mouth mason jar, a glass vase, or even a large drinking glass all work.
- Pebbles, river stones, marbles, or polished decorative stones: you need enough to fill the jar two to three inches deep. These anchor the bulbs and let roots grow down into the water below.
- Paperwhite bulbs: three bulbs fit comfortably in a standard wide-mouth jar. Buy the largest bulbs you can find since bigger bulbs produce more flowers.
- Clean water: tap water is fine. Room temperature is ideal.
- Optional but useful: a small amount of activated charcoal mixed into the pebbles helps keep the water clean and odor-free over the several weeks of forcing.
A note on container depth: paperwhites only need about two to three inches of root room below the bulb, so you don't need a deep jar. What matters more is that the jar is tall enough to support the leaves as they grow, since the foliage can reach 16 inches or more before the flowers open. A taller vessel keeps things tidy and helps prevent flopping later.
How to plant paperwhites in a jar, step by step
- Wash your jar and pebbles. This sounds fussy but clean stones keep the water from going murky. Just rinse them under the tap.
- Add two to three inches of pebbles to the bottom of the jar. This is the root zone, so don't skimp here.
- Place your bulbs on top of the pebbles, pointed side up. Pack them in close together without actually cramming them. Three bulbs in a standard mason jar looks full and flowers well.
- Tuck smaller pebbles or stones around the sides of the bulbs to hold them upright. You want the bulbs stable, not tipping over.
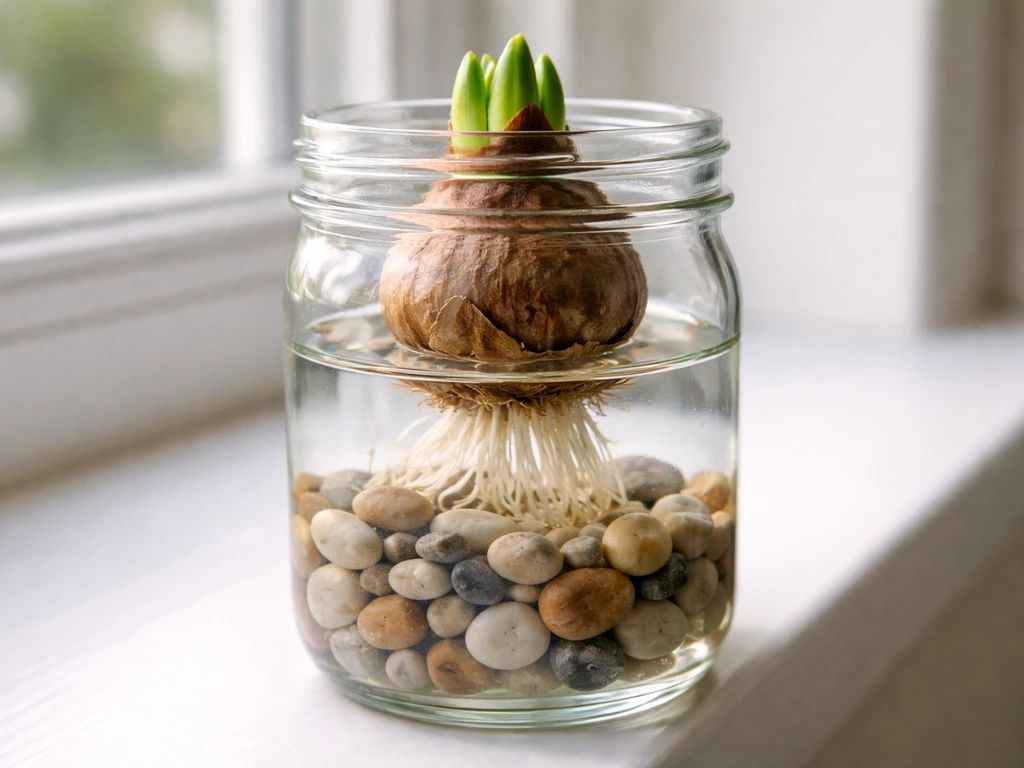
- Add water slowly until it just barely touches the base of the bulbs. The goal is to keep the basal plate (the flat bottom of the bulb) moist so roots can grow down, without submerging the bulb itself. Water over the bulb base causes rot.
- Move the jar to a cool, relatively dark spot for the first week or two while roots establish. A temperature of 50 to 60°F is ideal at this stage.
After a week or two you'll see roots growing down into the water and green shoots pushing up from the top of the bulbs. That's your signal to move the jar to a bright, sunny windowsill and let things take off.
Light, temperature, and water: the three things that make or break your blooms
Water level management
This is the single most important variable to get right. Keep water just touching the base of the bulb, not above it. As roots develop and grow longer, they'll reach down into the water in the pebble layer. Check every two to three days and top up as needed, but always bring it back to that same level: just at the base, never over it. If the water looks cloudy or smells off, drain it completely and refill with fresh water. If you added activated charcoal in the beginning, you'll have less of this problem.
Light
Once shoots are a couple of inches tall, move the jar to your brightest windowsill. South or east-facing windows work well. Paperwhites that don't get enough light stretch toward the nearest source and end up tall, weak, and floppy. Rotating the jar a quarter turn every day or two keeps growth even and stems straighter. If your indoor space is dark in winter, this step genuinely matters.
Temperature
Cool conditions slow the growth down just enough to produce shorter, sturdier stems. The sweet spot while roots are forming is 50 to 60°F. Once the buds are visible, keeping the room between 60 and 65°F rather than a warm 70°F+ will extend the bloom period and reduce the flopping problem. Avoid placing the jar near heating vents, radiators, or the top of the refrigerator. Those spots are too warm and will push rapid, weak growth.
One more thing: don't store fruit near your forcing jar if you can help it. Ripening fruit releases ethylene gas, which can interfere with flower development. This sounds like a small detail but it's worth knowing if you're wondering why a batch underperformed.
How to time your blooms and keep them coming
Paperwhites take roughly four to six weeks from planting to first bloom, though some sources put the range at six to ten weeks depending on conditions and variety. 'Ziva' is on the faster end. If you want flowers by a specific date, count back five to six weeks and plant then. For holiday blooms around late December, that means planting in mid to late November. If you’re aiming for Christmas blooms, plan your planting for mid to late November and stagger jars every couple of weeks.
The easiest way to have a continuous display through winter is to stagger your plantings. Start one jar, then plant a second jar two weeks later, and a third two weeks after that. Each round gives you about two weeks of blooms, so with three staggered batches you can have flowers from roughly late November through January. This is one of the genuinely clever things about forcing paperwhites: bulbs are cheap, the setup takes five minutes, and you just keep going.
If you're also interested in growing paperwhites outdoors or in rocks rather than jars, the timing principles are similar but the setups differ. Forcing in rocks uses a shallower, wider container and the same water-level logic applies. For holiday-specific timing, it's worth planning your first planting date carefully since a few days either way at this scale really does shift when you see flowers.
What to do when things go wrong
Floppy, tall, or leaning stems
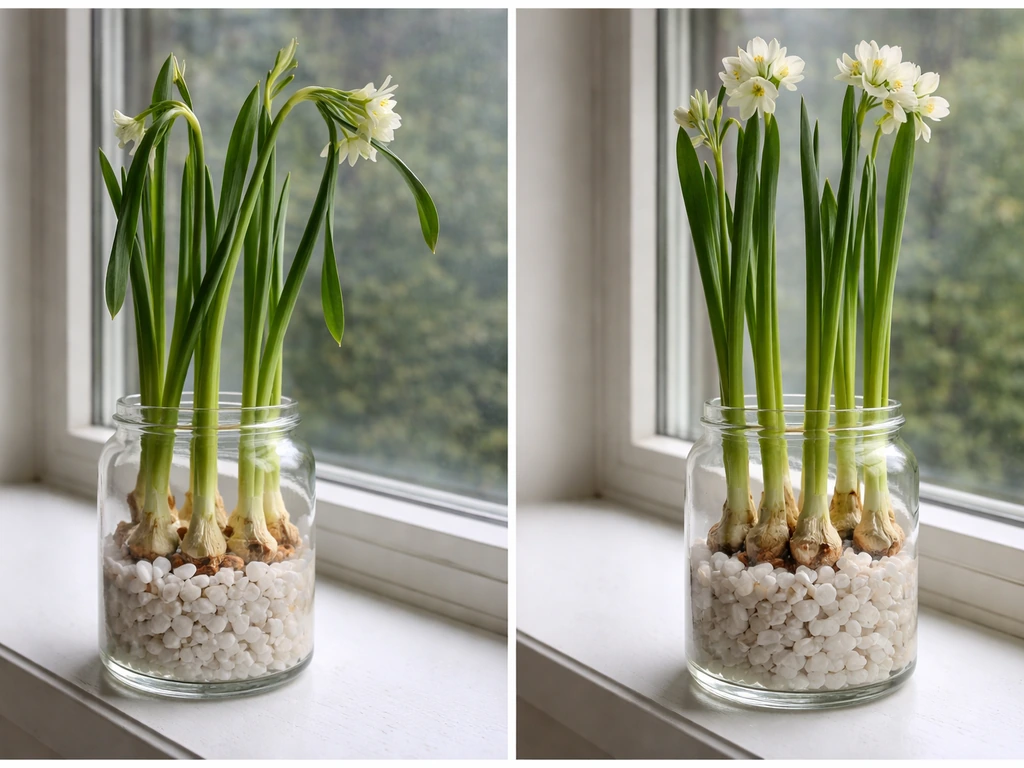
This is the most common complaint with forced paperwhites, and it almost always comes down to two things: too little light or too much warmth. If your stems are growing fast and flopping over, move the jar to a brighter spot immediately and, if possible, to a cooler room. Stems that have already flopped can be tied loosely together with a piece of twine or ribbon, which actually looks nice in a tall glass vase. Prevention is better though: bright light from the start and cool temps below 65°F will keep growth compact.
Yellowing leaves or rotting at the base
Yellow leaves that appear early usually mean the water level is too high and the bulb is sitting in water rather than just touching it. Drain the jar, check the bulb, and refill with water at the correct level. A little yellowing on the outer bulb skin is normal, but if the base of the bulb is soft or mushy, that bulb has rotted and won't recover. Remove it and let the remaining bulbs continue.
Mold or cloudy water
Murky water and surface mold are common in the warm indoor environment. Drain and replace the water completely, and add a small pinch of activated charcoal to the pebble layer if you didn't already. Make sure the jar isn't sitting somewhere warm and humid, like directly above a dishwasher or near a sink. Changing the water every week or so once you notice cloudiness keeps things clean.
Slow growth or no blooms
If your bulbs have been sitting for more than eight weeks with little progress, a few things could be at play. Very cool conditions (below 50°F) will slow rooting significantly. Bulbs that were old or poorly stored before you bought them may also underperform. No fertilizer is needed for forcing since the bulb itself contains all the energy for one bloom cycle, so adding plant food won't fix a slow bulb. The best fix is to check the temperature and water level, make sure the roots have something to reach into, and be patient. If nothing happens after ten weeks, chalk it up to a bad bulb and start fresh.
During bloom and what to do after
Once the flowers open, move the jar away from direct harsh sunlight to help the blooms last longer. Cool room temperature, around 60 to 65°F, extends the display. Each round of flowers lasts about two weeks. You can move the jar to a cool spot overnight (an unheated garage or porch that doesn't freeze works) to stretch the bloom time a bit further.
After flowering, paperwhites won't bloom again indoors. Unlike tulip or hyacinth bulbs that can sometimes be planted out to recover and bloom in future seasons, paperwhites forced in water have used up their stored energy and won't perform well even if you try to save them. The right move is to compost the bulbs once the foliage has died back. Some gardeners in warm climates (USDA zones 8 to 11) do plant spent paperwhite bulbs outdoors where they may eventually naturalize, but for most people in cooler zones, discarding and buying fresh bulbs next season is the practical path. Paperwhite bulbs are inexpensive enough that starting fresh every year isn't a hardship, and new bulbs give you reliable, strong results every time.
FAQ
Can I grow paperwhites in a jar without pebbles?
Yes, but you need a way to keep the bulb base from sitting in free water. Using pebbles (or similar inert stones) creates the buffer so water is only touching the base while roots grow down into it. If you skip stones, use a jar with a narrow mouth or a bulb support so the bulb stays dry above the base, and check the water level more often because it’s easier to over-soak.
How low can the water go before it stops working?
Water can be lower than you think, as long as it still touches the bulb base. If the base is fully above the waterline, roots may not reach reliably, and growth can stall. When you check every two to three days, aim to keep the same “just touching” height rather than a deeper pool, and refill gradually so you don’t accidentally flood the bulb.
Should I rinse the bulbs before planting?
If the bulbs look dusty or dry, you can gently wipe them, but don’t soak them in water ahead of time. Paperwhites are forcing bulbs, and pre-soaking often leads to uneven rooting or early rot, especially if the bulb base stays wet longer than intended. Plant them dry, then rely on the jar water level once they start forming roots.
What size jar works best for paperwhites?
Choose a jar that is tall enough for leaves to rise without collapsing, even though the root zone only needs about two to three inches. A wider jar also makes it easier to add pebbles evenly and keep bulbs from tipping, but overly crowded bulbs can compete and lean. A practical rule is to space bulbs so leaves can fan out, not braid tightly around the neck.
How many bulbs can I plant in one jar?
It depends on the jar diameter, but avoid stuffing them so tightly that the bulbs touch or leaves press against each other as they grow. For most household jars, two to four bulbs is usually manageable. If you pack more, expect more leaning and a higher chance of uneven light, which can make stems flop sooner.
Why do my paperwhites smell strong even when I’m growing “Grand Soleil d’Or”?
“Grand Soleil d’Or” is typically less musky, but scent intensity still varies by room temperature and airflow. Warmer rooms (especially near heat sources) can make fragrance feel stronger and can also speed up weak growth. Move the jar to a cooler spot around 60 to 65°F once buds appear, and give it indirect airflow rather than sealing it in a small, warm area.
Do I need to fertilize paperwhites in a jar?
No. Forcing relies on the bulb’s stored energy for the single bloom cycle. Fertilizer won’t fix slow rooting caused by incorrect temperature or water level, and it can worsen murky water problems. If you want a “cleaner” setup, focus on correct water contact and occasional water replacement, plus activated charcoal when appropriate.
How can I prevent mildew or mold if the water keeps getting cloudy?
Start by keeping warmth and humidity low, since mold often comes from a warm indoor microclimate. Replace the water completely once you notice cloudiness, and if you didn’t begin with activated charcoal, add a small pinch to the pebble layer. Also avoid placing the jar right above sinks, dishwashers, or other wet areas, where condensation keeps surfaces damp.
What’s the best way to handle a stem that has already flopped?
If stems tip after stretching, move the jar immediately to brighter light and, if possible, a cooler room. For already-flopped stems, tie them loosely with twine or ribbon so you don’t crush the delicate flower stems. Loosely supported stems can look intentional in a tall glass, but severe bending may not fully correct.
My bulbs develop yellow leaves early. Is that always rot?
Early yellowing is often from water level being too high, meaning the bulb base is sitting in water. Drain, check that the bulb base is only just touching the water, and refill at the correct height. If the bulb base feels soft or mushy, that indicates rot, and that bulb should be removed so healthy bulbs can continue.
How do I extend bloom length once flowers open?
Cooler temperatures extend the display. Keep the room around 60 to 65°F and move the jar away from harsh direct sun once blooms are open. If you can, overnight cooling to a non-freezing porch or garage can slow the decline, but avoid freezing conditions and sudden exposure to very warm indoor spots.
Can I replant forced paperwhites outdoors after they bloom?
Sometimes in mild climates, paperwhite bulbs may survive outdoors, but success depends heavily on your zone, soil drainage, and whether the bulbs have enough time to re-establish energy reserves. In cooler regions, most gardeners discard after blooming because indoor-forced bulbs rarely perform reliably again. If you try outdoors, plant in well-drained soil and avoid areas that stay wet in winter.
My bulbs have sat for a long time with no progress. What should I check first?
First verify the two variables that control most failures: water contact (base just touching water) and temperature (not too cold, ideally around 50 to 60°F while roots form). Then confirm roots actually have a path into the water, meaning the pebble layer is deep enough and the bulb is stable. Fertilizer generally won’t help, so don’t add it to “jump start” the bulbs.
How do I schedule plantings for specific holiday dates?
Count back from your target date by about five to six weeks, then plant in mid to late November for late-December blooms. For a smoother display, start a first jar, then plant additional jars about two weeks apart. This staggers peak bloom so you’re less likely to end up with everything opening at once or missing a narrow window.
Citations
Penn State Extension notes the classic paperwhite ‘Ziva’ has pure white flowers and a strong musky fragrance, and also mentions some varieties can be shorter/sturdier but that others may need support once in full bloom.
https://extension.psu.edu/enjoying-paperwhite-narcissus-in-winter
Fine Gardening describes ‘Ziva’ as well-suited to forcing indoors.
https://www.finegardening.com/plant/ziva-paperwhite-narcissus
Rotteveel Bulb Company states average forcing time for paperwhites is about 4–6 weeks after planting and gives ‘Ziva’ as a commonly used indoor forcing variety.
https://www.rotteveelbulb.com/products/tazetta/indoor-narcissus/indoor-narcissus-paperwhite-ziva
A.D.R. Bulbs describes ‘Paperwhite Ziva’ as having strong fragrance and rapid bloom timing for indoor use, and gives water-forcing guidance (“keep water just touching the bulb base” for water culture).
https://www.adrbulbs.com/flowerbulbs/Narcissi-tazetta-Paperwhite-Ziva
A.D.R. Bulbs states ‘Grand Soleil d’Or’ is primarily suited for indoor forcing, blooms about 4–6 weeks after planting, and produces clusters of 10–20 small scented blooms per stem.
https://www.adrbulbs.com/flowerbulbs/Narcissi-Tazetta-Paperwhite-Grand-Soleil-d-or
Iowa State Extension notes that forcing varieties vary in fragrance; it explicitly states ‘Grand Soleil d’Or’ is less musky/more scented than many other paperwhites (it lists musky fragrance for many varieties and separately names ‘Grand Soleil d’Or’).
https://yardandgarden.extension.iastate.edu/how-to/forcing-paperwhite-narcissus-bulbs
University of Missouri Extension emphasizes paperwhites are among the easiest bulbs to force indoors during winter and ties best results to keeping them cool after planting.
https://extension.missouri.edu/news/paperwhites-just-add-water-for-instant-spring
BBC Gardeners World notes ‘Paperwhite Ziva’ can be forced indoors in a vase/shallow bowl on top of a layer of gravel and references its strong fragrance.
https://www.gardenersworld.com/plants/narcissus-paperwhite-ziva/
Wegmans Nursery states paperwhites bloom about 5–7 weeks after planting and calls out that they are grown in containers/pots for indoor enjoyment.
https://www.wegmansnursery.com/care-guides/bulbs/paperwhites
Chicago Botanic Garden recommends a tall, narrow glass container/vessel setup with a layer of clean stones (river stones/polished pebbles, marbles, etc.) and indicates that plant placement can be done with bulbs first and smaller bulbs between/around them.
https://www.chicagobotanic.org/plantinfo/plant_profiles/paperwhite_daffodils
UW–Madison Extension gives water-forcing guidance: for paperwhite narcissus grown without potting mix, keep water level just below the bottom of the bulbs (i.e., wetting basal/root area without submerging the bulb).
https://hort.extension.wisc.edu/articles/forcing-bulbs-2/
UC ANR instructs to add just enough water so the level is below the paperwhite bulbs but is wetting the roots, and recommends a cool (50–60°F) spot out of direct sunlight for optimal growing before flowering.
https://ucanr.edu/sites/default/files/2022-07/370291.pdf
Knollwood Gardens recommends that after potting/setting paperwhites, you add water to the point that the bulb base is just reached (and implies not soaking the bulb).
https://www.knollwoodgardens.com/media/resources/paperwhite%20how%20to.pdf
Gardening Know How advises selecting a container (without drainage holes) roughly 3–5 inches deep for water forcing.
https://www.gardeningknowhow.com/ornamental/bulbs/paperwhites/forcing-paperwhite-bulbs.htm
Buchanan’s Plants states paperwhites need only 2–3 inches of root room so shallow containers work well, and suggests keeping the base moist without soaking the entire bulb.
https://buchanansplants.com/wp-content/uploads/2013/07/BNP-Bulbs-Forcing-1.pdf
Iowa State Extension says when forcing in bowls, partially fill the container with washed gravel/stones (washed/cleaned medium emphasized).
https://yardandgarden.extension.iastate.edu/how-to/forcing-paperwhite-narcissus-bulbs
PlantTalk Colorado notes paperwhites can be forced in shallow containers with pebbles and water, and that no fertilizer is needed for forcing.
https://planttalk.colostate.edu/topics/houseplants/1322-paperwhite-narcissus/
Jackson & Perkins gives bloom timing and duration: flowering begins in about 4–6 weeks, and it lasts about 2 weeks per gift/round; it also says the plant will not rebloom.
https://www.jacksonandperkins.com/paperwhite-gifts-care/a/care-instructions-paperwhites/
Tagawa Gardens states paperwhites begin to bloom about 4–8 weeks after potting and that they bloom only once, so discard bulbs after flowering.
https://tagawagardens.com/wp-content/uploads/2022/11/Paperwhite_Forcing.pdf
A bloom calendar/planting guide for paperwhites states blooms occur approximately 6–10 weeks after planting and provides example staggered-week planting guidance for holidays.
https://thefarmatgreenvillage.com/wp-content/uploads/2022/10/Paperwhite-Bloom-Calendar-Planting-Guide.pdf
Rotteveel Bulb Company states forcing time for paperwhites averages about 4–6 weeks after planting (used as a quick estimate for jar forcing).
https://www.rotteveelbulb.com/products/tazetta/indoor-narcissus/indoor-narcissus-paperwhite-ziva
Harlequins Gardens’ indoor-planting guidance includes that you should water/place paperwhites in a light, cool place and then transition to a sunny/room-temperature spot as shoots/foliage develop (supporting the “cool then brighter” technique).
https://harlequinsgardens.com/wp-content/uploads/2021/03/Tips-on-Indoor-Planting-for-Paperwhites.pdf
Tagawa Gardens warns that low light can make paperwhites become leggy and require staking/support.
https://tagawagardens.com/wp-content/uploads/2022/11/Paperwhite_Forcing.pdf
UW–Madison Extension highlights that proper forcing involves correct temperature conditions to flower earlier indoors, and it provides the baseline “water just below basal plate” approach for paperwhites.
https://hort.extension.wisc.edu/articles/forcing-bulbs-2/
Biology Insights attributes floppy paperwhites mainly to insufficient light and/or overly warm conditions; it advises moving plants to a cooler location (about 50–65°F / 10–18°C) and increasing light to reduce leggy, weak stems.
https://biologyinsights.com/paperwhites-falling-over-why-it-happens-and-how-to-fix-it/
Biology Insights states cooler temperatures (50–65°F) help slow growth so stems stay shorter and sturdier, while too-warm/low-light conditions produce tall, spindly stems that flop.
https://biologyinsights.com/how-to-grow-and-care-for-paperwhite-plants/
UC ANR recommends keeping bulbs in a cool (50–60°F) spot out of direct sunlight for optimal growing, then transitioning after rooting (it also notes using a heat mat/heating pad can help if needed for rooting).
https://ucanr.edu/sites/default/files/2022-07/370291.pdf
Chicago Botanic Garden notes paperwhite leaves can reach ~16 inches tall and become top-heavy when in bloom, reinforcing the need for sturdy containers or pans/supported display setups.
https://www.chicagobotanic.org/plantinfo/plant_profiles/paperwhite_daffodils
Garden Barn states paperwhites bloom for about two weeks with proper care and that reblooming is difficult; it also frames these as typically “discard after bloom” florist-style bulbs.
https://www.gardenbarn.com/content/paperwhite-care-and-re-blooming
Knollwood Gardens indicates paperwhites can be moved to a cool spot after flowering for freshness (i.e., temperature management extends bloom/display time).
https://www.knollwoodgardens.com/media/resources/paperwhite%20how%20to.pdf
Epic Gardening notes that after flowering, keeping the foliage healthy for a while supports the bulb (while many recommend discarding/restarting for convenience).
https://www.epicgardening.com/paperwhites-finished-blooming/
Missouri Extension advises keeping paperwhites cool after planting and, if possible, moving to a cooler location after flower buds are visible to prevent overly leggy stems and keep flowers fresher longer.
https://extension.missouri.edu/news/paperwhites-just-add-water-for-instant-spring
A Growers Outlet PDF notes ‘Ziva’ is a classic paperwhite variety and presents it as one of the fastest from bulb to bloom (supporting cultivar choice for quick indoor results).
https://growersoutlet.com/Plant_Info/Bulbs/Narcissus/Narcissus_Ziva.pdf
UW Extension includes a general caution for forcing bulbs: avoid ethylene exposure (example given: don’t store fruit in the refrigerator while forcing because ethylene impairs flower development).
https://hort.extension.wisc.edu/articles/forcing-bulbs-2/
Buchanan’s Plants suggests changing water when it appears murky and optionally treating/tidying water with activated charcoal to help keep the forcing setup clean.
https://buchanansplants.com/wp-content/uploads/2013/07/BNP-Bulbs-Forcing-1.pdf
PlantTalk Colorado states paperwhites bloom only once and should be discarded after they have flowered.
https://planttalk.colostate.edu/topics/houseplants/1322-paperwhite-narcissus/
Jackson & Perkins states paperwhites “will not rebloom” and recommends discarding or composting after blooms and foliage fade.
https://www.jacksonandperkins.com/paperwhite-gifts-care/a/care-instructions-paperwhites/
Missouri Extension says foliage and flower stems can become too leggy if conditions are too warm, and emphasizes managing temperature once leaves/flower buds are visible.
https://extension.missouri.edu/news/paperwhites-just-add-water-for-instant-spring
Next Articles
How to Grow Paperwhites Indoors: Step by Step Guide
Step-by-step indoor guide to grow paperwhites: bulb choice, planting in water or soil, care, timing, and flop prevention
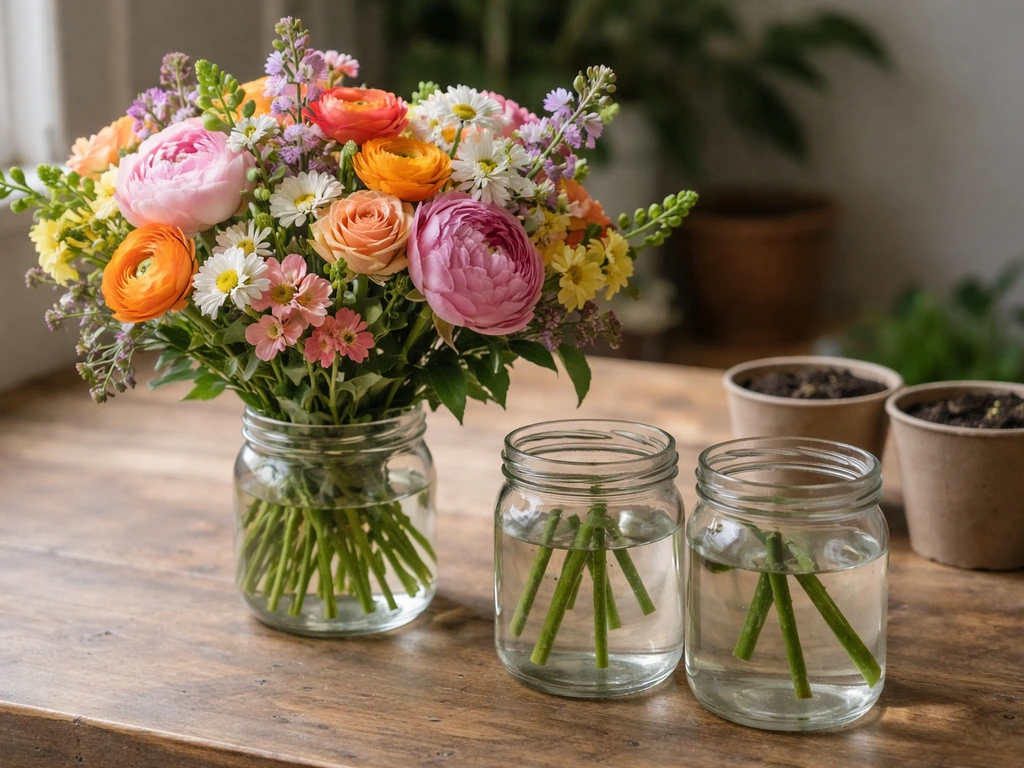
How to Grow Flowers From a Bouquet: Step-by-Step
Step-by-step guide to propagate bouquet stems into new flowers: prep, rooting in water/soil, transplanting, care, timeli
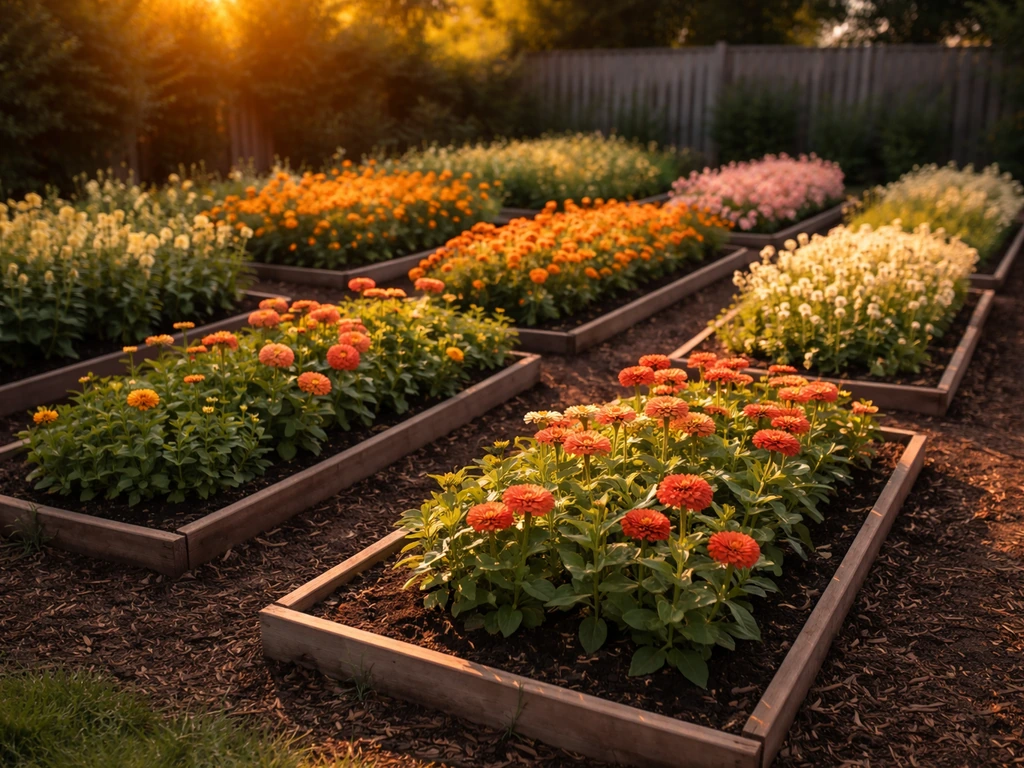
How to Grow a Cut Flower Garden: Step-by-Step Guide
Step-by-step plan for a sun, soil, and spacing cut flower garden with staggered blooms, pest care, and fresh harvest tip