To have paperwhites blooming by Christmas Day, count back 4 to 6 weeks from December 25 and plant your bulbs between mid-November and early December. If you want a safety buffer, aim for November 15 to 20, that gives slower varieties and cooler rooms enough time without the flowers opening too early. No chilling required, no fuss with the refrigerator: paperwhites are one of the very few bulbs that will flower from a standing start at room temperature.
How to Grow Paperwhites for Christmas: Timetable & Tips

James Holloway
15 Jul 2026
Why forcing paperwhites for Christmas actually works
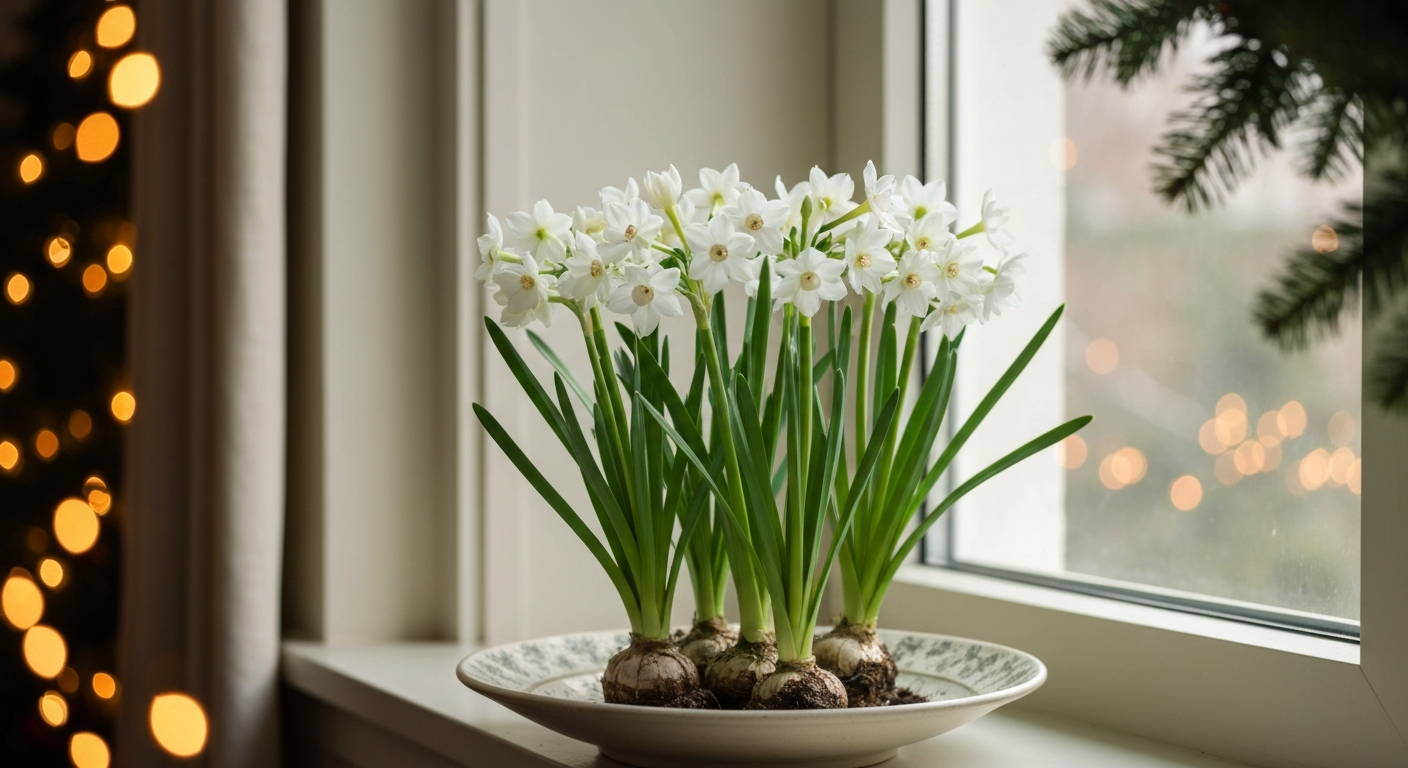
Most spring-flowering bulbs, tulips, hyacinths, daffodils, need weeks of cold treatment to trigger blooming. Paperwhites (Narcissus papyraceus and the closely related tazetta group) do not. They come from the warmer Mediterranean and North African regions, so they skip that cold requirement entirely. Plant them indoors in November, keep them somewhere reasonably cool and bright, and they will root and bloom on their own timeline. That makes them almost uniquely suited to holiday forcing, and it is genuinely hard to fail with them as long as you start on time and choose a decent variety. I have grown them in everything from old jam jars to terracotta pots, and the results are reliably festive every time.
The three most popular methods, growing in a jar of water, nestling bulbs in pebbles or gravel, and planting in potting mix, all work. The differences come down to aesthetics, how much support the stems get, and how often you top up water. All three are covered in detail below, so pick the one that fits what you already have at home.
Timing your planting so bulbs bloom on the day you want
The key variable is temperature. University extension sources confirm that paperwhites typically bloom 3 to 6 weeks after planting under standard indoor conditions, but the real range runs from about 2 weeks (very warm room, fast variety like Ziva) to 8 weeks (cooler staging, slower variety). The most reliable approach is a two-stage temperature strategy: keep newly planted bulbs in a cool, low-light spot at around 45 to 60°F (7 to 16°C) for the first 2 to 3 weeks while roots establish, then move them to a warmer, brighter spot at 65 to 70°F (18 to 21°C) to trigger flowering. Cooler rooting means sturdier, shorter stems, a real practical benefit since leggy paperwhites are one of the most common complaints.
Use the table below to count back from your target bloom date. These windows are based on the variety-specific timing data in the next section and assume the two-stage temperature approach.
| Target bloom date | Fast varieties (e.g. Ziva) | Mid-speed varieties (e.g. Inbal) | Slower varieties (e.g. Grand Soleil d'Or) |
|---|---|---|---|
| December 25 | Plant Dec 1–5 | Plant Nov 25–Dec 1 | Plant Nov 10–15 |
| December 20 | Plant Nov 26–30 | Plant Nov 20–25 | Plant Nov 5–10 |
| December 15 | Plant Nov 20–25 | Plant Nov 15–20 | Plant Nov 1–5 |
| New Year's Day | Plant Dec 8–12 | Plant Dec 2–8 | Plant Nov 18–22 |
These are guidelines, not guarantees, your room temperature will shift things by several days in either direction. I always plant a second pot a week after the first as insurance. That staggered approach gives you a rolling display through the holidays rather than a single all-or-nothing moment.
Everything you need before you start
One of the things I love about paperwhites is that the supplies list is short and mostly stuff you can find around the house. Here is a complete checklist covering all three methods:
- Paperwhite bulbs: firm, plump, dry bulbs with an intact basal plate — no soft spots, no mold, no foul smell. Larger bulbs (15 cm diameter or above, by commercial grading) produce more stems and bloom earlier than smaller ones.
- Containers for jars/vases: a bulb forcing vase with a narrow neck, or a clean glass jar or Mason jar at least 6 to 8 inches tall. The neck should be narrow enough to support the bulb while its roots hang down into water.
- Pea gravel or aquarium gravel (for the pebble method): coarse pieces roughly 1/4 to 1/2 inch (6 to 12 mm) — enough to fill your chosen bowl or dish two-thirds full.
- Shallow bowl or dish (for the pebble method): at least 3 to 4 inches deep with no drainage holes, such as a ceramic salad bowl, a bulb pan, or a decorative planter.
- Pot with drainage holes (for the potting-mix method): 4 to 5 inches deep, at least 6 inches in diameter. Terracotta works well because it breathes.
- Sterile, well-draining potting mix: a coir or peat-based soilless mix with added perlite or vermiculite for drainage. Do not use garden soil — it compacts and can harbor rot.
- Water: plain tap water, allowed to sit for an hour if your water is heavily chlorinated.
- Balanced water-soluble fertilizer (optional): only needed if you want to feed after roots are established at 2 to 3 weeks; use half-strength.
- Bamboo stakes and soft twine or a bulb support ring: paperwhites can reach 16 to 18 inches and will lean without support, especially in warm rooms.
- A cool, dark or low-light location: an unheated basement, garage, or north-facing room at 45 to 60°F for the rooting stage.
- A bright, warm windowsill or table: indirect bright light at 65 to 70°F for the finishing stage.
Which variety should you grow?
Variety choice makes a real difference, especially for Christmas timing. 'Ziva' is the one most bulb suppliers push, and for good reason, it is fast, predictable, and widely available. But if strong fragrance is not your thing (and it is intense), 'Inbal' is worth tracking down. 'Grand Soleil d'Or' gives you golden-yellow flowers that look beautiful against holiday greenery, though it needs more lead time. The table below gives a practical comparison:
| Variety | Flower color | Weeks to bloom (at typical indoor temps) | Height | Fragrance | Best for |
|---|---|---|---|---|---|
| Ziva | Pure white | 2–3 weeks | 16–18 inches | Very strong | Fastest and most reliable; good for late starters |
| Inbal | White | 3–4 weeks | 14–16 inches | Delicate/mild | Beginners sensitive to strong scent; dependable |
| Grand Soleil d'Or | Golden yellow with orange cup | 5–6 weeks | 14–16 inches | Moderate-strong | Colorful displays; needs early planting |
| Actaea | White with red-edged yellow cup | 5–7 weeks | 16–20 inches | Mild-moderate | Taller stems; elegant look; requires more time |
My personal go-to is Ziva for Christmas forcing because the tight timing window leaves little room for slow starters. I grow Grand Soleil d'Or in a second pot planted in early November when I want the warm color contrast. If you are browsing bulb selections at a local garden center and do not see any of these labeled clearly, look for bulbs marked 15 cm grade or larger, the size alone tells you a lot about bloom performance.
Method 1: Forcing paperwhites in a jar
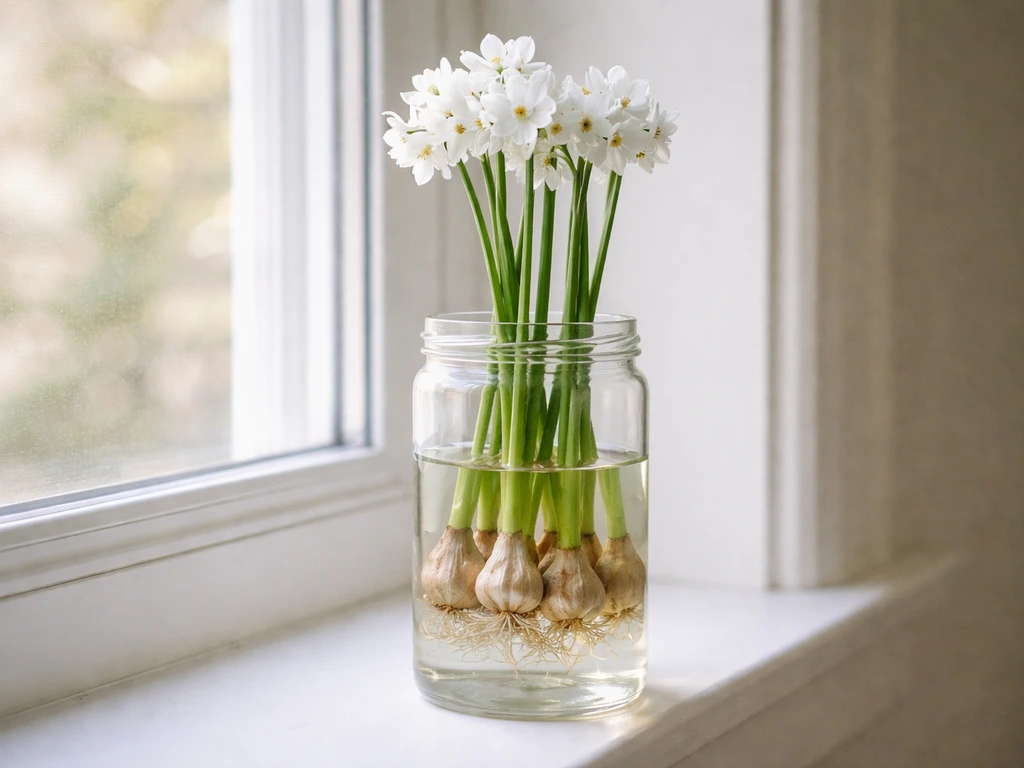
Growing paperwhites in a glass jar or bulb vase is the most visually striking method, you can watch the roots develop in real time, which is genuinely satisfying. All you need is the right container and a careful eye on the water level. This works especially well for a single specimen on a shelf or windowsill.
Step-by-step for the jar method
- Select a clean glass jar or bulb forcing vase at least 6 inches tall. A jar with a slightly narrower opening at the top helps cradle the bulb, but any jar where the bulb sits above the waterline works. [Image: A clear glass bulb vase with a single Ziva paperwhite bulb resting in the neck, roots just beginning to emerge — caption: 'A narrow-necked vase keeps the bulb suspended with its base just above the water.']
- Add 1 to 2 inches (2.5 to 5 cm) of clean pea gravel or glass marbles to the bottom of the jar. This is optional but stabilizes the bulb and looks attractive through the glass. [Image: Pea gravel being poured into a clear glass jar — caption: 'A small layer of gravel at the base adds stability and visual interest.']
- Set the bulb, pointed end up, on top of the gravel or directly in the neck of the vase. The basal plate (the flat, slightly rough bottom of the bulb) should face down.
- Add water until it just barely reaches the basal plate — the base of the bulb should be touching or just kissing the water surface, not submerged. Submerging the bulb body causes rot. [Image: Close-up showing the water level at exactly the base of the bulb — caption: 'Keep water level at the basal plate, not above it. Even 1 cm too high causes rot.']
- Move the jar to your cool, low-light rooting spot (45 to 60°F). Leave it there for 2 to 3 weeks. Top up the water every few days to maintain the same level as roots grow down into the jar.
- Once you see 1 to 2 inches of white roots and a green shoot emerging from the top, move the jar to your bright, warm windowsill. [Image: Jar with 2 inches of white roots visible below the bulb and a green shoot above — caption: 'Visible root growth signals the bulb is ready to move into warmth and light.']
- Rotate the jar a quarter turn every day or two so the stems grow straight rather than leaning toward the light. Provide a stake if stems reach above 10 inches and start to lean.
- Maintain the water level through flowering. Change the water completely if it begins to look cloudy or smell stale.
Method 2: Growing paperwhites in rocks or pebbles
The pebble method is ideal when you want a wider, fuller display with multiple bulbs in a decorative bowl. For practical container guidance see Forcing Paperwhite in a Soil Pot, lesson plan (shows 3–5 bulbs per 6" pot recommendations), which recommends about 3–7 bulbs for a 6" pot and 1–3 bulbs for narrow vases depending on neck size Forcing Paperwhite in a Soil Pot — lesson plan (shows 3–5 bulbs per 6" pot recommendations). It is the most versatile approach, you can use almost any watertight container you already own, and it works beautifully as a table centerpiece. This is the method I use most often for holiday entertaining because a wide low bowl of paperwhites looks stunning in the middle of a dining table.
Step-by-step for the pebble method
- Choose a watertight bowl, dish, or low planter at least 3 to 4 inches deep. No drainage holes needed — the pebbles create drainage space within the container. [Image: A wide ceramic bowl filled two-thirds with pea gravel, set on a wooden table — caption: 'Any decorative bowl at least 3 inches deep works well for a pebble display.']
- Fill the container about two-thirds full with clean pea gravel, aquarium gravel, or coarse horticultural grit (roughly 1/4 to 1/2 inch pieces). These allow roots to work through while supporting the bulb bodies above the waterline.
- Nestle the bulbs into the gravel, pointed end up. Crowd them close together — paperwhites are forgiving and a full, dense look is the goal. For a 6-inch diameter bowl, use 5 to 7 bulbs; for a wider 10-inch bowl or basin, use 8 to 12 bulbs. [Image: Seven paperwhite bulbs set upright in a pebble-filled bowl, spaced about 1 inch apart — caption: 'Pack bulbs in close for a full, lush display — they do not mind crowding.']
- Add water slowly until the level reaches just below the basal plates of the bulbs. The bottom of each bulb should be at or just touching the water surface. Pour from the edge of the bowl to avoid disturbing the bulb arrangement.
- Press a few extra pebbles around the sides of the bulbs to hold them firmly upright — this reduces leaning later. [Image: Hands pressing gravel gently around the sides of paperwhite bulbs to secure them — caption: 'Wedge pebbles around the bulb sides now to prevent leaning stems later.']
- Move the bowl to your cool rooting location (45 to 60°F) for 2 to 3 weeks. Check water level every 2 to 3 days and top up to just below the basal plates.
- When you see solid white roots threading down through the gravel and green shoots 1 to 2 inches tall, bring the bowl into a bright, warm room to finish growing.
- Once stems hit about 8 inches, use a decorative support ring or loosely looped twine tied around a few stakes to keep them upright. [Image: A blooming bowl of paperwhites with a simple bamboo ring support holding the stems — caption: 'A low support ring placed early prevents the whole display from flopping over at peak bloom.']
Method 3: Planting paperwhites in pots with potting mix
Planting in potting mix is the closest to conventional bulb growing and gives the roots the most support. For potting-mix method specifics, see Enjoying Paperwhite Narcissus in Winter, Penn State Extension (container depth, planting depth, spacing): use a container about 4–5" (10–13 cm) deep; plant bulbs so the top third of the bulb is exposed and crowd bulbs so they are nearly touching (≈1" or less spacing) Enjoying Paperwhite Narcissus in Winter — Penn State Extension (container depth, planting depth, spacing). Stems tend to be slightly sturdier than with water-only methods, and the bulbs are less prone to wobbling. This is a great option if you are gifting the pot, or if you want to try giving the bulbs a second season outdoors afterward in mild climates.
Step-by-step for the potting-mix method
- Choose a pot with drainage holes that is at least 4 to 5 inches deep. A 6-inch terracotta pot works perfectly for 3 to 5 bulbs. Place a saucer underneath to catch drainage. [Image: A terracotta pot with drainage holes next to a bag of perlite-amended potting mix — caption: 'A pot at least 4 inches deep with drainage holes is essential to prevent basal rot.']
- Fill the pot about halfway with a sterile, well-draining soilless potting mix. A coir or peat-based mix with added perlite or vermiculite is ideal — avoid garden soil, which compacts and can introduce disease. If your mix does not already contain perlite, add roughly 20 to 30% perlite by volume and blend it in.
- Set the bulbs on top of the mix, pointed ends up, spaced about 1 inch apart or less — crowding is fine and gives a fuller look. For a 6-inch pot, 3 to 5 bulbs is the right number. [Image: Five paperwhite bulbs set upright in a terracotta pot half-filled with potting mix, tips pointing up — caption: 'Leave about 1 inch between bulbs; they can touch. Pointed tips always go up.']
- Fill in around the bulbs with more potting mix, pressing it gently firm. Leave the top one-third of each bulb exposed above the soil surface — do not bury them completely. The tips should be visible and the shoulders of the bulbs just sitting on the soil. [Image: Potted paperwhites with the top third of each bulb visible above the potting mix surface — caption: 'The top third of the bulb should sit above soil level, not buried. This is correct depth.']
- Water thoroughly until water runs from the drainage holes, then allow to drain completely. Do not let the pot sit in standing water.
- Move the pot to your cool rooting location (45 to 60°F) for 2 to 3 weeks. Water lightly every week to keep the mix just barely moist — not wet, not bone dry.
- When roots are established and shoots are 1 to 2 inches tall, move the pot to a bright windowsill at 65 to 70°F. Water when the top inch of potting mix feels dry. [Image: Paperwhite pot on a bright windowsill, shoots about 4 inches tall with a south-facing window behind — caption: 'Bright indirect light and warmth at this stage push the stems into rapid growth.']
- Feed with a half-strength balanced water-soluble fertilizer once after roots are well established (around week 3 to 4 after planting) if you choose — it is not required for a good bloom, but it does not hurt. Stake stems when they reach 8 to 10 inches.
Caring for your paperwhites through bloom
Once your paperwhites move into the warm bright room, growth accelerates noticeably, sometimes visibly day by day. The key care points at this stage are light, water, and temperature control. Keep the plants in the brightest indirect light you have, ideally within 1 to 2 feet of a window. Direct afternoon sun through glass in winter is usually fine and will not scorch them. Avoid placing them near heat vents, fireplaces, or radiators, hot dry air shortens bloom time considerably. A room that stays around 65°F (18°C) rather than a warm 72°F (22°C) will give you longer-lasting flowers, sometimes by a week or more.
For water culture methods (jar and pebbles), top up water every 2 to 3 days. For pot-grown plants, check moisture every couple of days, the mix should stay lightly moist, never waterlogged. Once in bloom, paperwhites typically last 1 to 2 weeks at cool room temperature before petals fade. Moving them to a cooler room at night (even 55 to 60°F) extends the display nicely.
Troubleshooting common problems
Leggy, floppy stems
This is the number one paperwhite complaint and it happens when bulbs root in too much warmth, or when they move to bright light too quickly before roots are established. Prevention is better than cure: that cool rooting period is not optional if you want stocky stems. If your stems are already stretching, you can use the alcohol trick, diluting isopropyl alcohol (or a clear spirit like vodka or gin) to about 5% and using it as your watering solution once stems are a few inches tall has been shown to reduce height by 20 to 30% without affecting flower quality. A 5% solution means 1 part 70% isopropyl alcohol to about 13 parts water. Do not use beer, wine, or undiluted spirits, those concentrations damage the plant.
Bulb rot
Soft, brown, foul-smelling bulbs are a sign of Fusarium basal rot or bacterial rot, usually caused by overwatering or by planting a bulb that was already compromised. Always check bulbs before planting, discard any with soft spots, mushy basal plates, or off smells. In water culture, keep the water level at or just below the basal plate, never above it. If a bulb in a shared bowl starts going soft, remove it immediately before the rot spreads to neighboring bulbs.
Weak or no flowers
If stems come up but flowers are weak or do not open properly, the most likely culprits are too little light during the finishing stage, or a bulb that was undersized at purchase. Under-lit paperwhites produce tall, pale stems with small or aborted flowers. Move them to the brightest window you have. Going forward, invest in larger grade bulbs (15 cm or above), the difference in flower count and quality is substantial.
Pests
Paperwhites are toxic to most insects and rarely suffer pest problems indoors. Occasionally fungus gnats appear in potting-mix containers, these are attracted to consistently moist soil surfaces. Let the top inch of mix dry out between waterings and the gnat population drops quickly. Mealybugs can occasionally appear; wipe them off with a cotton swab dipped in rubbing alcohol.
What to do with the bulbs after they bloom
Here is the honest answer: paperwhites forced indoors almost never rebloom well. The forcing process exhausts the bulb's stored energy, and the indoor conditions cannot replicate the natural dormancy cycle needed to rebuild it. Most gardeners simply compost forced paperwhite bulbs. If you are in USDA Hardiness Zone 8 or warmer (or an equivalent mild climate), you can plant them outdoors in a sunny, well-drained spot after the foliage dies back naturally, they sometimes naturalize and eventually rebloom outdoors, though not reliably in the first year. For tips on planting and caring for them outdoors, see our guide on how to grow paper flower plant. In colder zones, they will not survive winter outdoors, so composting is the practical choice. Either way, do not feel like you have failed, the bulb gave you exactly what it was meant to give.
Safety: pets, children, and the fragrance factor
Paperwhites are toxic to dogs, cats, and horses, all parts of the plant contain lycorine and other alkaloids that cause vomiting, drooling, and in larger ingestions, more serious symptoms. Keep bulbs and plants out of reach of pets and small children. The toxicity extends to the water in pebble and jar displays, so do not let pets drink from the containers. If you suspect your pet has eaten any part of a paperwhite, contact your vet immediately.
On fragrance: Ziva and Grand Soleil d'Or are powerfully scented. In a small room or with multiple pots, the smell can be overwhelming to some people and may trigger headaches. If you or household members are sensitive, consider Inbal (milder fragrance) or keep the display in a well-ventilated space. The fragrance is one of the things people either love or strongly dislike about paperwhites, it is worth testing your reaction before filling your living room with a dozen pots.
FAQ
What is the fastest, most reliable way to force paperwhites to bloom by Christmas?
Choose a fast-forcing variety (e.g., 'Ziva' or 'Inbal'), use large firm bulbs (15 cm+ if available), and count back 3–6 weeks from your target bloom date. Plant in jars, pebbles, or potting mix, keep newly planted bulbs cool and dim (45–60°F / 7–16°C) for 2–3 weeks to establish roots, then move to brighter, warmer conditions (65–70°F / 18–21°C) to finish and open flowers. Under warmer finishing temperatures expect a shorter 2–3 week period to bloom; under cooler indoor temps allow up to 6–8 weeks.
How do I calculate the planting schedule so paperwhites bloom on a chosen date (count-back timing)?
Decide your bloom date (e.g., Dec 25). For most paperwhites use a 3–6 week window: for fast varieties and warm indoor finish, plant 2.5–3.5 weeks before; for average conditions plant 3–4.5 weeks before; for cooler conditions or slower varieties allow 5–6+ weeks. Example quick table: Target bloom Dec 25 → plant between Nov 13–Dec 9 depending on variety and temperature. If bulbs are large and you can use warmer finishing temps, lean to the shorter end.
What supplies do I need for jars, pebbles, and potting-mix methods?
Basic supplies: quality paperwhite bulbs (firm, undamaged), containers: narrow bulb vases/jars for water-only, shallow bowls or decorative containers for pebbles, 4–6" pots for soil; pea gravel/aquarium gravel or marbles (6–12 mm) for support; sterile potting mix (peat/coir-based with perlite); clean water; balanced water‑soluble fertilizer (optional, half strength after 2–3 weeks); stakes or support rings for long stems (optional); labels, tray, and small trowel. Use clean containers and sterile media to reduce rot.
Step-by-step: how to force paperwhites in a jar or bulb vase (water-only method)?
1) Select a bulb vase or clear jar with a neck that supports bulbs. 2) Place a 1–2 in (2.5–5 cm) base layer of pea gravel or marbles. 3) Sit bulbs on top of the gravel so they touch but do not press them in; bulbs may be nearly touching. 4) Add water so it just reaches the base of the bulbs — the basal plate/root zone should be in contact but the bulb body stays dry. 5) Keep in cool, low light (45–60°F / 7–16°C) for 2–3 weeks to form roots. 6) When shoots are 1–2" or roots are 2–3" long, move to bright indirect light and warmer temps (65–70°F / 18–21°C) to encourage rapid shoot elongation and flowering. 7) Top up water to maintain root contact; change water every 1–2 weeks if cloudy.
Step-by-step: how to grow paperwhites among rocks/pebbles?
1) Use a shallow bowl or wide-mouthed container. 2) Add 2–3" (5–8 cm) of pea gravel or coarse grit. 3) Arrange bulbs on the gravel so they almost touch; you can press them slightly into the gravel for stability but keep tops exposed. 4) Add water to wet the gravel until it nearly reaches bulb bases (but avoid submerging bulb bodies). 5) Follow the same cool-rooting then warm-finishing schedule: cool/dim 2–3 weeks, then bright/warm to flower. 6) Maintain water level so roots remain moist; refresh water if it becomes cloudy.
Step-by-step: how to force paperwhites in potting mix (pots)?
1) Choose a 4–6" (10–15 cm) pot with drainage. 2) Fill with sterile well‑draining potting mix (60–80% peat/coir + perlite). 3) Plant bulbs so the top third remains exposed and bulbs are nearly touching (≈1" or less spacing). 4) Water thoroughly and let drain. 5) Place pot in cool, low‑light (45–60°F / 7–16°C) for 2–3 weeks to establish roots. 6) Move to bright indirect light and 65–70°F (18–21°C) to finish. 7) Water when surface begins to dry; do not keep soggy to avoid rot.
Next Articles
How to Grow a Paper Flower Plant Step by Step
Step-by-step guide to grow a paper flower plant from seed or cuttings, with light, watering, feeding, pruning, and fixes
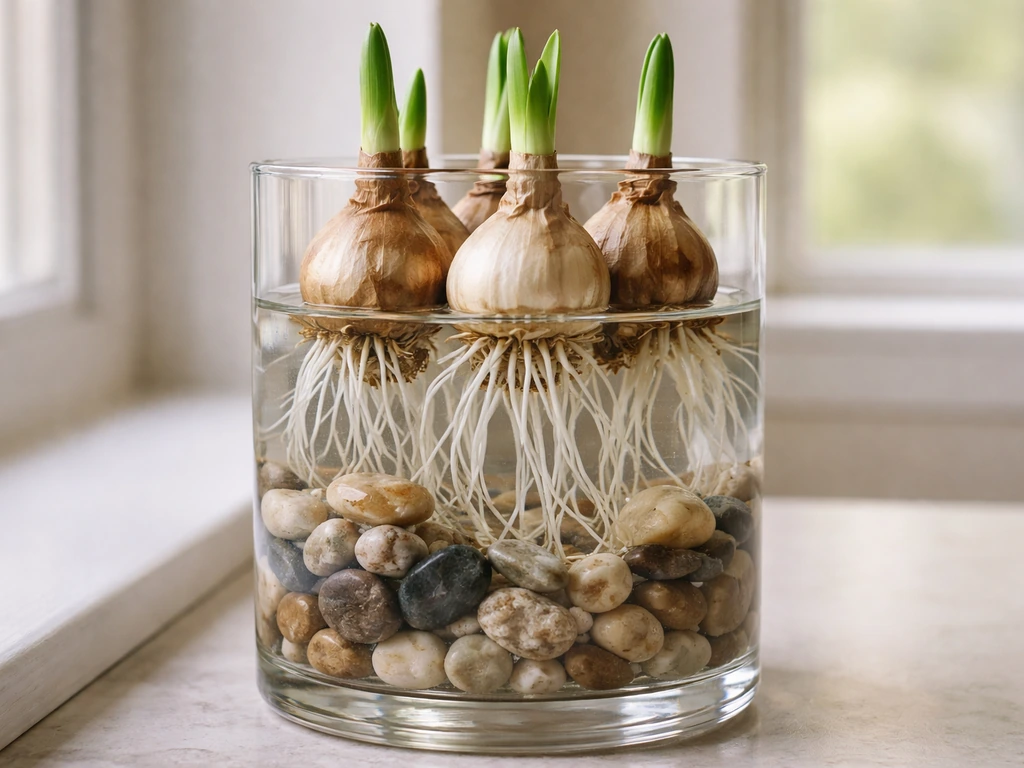
How to Grow Paperwhites in Rocks: Step-by-Step Guide
Step-by-step how to grow paperwhites in rocks indoors: rock choice, bulb setup, water level, light care, and post-bloom
How to Grow Paperwhites in a Jar: Step-by-Step Guide
Step-by-step how to grow paperwhites in a jar with water level, light, and timing to get fast, straight blooms plus fixe