You can <span>grow flowers at home</span> from seed successfully, even as a total beginner. The process breaks down into a few clear stages: gather the right supplies, sow at the correct depth, keep moisture consistent until germination, then care for your seedlings until they're ready to go in the ground. Whether you're starting a handful of marigolds on a windowsill or sowing a whole cutting garden from scratch, the core steps are the same. Here's exactly how to do it.
How to Grow Flowers From Seeds: Step by Step Guide
James Holloway
24 Mar 2026

What you need to grow flowers from seed
You don't need much, but you do need the right things. The biggest mistake beginners make is using regular garden soil to start seeds indoors. It compacts, it holds too much moisture, and it's full of the fungi that cause damping-off, which is the sudden collapse of seedlings at the soil line. Stick with a seed-starting mix or a soilless potting mix instead. A simple homemade version uses coco coir and perlite, which gives you the light, airy texture seeds need. Most commercial seed-starting mixes are already free of damping-off fungi, which is one less thing to worry about.
For containers, you have plenty of options. Seed trays or flats are great for sowing lots of seeds at once. Small flower pots, peat pots, and peat pellets all work well for individual sowings. If you're direct sowing outdoors, you just need a prepared bed or patch of cleared soil. Beyond that, keep it simple.
- Seed-starting mix or soilless potting mix (not garden soil)
- Seed trays, small pots, peat pots, or peat pellets for indoor starting
- A spray bottle or mister for gentle watering without disturbing seeds
- Labels and a permanent marker (you will forget what's what, trust me)
- A light source: a sunny south-facing window or fluorescent shop lights
- A heat mat (optional but helpful for faster germination)
- Your seeds, ideally from a reliable source with a current year's date on the packet
If you're growing outdoors and direct sowing, you'll also want a trowel, a watering can with a gentle rose head, and some way to mark your rows or areas. That's genuinely all you need to get started.
How flowers grow from seed (germination to blooms)
Understanding what's actually happening underground helps you make better decisions and not panic when things seem slow. When a seed is placed in moist, warm soil, it absorbs water and the embryo inside starts to swell. The seed coat splits, a root emerges and anchors downward, and then a shoot pushes upward toward light. That whole process is germination, and the speed depends almost entirely on temperature and moisture.
Marigold seeds, for example, typically germinate in 5 to 7 days under favorable warmth and moisture. Poppies are slower: expect anywhere from 7 to 28 days depending on soil temperature, with cool soils pushing germination toward that four-week mark and warmer soils cutting it to about two weeks. Snapdragons fall somewhere in the middle and prefer cooler temperatures around 60 to 70 degrees Fahrenheit during germination.
After the first tiny sprout (the seedling) emerges, it will produce seed leaves (cotyledons) first, then true leaves that look like the actual plant. Once you see true leaves, the plant is photosynthesizing on its own and growing in earnest. From there, the timeline to blooms depends on the species. Dwarf marigolds can flower in as few as 5 weeks from sowing. Impatiens, on the other end, can take three months or more. Fast-growing annuals direct sown outdoors often flower within 6 to 7 weeks of germination when conditions are right.
Start indoors or sow directly outside? Here's how to decide
Some flowers are best started indoors weeks before your last frost, and others do better when you simply sow them straight into the ground. Getting this decision right saves a lot of frustration.
Starting seeds indoors
Starting indoors gives you a head start on the season, which matters if you have a short growing window or want blooms as early as possible. Marigolds, snapdragons, and many other popular annuals are routinely started indoors 6 to 8 weeks before your intended outdoor planting date. Count back from your last frost date to figure out when to sow. For example, if your area's last frost is typically mid-May, start seeds indoors in late March or early April. Penn State Extension recommends planning your seeding dates by adding the days needed for germination plus at least a week for acclimation, and working backward from your target planting date.
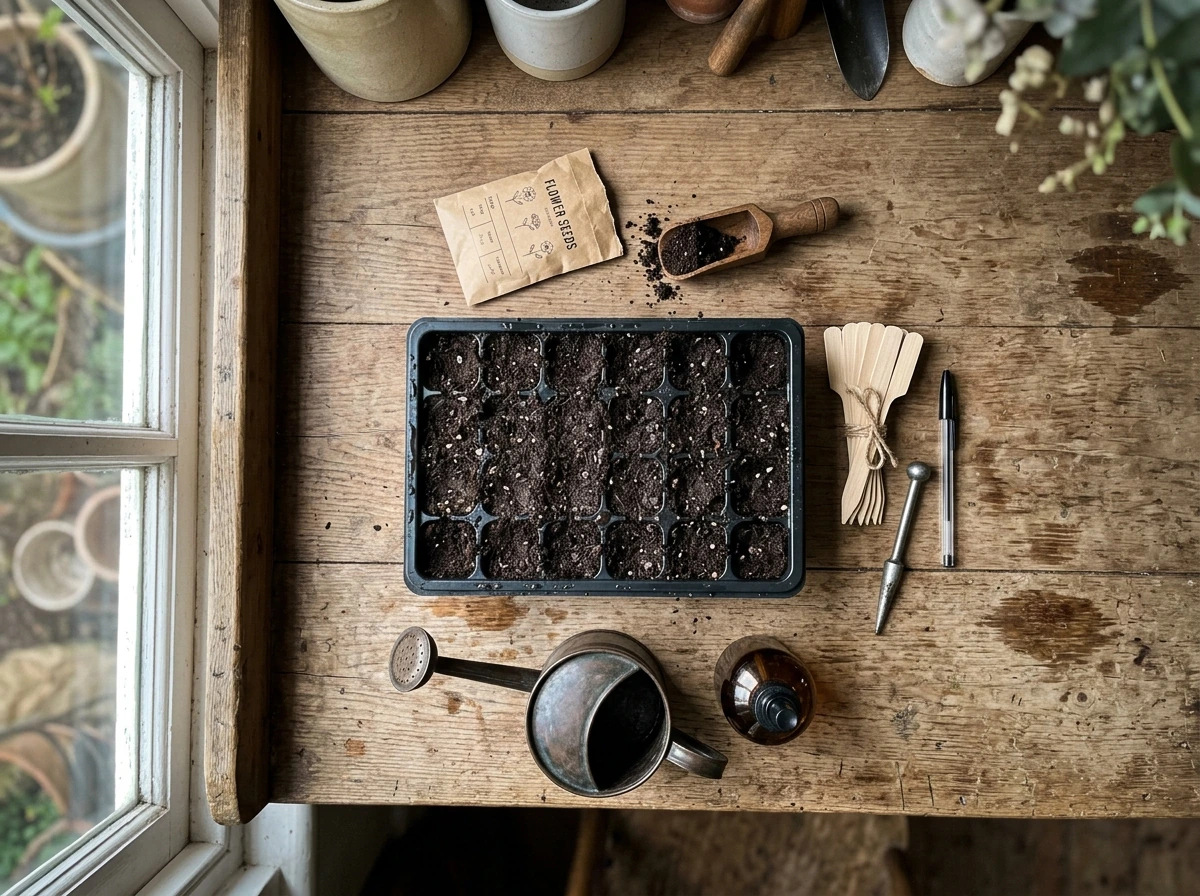
- Fill your seed tray or pots with moistened seed-starting mix, pressing it gently so there are no big air pockets.
- Sow seeds at the depth listed on the packet (more on this below). For very fine seeds like snapdragons, press them onto the surface and cover with a thin layer of vermiculite rather than soil.
- Mist the surface gently with a spray bottle to settle seeds without washing them away.
- Cover trays loosely with a plastic dome or plastic wrap to hold humidity, and set in a warm spot (or on a heat mat).
- Check daily for moisture and for signs of germination. Once seedlings emerge, remove the cover and move to strong light immediately.
- Position lights so seedling tops are roughly 1 inch below fluorescent tubes, raising the light as seedlings grow. If using shop lights, run them about 16 to 18 hours per day at minimum.
- Water carefully at the base to keep the mix evenly moist but never waterlogged.
Direct sowing outdoors
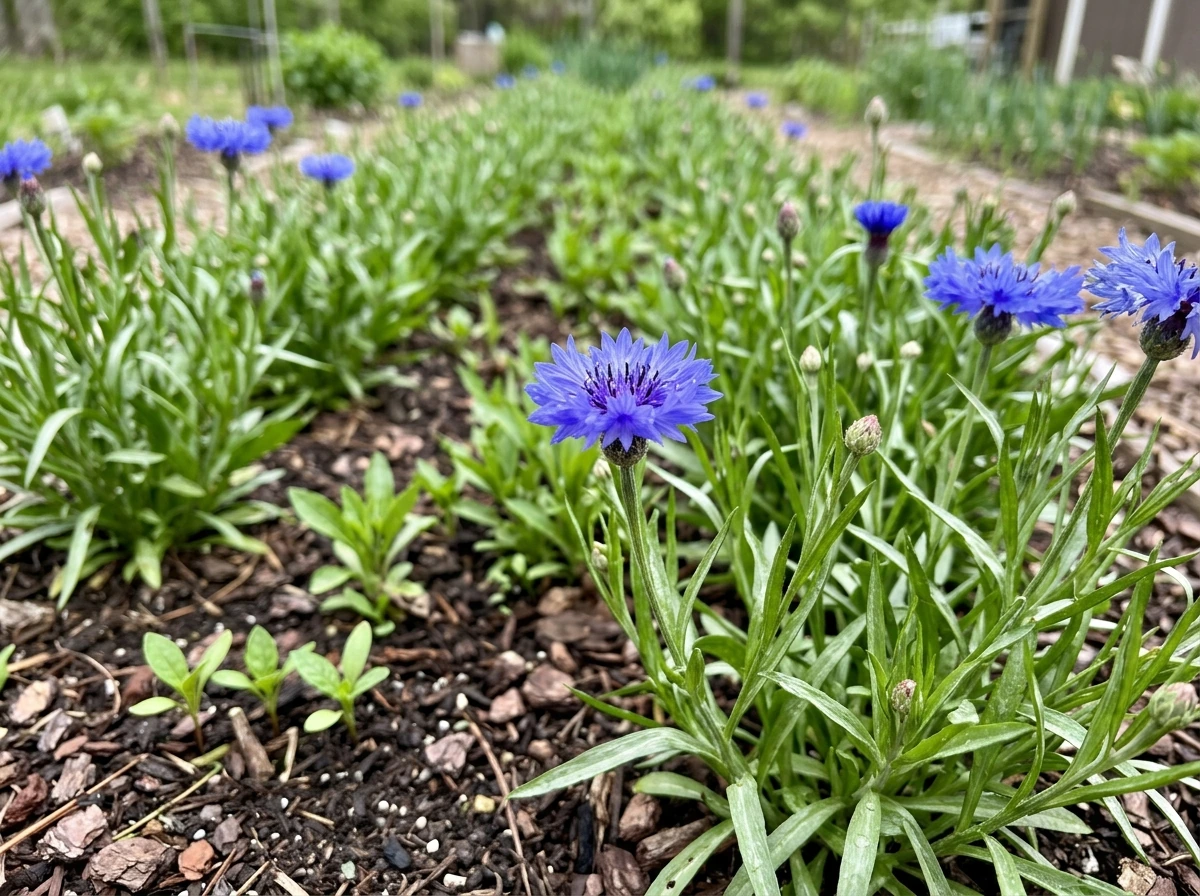
Direct sowing is simpler and works beautifully for flowers like poppies, wildflowers, and cornflower seeds how to grow that don't transplant well or that simply thrive when sown where they'll grow. If you’re looking for wildflower seeds how to grow specifics, follow the same guidance on timing and sowing. Wait until after your last frost date and until the soil has warmed up before direct sowing most annuals, then follow the same timing and sowing approach for <span>how to grow duck flower</span>. Poppies are actually an exception: they prefer cool soil and can be direct sown in early spring or even in late fall for spring germination.
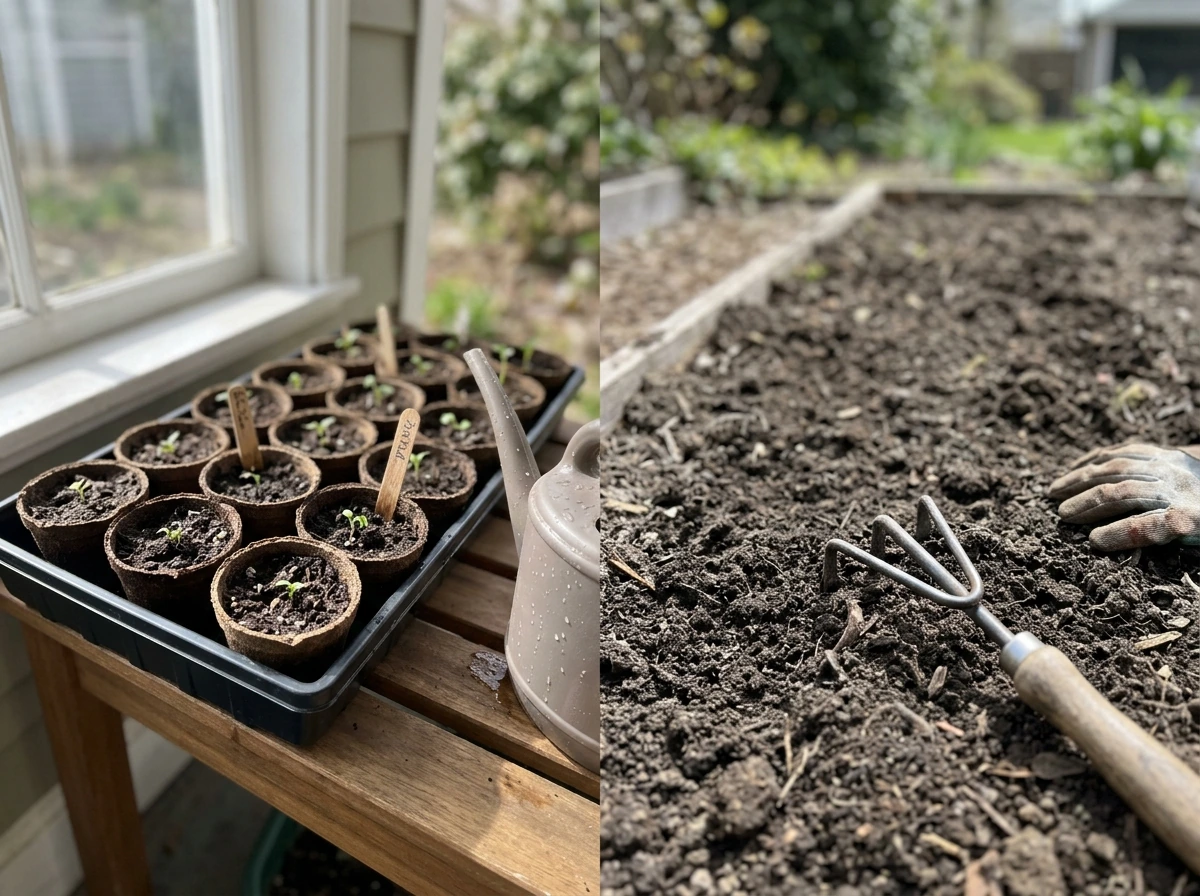
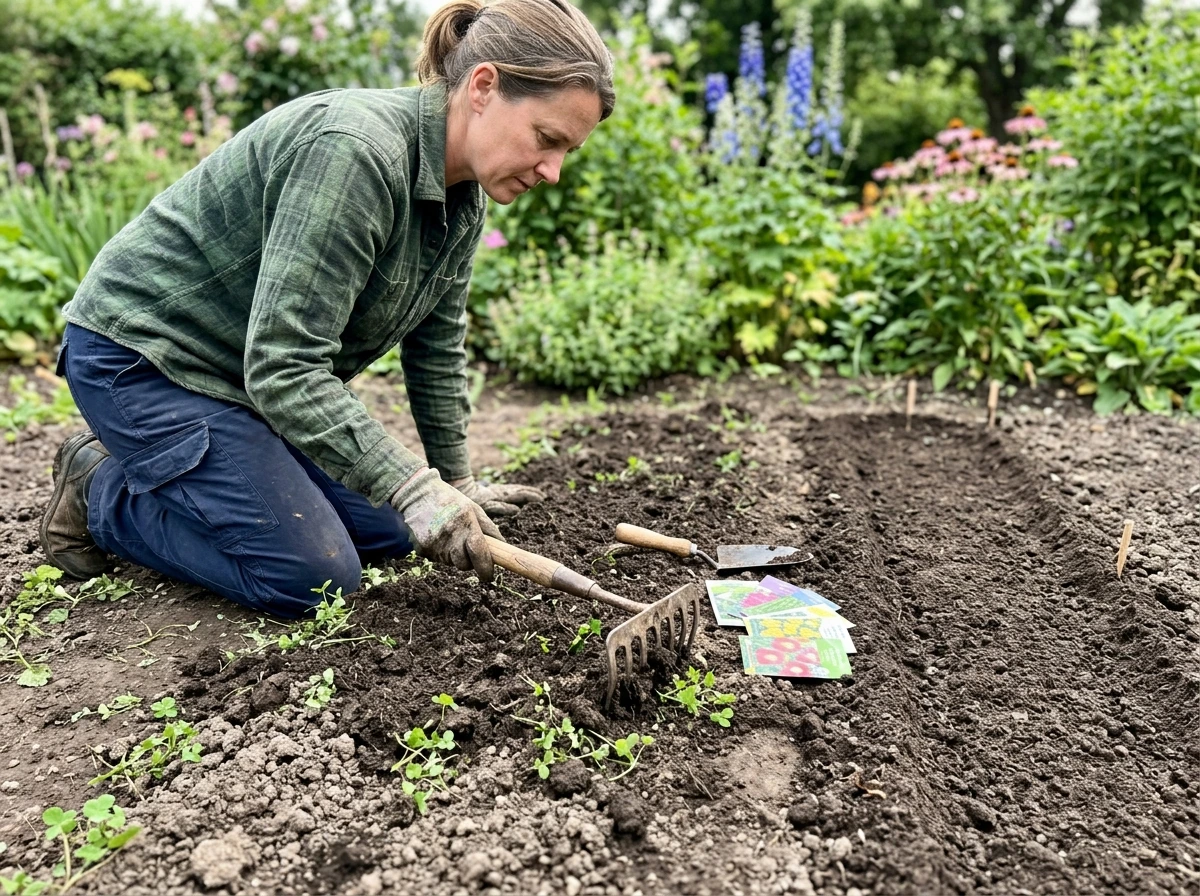
- Prepare your bed by loosening the top few inches of soil and removing weeds, clods, and rocks.
- Rake the surface smooth so small seeds make good contact with soil.
- Sow at the recommended depth and spacing (from your seed packet).
- Water gently using a watering can with a rose head or a mister. Keep the soil consistently moist until germination.
- Once seedlings emerge and have true leaves, thin to the spacing recommended on the packet.
- Continue watering when the soil is dry, not on a fixed schedule.
Best way to sow seeds: depth, spacing, watering, and labeling
Sowing depth is one of the most important variables to get right. The general rule is to sow seeds at a depth equal to about two to three times the seed's diameter. Tiny seeds, like those of snapdragons or wildflower mixes, are typically sown at the surface or under just 1/8 inch of cover. Larger seeds like marigolds can go a little deeper. Always defer to what's printed on your packet since seed companies have already done this math for you.
One detail worth knowing: some seeds need light to germinate and should never be buried. Snapdragons are a classic example. The better approach for light-requiring seeds is to press them onto the surface of moist mix and cover them with a very thin layer of vermiculite, which holds moisture without blocking light. Seeds that need darkness, like calendula (pot marigold), should be covered fully and kept out of light until they've sprouted.
Spacing matters too, and not just for the final plant size. Crowded seedlings compete for light and air circulation, which raises the risk of damping-off. Sowing at the optimum spacing from the start reduces that risk and means less thinning work later.
For watering newly sown seeds indoors, use a fine mist spray bottle rather than pouring water on. It's easy to displace tiny seeds or wash them to one corner of the tray if you're too heavy-handed. Outdoors, a watering can with a gentle rose head works well. The goal is consistent moisture from sowing until germination. Keep that seed bed moist every day if needed, especially in warm or windy weather.
Label everything as you go, not after. It takes about five seconds and saves enormous confusion later. Use a permanent marker on plastic labels or popsicle sticks, and write both the variety name and the sowing date. You'll thank yourself in six weeks when you're trying to figure out which tray is six weeks old and which is four.
After germination: light, thinning, fertilizing, and what to watch for
The moment seedlings emerge is when most beginners accidentally go wrong. The two biggest issues are not enough light and too much water.
Light
Once seeds have sprouted, they need strong light immediately, or they'll stretch toward whatever dim source is available and become leggy and weak. A south-facing window can work on very bright days, but a cloudy week can set seedlings back significantly. Fluorescent or LED grow lights are more reliable. Keep the light source close, with the tops of seedlings about 1 inch below standard fluorescent tubes. For sun-loving plants under shop lights, keep lamps less than a foot from the tops and run lights for at least 16 hours a day to give seedlings enough energy to grow strong.
Thinning
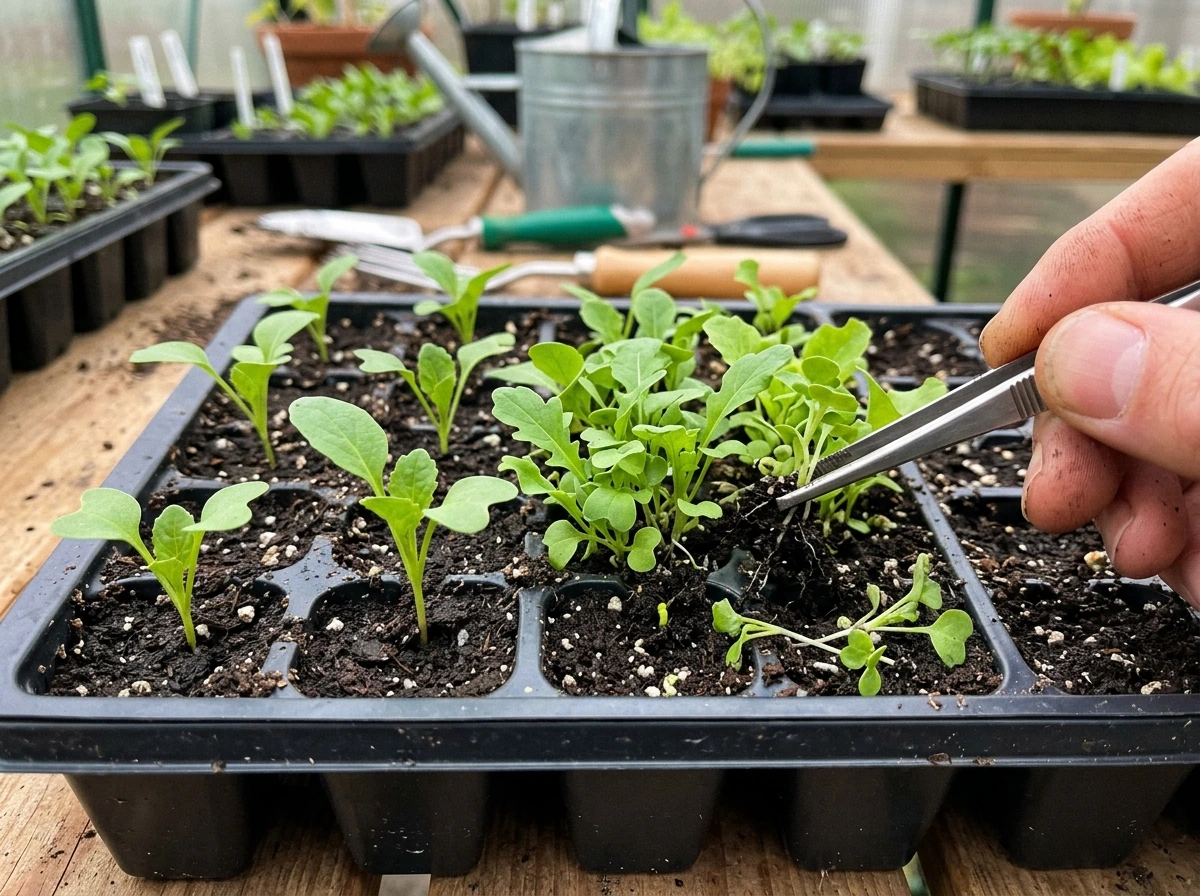
Once your seedlings develop their first true leaves (not the seed leaves that emerge first, but the second set that actually look like the plant), it's time to thin. Thin to the spacing recommended on the seed packet. Use scissors to snip the extras at soil level rather than pulling, which can disturb roots of the seedlings you want to keep. This feels wasteful but it's necessary: overcrowded seedlings don't develop well and are much more vulnerable to disease.
Fertilizing
Seed-starting mix has little to no nutrients, so once seedlings have a few sets of true leaves, start feeding with a diluted balanced liquid fertilizer. Half the recommended dose is usually enough at this stage. Don't rush to fertilize before true leaves appear; the seed itself contains enough energy to carry the plant through germination and the first leaf stage.
Watering and damping-off watch
Overwatering is the most common reason seedlings die after germination. The culprit is usually damping-off, a fungal condition where seedlings rot at the soil line and suddenly keel over. Symptoms include mushy, tan spots near the base of the stem. Once it starts in a tray, it spreads fast.
The best prevention is using clean soilless mix (which is typically free of these fungi), avoiding overwatering, and making sure seedlings have good air circulation. Water only when the top of the mix feels dry, not on a set schedule. Don't plant seeds too deep, as this prolongs the time the fragile stem spends pushing through soil, increasing exposure and risk.
Don't plant seeds too deep, as this prolongs the time the fragile stem spends pushing through soil, increasing exposure and risk, and Utah State University Extension notes that planting seeds too deep can stress seedlings and raise exposure to soil pathogens that contribute to damping-off Utah State University Extension notes that planting seeds too deep stresses seedlings and can increase exposure to potential soil pathogens.
Pest watch
Indoors, fungus gnats are the most common pest problem with seedlings. They're attracted to consistently wet soil and their larvae can damage roots. Letting the top layer of mix dry out between waterings is usually enough to discourage them. Outdoors, slugs, snails, and cutworms are worth watching for on young transplants in the first few weeks.
Hardening off and transplanting your seedlings
If you've started seeds indoors, your seedlings have been living in a controlled environment with gentle light, stable temperatures, and no wind. Putting them straight outside is a shock, and they'll show it: leaves may turn pale, curl, or even die back. The fix is hardening off, a gradual introduction to outdoor conditions over 7 to 14 days.
On the first day, take your seedlings outside to a shaded, sheltered spot (protected from strong wind and direct midday sun) for just 3 to 4 hours during the warmest part of the day. Bring them back inside in the evening. Each day after that, increase the time outside and gradually expose them to more sun. By the end of the first week, they should be able to handle a full day outdoors in partial sun. By the end of week two, they can go into their permanent spot.
Bring plants back inside any night when temperatures are expected to drop below 45 degrees Fahrenheit, or if strong wind or rain is forecast. Don't rush this process. A few extra days of hardening off is cheap insurance against losing seedlings you've been growing for weeks.
When transplanting, water your seedlings well the day before. Dig a hole slightly larger than the root ball, set the plant at the same depth it was growing in its container, firm the soil gently around the roots, and water in well. Early morning or a cloudy day is the best time to transplant, reducing heat stress on freshly moved plants.
Planting timelines and how to plan a simple flower garden from seed
The easiest way to plan is to start with your last frost date. If you don't know yours, look it up for your zip code or nearest town. That date becomes your anchor point. From there, work backward for indoor starts and forward for direct sowing dates.
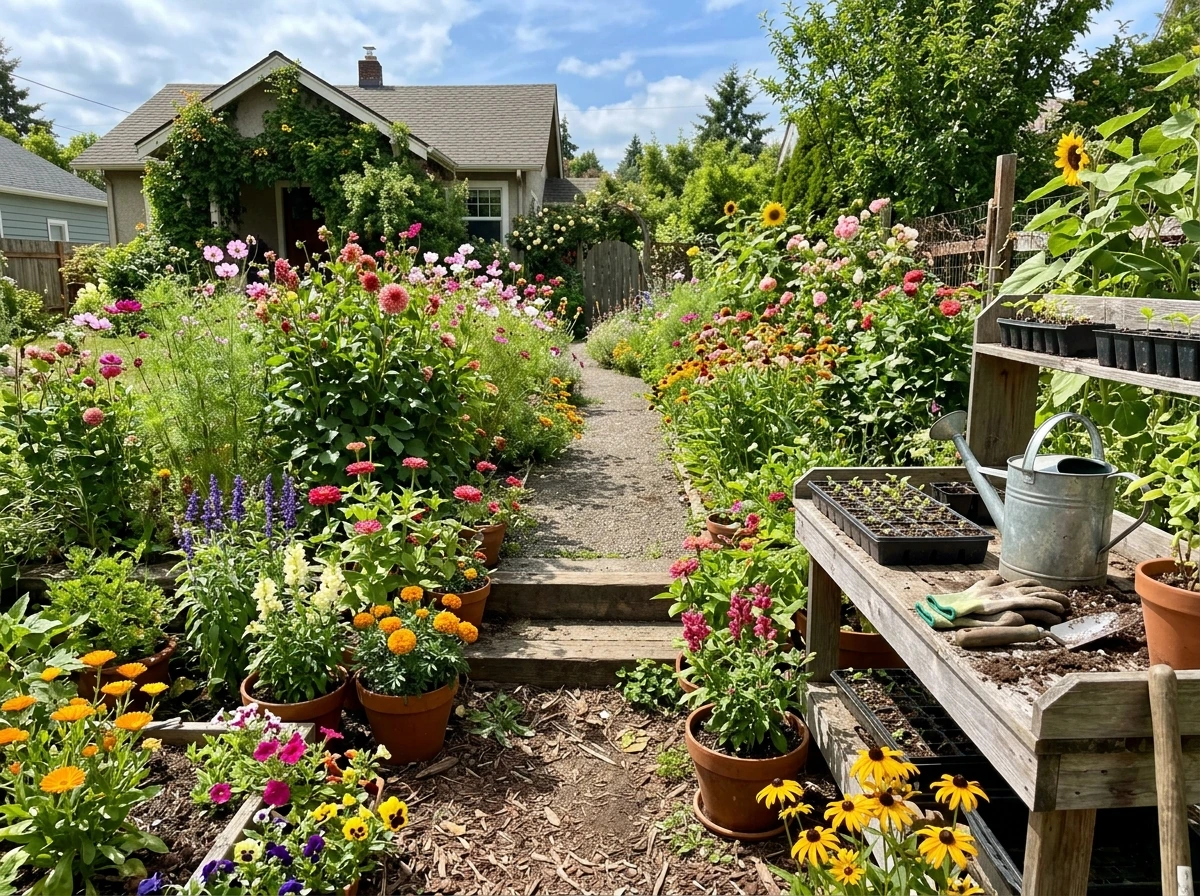
Here's a practical example of a simple cutting garden you could plan from seed, using some of the easiest and most rewarding varieties:
| Flower | Start method | When to start | Days to germinate | Weeks to first bloom |
|---|---|---|---|---|
| Marigold | Indoors or direct sow | 6–8 weeks before last frost (indoors); after last frost (direct) | 5–7 days | ~5 weeks (dwarf types) |
| Snapdragon | Indoors | 8–10 weeks before last frost | 7–14 days | 12–16 weeks from seed |
| Poppy | Direct sow outdoors | Early spring or late fall (cool soil preferred) | 7–28 days (temperature dependent) | 10–12 weeks |
| Wildflower mix | Direct sow outdoors | After last frost; some types in fall | 7–21 days (species dependent) | 6–10 weeks |
| Cornflower | Direct sow outdoors | Early spring, before last frost | 7–14 days | 8–10 weeks |
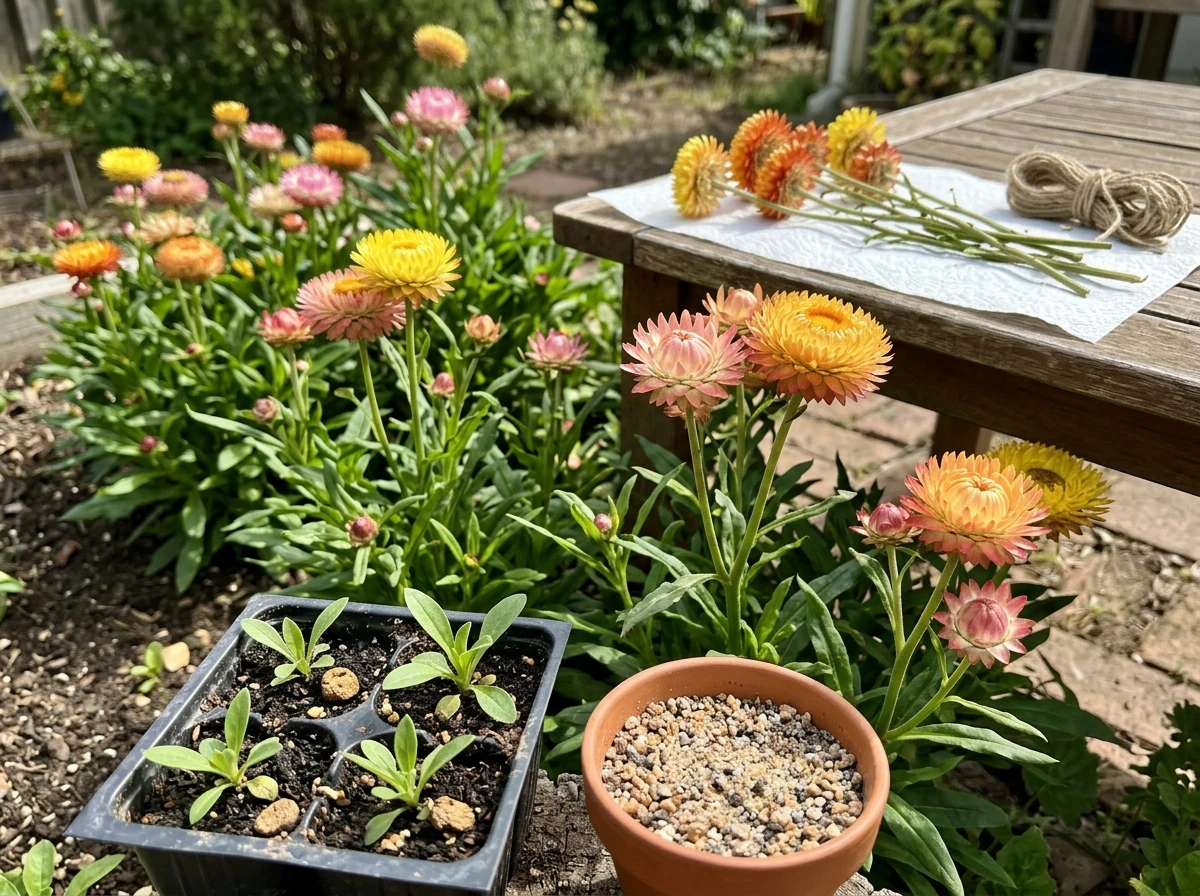
| Strawflower | Indoors or direct sow | 4–6 weeks before last frost (indoors); after last frost (direct) | 7–14 days | 8–10 weeks |
A simple first garden could be just two or three of these. Marigolds are almost foolproof and give you blooms fast. Poppies reward patience and self-seed year after year. Wildflower mixes are a great choice if you want to scatter seeds over a larger area without a lot of precise spacing. If you want to go deeper on any of these, the growing guides for wildflowers, cornflowers, and strawflowers how to grow cover their specific needs in more detail.
To build your actual planting calendar: pick your last frost date, choose your flowers, look up how many weeks each needs to develop before transplanting (or when they can be direct sown), and mark your start dates on a calendar. Then add your target bloom dates to see whether your timing matches your goals. It's a ten-minute exercise and it makes the whole season feel much more manageable.
One thing I always tell new growers: start smaller than you think you should. A few well-tended trays of seedlings will give you far more satisfaction than an overwhelming batch that gets neglected. Get those first seeds to bloom, learn what worked and what didn't, and scale up next season. The skills compound quickly, and there's something genuinely exciting about watching a flower you started from a tiny seed open its first bloom.
FAQ
What should I do if my flower seeds don’t germinate?
If seeds don’t germinate, first check the basics: temperature and moisture. Many flower seeds need consistently warm conditions (often 65 to 75°F) and evenly moist media, not soaking wet. Then confirm freshness, because older packets commonly lose vigor even if they still look fine. Finally, re-check the packet for light requirements, some seeds (like snapdragons) need surface sowing and thin cover, burying them can stop germination.
Can I start flowers indoors and then transplant them later, even if I direct-sow usually?
Yes, but only with seeds that are labeled as transplantable and not known to dislike disturbance. For light requiring seeds, still avoid burial, press them onto the surface and use a breathable thin cover. If you direct-sowed outdoors and later want to thin, remove the extras carefully at soil level rather than pulling, so you don’t damage neighbors’ roots.
How do I water seedlings after they sprout without overwatering?
Use the “top dry” rule rather than a schedule. Water when the top layer of the mix feels dry to the touch, and water just enough to re-moisten evenly, no puddles. If you see algae on the surface or seedlings look chronically wet, back off. A drainage hole in every container is non-negotiable for seed starting.
My seedlings are leggy, what’s the fix?
If seedlings are stretching, they need more usable light, not more fertilizer. Move the light closer, increase daily light hours (often 14 to 16), and make sure the bulbs are not far beyond the recommended distance for your setup. Also rotate trays daily so growth stays even, otherwise stems can lean toward one brighter side.
When should I thin seedlings, and should I pull them or cut them?
Thin once you have true leaves and use the spacing from the seed packet as the target. Snipping is usually best because it avoids disturbing the remaining seedlings’ root systems. If you’re using peat pellets or pots, keep in mind that overcrowding can still cause damping-off, so thinning is still important even when the container can be moved.
When is the right time to fertilize flower seedlings, and how strong should the fertilizer be?
Fertilizer is usually safe after true leaves appear because earlier the seedlings can rely on the seed’s stored energy. Use a diluted balanced liquid fertilizer and avoid “feeding early” when light is weak, because extra nitrogen can make tall, fragile plants. If leaves look pale but stems are sturdy and light is adequate, slightly increase nutrients next, don’t start with a full strength dose.
Do I need to bury all flower seeds, or are some better on the surface?
For light-requiring seeds, keep them on the surface or barely covered (for example, with a thin vermiculite layer) and do not bury them. For darkness-requiring seeds, cover them at the correct depth and keep the mix uniformly moist until germination. If your packet doesn’t specify, treat tiny seeds as surface sow candidates and verify with the seed company guidance before attempting germination.
Why is mold forming on my seed-starting mix, and is it dangerous?
Mold on the soil surface is often a moisture and airflow issue rather than a catastrophe. Let the top dry slightly between waterings, improve air circulation (gentle airflow from a fan can help), and avoid spraying water directly on the seedlings. If you see repeated damping-off symptoms, discard affected seedlings promptly and make sure you’re using a clean soilless mix.
My seeds germinated, then stopped. Could temperature or humidity be the cause?
Temperature swings are a common hidden problem. Germination can stall if the mix is too cool at night, too hot on a sunny windowsill, or drying out between waterings. Use a tray cover or humidity dome early for moisture consistency, but ventilate once you see sprouts to prevent stagnant, overly wet conditions.
How do I harden off seedlings safely before planting outside?
Hardening off should be gradual, and you should protect seedlings when nights are forecast to drop below about 45°F. Also shield them from strong wind and direct midday sun at first, then increase sun exposure slowly over 7 to 14 days. If a storm hits or temperatures swing hard, restart the schedule from the last “successful” day rather than pushing forward.
What pests should I expect when growing from seed, and how can I prevent damage?
If seedlings keep getting eaten outdoors, consider timing and barriers first. In many areas, slugs and snails target young transplants, while cutworms can damage plants at soil level. Use physical barriers or collars early, hand-pick at dusk, and water in the morning so foliage is less inviting at night. For indoor seedlings, fungus gnats are reduced by letting the top of the mix dry between waterings.
Why did my seedlings decline right after transplanting, and how can I prevent it?
If your seedlings look healthy indoors but yellow or curl after moving outside, it’s usually transplant shock and sunlight stress. Review hardening-off timing (you may need more days) and choose a transplant day with cooler temperatures, morning or cloudy conditions. Water well immediately after transplanting, then keep the soil lightly moist for a few days instead of soaking repeatedly.
Next Articles
Strawflowers How to Grow From Seed to Bloom and Cut
Step-by-step strawflower how to grow from seed to bloom, including care, cutting for drying, and troubleshooting.
Cornflower Seeds How to Grow: Step-by-Step Guide
Grow cornflowers from seed with timing, depth, spacing, soil, germination expectations, fixes for common issues, and blo
How to Grow Flowers at Home: Step-by-Step Guide
Step-by-step guide to grow flowers at home from seed, plan sun and soil, prevent pests, and get nonstop blooms.